What's new
What's new

VERY old Johnson saw

BrianB

Hot Rolled
Joined
Aug 24, 2006
Location
Shelbyville, Ky
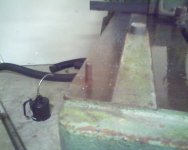
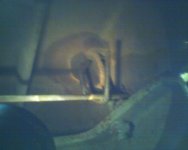
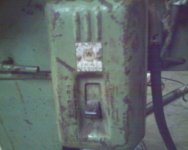
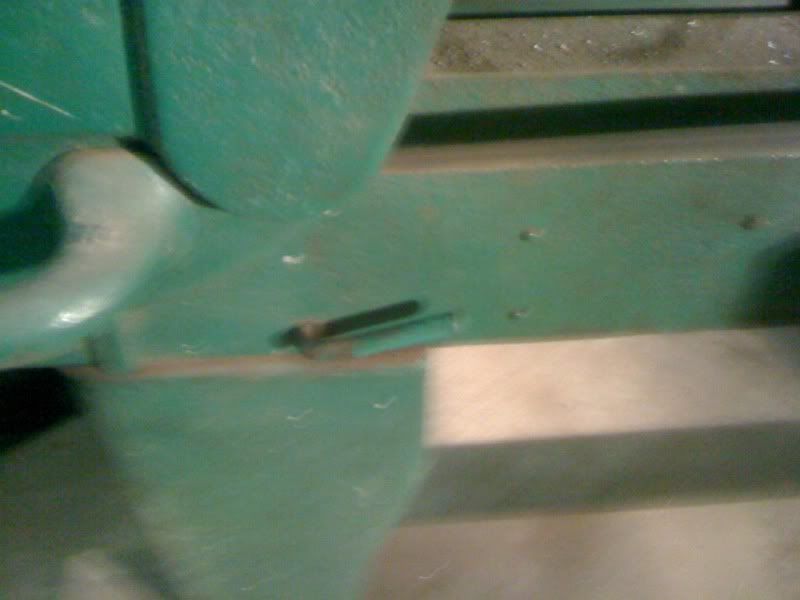
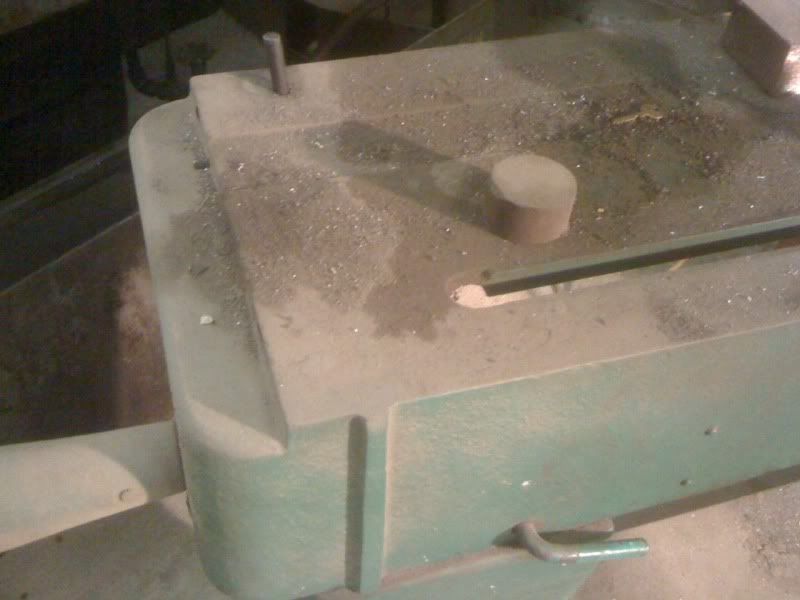
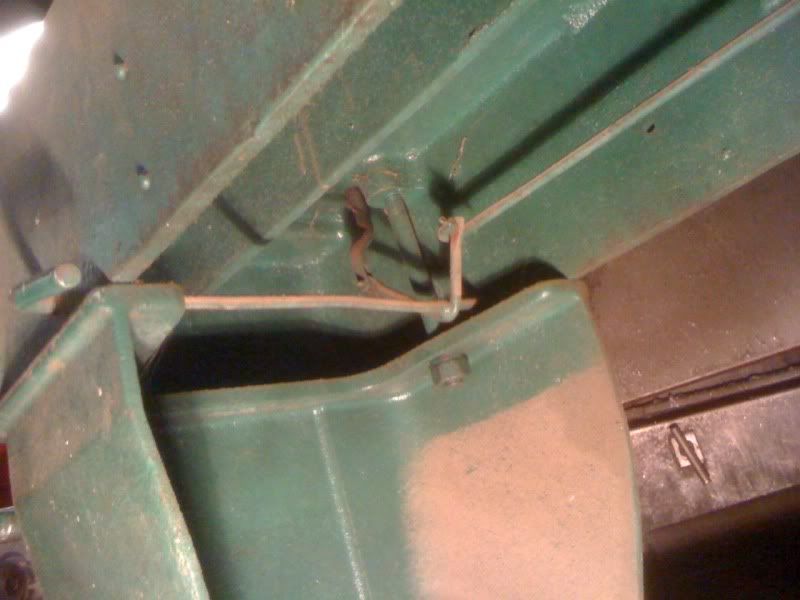
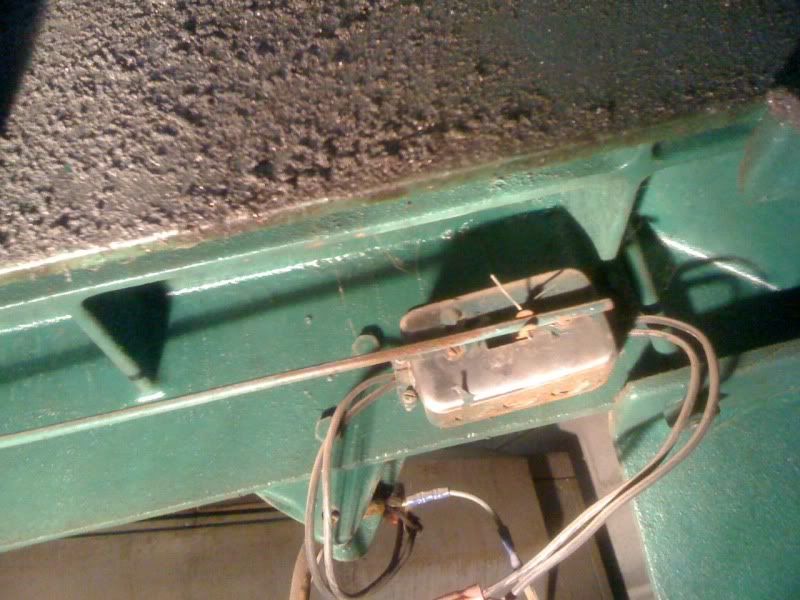
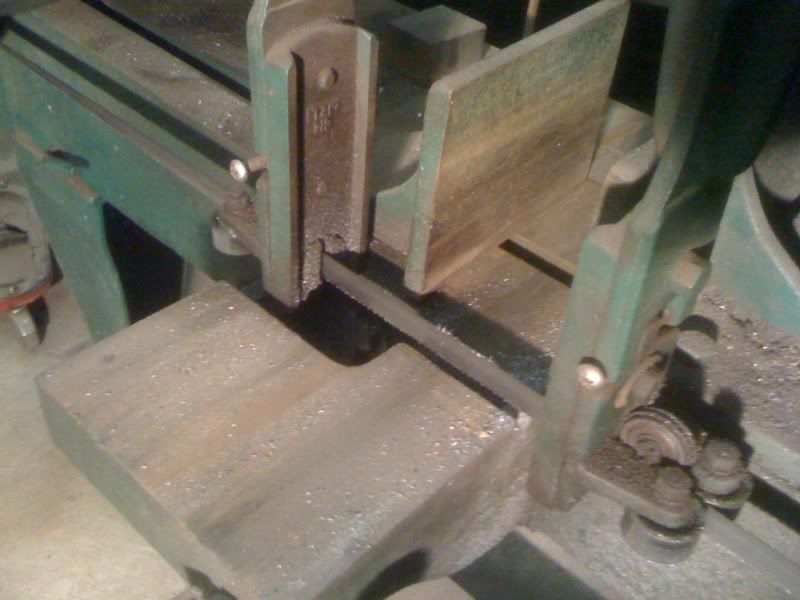
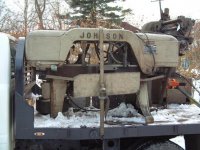
I recently acquired what I believe is a 1st year model Johnson model J bandsaw SN810. It still has the original Leland electric 3phase motor dated to 1937. It looks stylish next to my 1944 Monarch, its a whole art deco thing going on. haha Anyways I would like to restore this saw to a more original and to me functional state. It runs good but long ago the automatic shutoff was removed and you now have to turn it on and off with the main switch. I am hopeing someone here will have a similar vintage saw that can help me figure out how the shutoff was wired up and attached. Here is a picture of the saw and what is left of the on off switch and auto shutoff mechanism. Any help and insight is greatly appreciated!
 

Attachments

  • 1938_johnson.jpg
    1938_johnson.jpg
    91.8 KB · Views: 1,130
Last edited:
Brian,

Am I mistaken, or is the shut-off switch (electrical switch) common to both the auto, and manual switch posts? If anything like a Wellsaw, it should be.

Given it is, then all you need do, is devise a connecting rod so that when the saw comes down to the end of the cut, the rod will actuate the electrical switch.

From your post, I garner that the problem you are experiencing is one of a mechanical nature (a missing linkage rod).

J.D.
 
I have the same saw and use it everyday. Mine is complete and unaltered except for the SP motor I put on it and the bleed down cylinder is missing.

They must have made thousands of those saws. I have seen them everywhere.

Let me know what pics you want.

SCOTTIE
 
Well if you look closely at the picture you will see a rod that protrudes through the bed. This rod is contacted by a bracket attaced to the saw head so that when the head comes down it pushes the rod down flush with the bed and it shuts off the saw.(See Stop Rod Picture) I have been looking for pictures of other Johnson saws with this setup but have yet to find any. I also included a picture showing the linkage from underneath this is what I am wondering how and where it hooks up. The other saws I see have the on off handle made in such a way that when the top comes down it directly pushes on the on off handle and it shuts off. This saw has a Westinghouse De Ion Motor Guardian thermal circuit breaker setup that is currently the on off switch. I am guessing it is original to the saw as it is for the correct amps and is of the proper vintage. There is one knockot missing out of the box and I am guessing it originaly had wires coming out of it mounted to a open close switch under the bed that was activated by the rod through the bed and the on off handle on the side of the saw. Another interesting thing I noticed today while looking at pictures is that my saw has the roller guides in a mirrored setup as opposed to both sets of rollers facing towards the rear of the saw. At first I thought well maybe somebody put the rear guide together wrong at some point so I went out for a closer look. What I saw is that the castings are mirrors of eachother meaning to me that the saw is assembled correctly as the long cast rib faces the rollers on each side and the short cast rib faces the mounting brackets. If I was to turn the mounting brackets around then there would be some interference with the ribs. It appears that originaly there must have been left and right guide arms to perorm the mirrored function as can be seen in the pics. I can also see no provision for a blade brush, that must have occured later as well. I guess it isn't to big a deal since it has lasted 72 years, if it lasts that long again it won't matter to me!
 

Attachments

  • Stop_Rod.jpg
    Stop_Rod.jpg
    85.7 KB · Views: 297
  • Stop_linkage.jpg
    Stop_linkage.jpg
    79.2 KB · Views: 314
  • Left_bracket.jpg
    Left_bracket.jpg
    86.8 KB · Views: 311
  • Right_Bracket.jpg
    Right_Bracket.jpg
    86.2 KB · Views: 274
  • Saw Setup.jpg
    Saw Setup.jpg
    86.5 KB · Views: 503
I am thinking something like this mounted under the bed and attached by a rod to the start stop linkage might have been what was used, or at least a way to get it back close to right. Who made Triple Pole Single Throw switches back in the 30's and 40's? Anybody got any vintage ones laying around? Would this have been a common way at the time to start and stop a small 3-phase motor? This thing is like 2 amps so its not like arcing the contacts would be a problem or that a big motor starter would have been needed.
Thanks,
Brian
 

Attachments

  • tpst switch.jpg
    tpst switch.jpg
    42.7 KB · Views: 972
Just be aware that a small contactor set up for 3-wire control might be easier than some lever pushing a toggle switch off. Low volts would be best, and what might be in your spare parts bins.

The operator gets a Start-Stop station, and the saw gets a normally closed limit switch that is in series with the Stop button. Saw comes down to its stops, actuates the limit switch, and the contactor drops out.


If the original was purely mechnical, perhaps it wasn't as reliable, perhaps the linkage was inconsistent?

I am probably re-inventing the wheel by suggesting this arrangement.
 
Last edited:
I dont see anyway to wire into the current control box to make it trip. Is there one? Here is what it looks like. If I wired it as you propose wouldn't I need to add a switch and another control box for the contactor? I was thinking with the manual motor control switch I would only have to add one device and at 240V 2amp shouldn't be to bad to open and shut I wouldn't think, but perhaps that is why it has been eliminated as it didn't hold up.
 

Attachments

  • westinghouse_box.jpg
    westinghouse_box.jpg
    85.8 KB · Views: 245
  • westinghouse_wiring.jpg
    westinghouse_wiring.jpg
    86.5 KB · Views: 306
Mine...

I have one identical, and the switch system is also missing.

I did the latching-contactor setup... press the START button, it pulls in relay, which holds itself AND powers the motor.... essentially, a wire from the output side of the contactor back to the contactor coil. When the stop-bar is contacted, it pushes a momentary button that breaks the HOLD loop, and the contactor drops out, machine shuts down.
 
switch

Years ago they made toggle switches with sheet steel handles that had a hole in it.You could connect rods to the handle and rig up mechanical interlocks.I have not seen one of those switches for many a year,except the one on my own bandsaw.If they are no longer available it may explain the situation with these bandsaws.
The magnetic starter with a limit switch to stop the saw scheme is probably an easy way out.
 
These pics may help.

saw1.jpg


saw5.jpg


saw2.jpg


saw6.jpg


saw3.jpg


saw4.jpg


SCOTTIE
 
Excellent pictures! Thanks Scottie you answered my queation and where and what kind of shut off they used. I think I will be able to fab something up now. Where is your Thermal overload protection box mounted or do you have one? I am certain that over top the serial number plate like where it currently is on my saw was not correct. I am guessing it was in the rear some place. I think with one of those Levitron switches I can drill a hole in the switch for the rod and make it work like original again. After seeing your pictures I am even more confused on the correct mounting of the guides though. Thanks again,
Brian
 
I was curious as to if your saw had a thermal overload box as well for motor protection, and if so where it was mounted. The confusing thing is your guides are mounted backwards from mine. All the old literature I have found shows the front/left guide has its rollers pointing towards the workpiece. You have yours pointing away from the workpiece. Then where I was originaly confused was on the rear/right hand guide. On mine the rollers face the worpiece, and on yours and others it faces away towards the rear of the saw. This is the typical guide configuration I have seen......
 

Attachments

  • DSCF0324.jpg
    DSCF0324.jpg
    95.6 KB · Views: 378
I acquired this saw many years ago before I had three phase power. I replaced the original motor (which I still have somewhere) with a 3/4 HP SF. It is wired for 120V and the motor has it's own thermal protection.

I doubt that the saw came with motor protection built in. A proper installation would include a "user supplied" fused disconnect or magnetic starter with heaters.

I have not seen any guides set up as you describe. It is logical to "straighten" the blade with the rollers before it goes through the "slit" in the guide. Likewise it should exit between the other slit before being allowed to resume curl for the drive wheel. The main arms are identical castings with the lower sections being removable, interchangeable, and adjustable for pitch.

If it makes you feel any better, mine has sawed tons of material in this configuration and cuts "VERY" straight. Before I got my big Marvel it did daily service and still gets used a lot. It has required nothing more than blade changes for the past twenty years or so.

SCOTTIE
 
Well-----------color my face red!

My curiosity got the best of me and I Googled the saw. The photo on the front of this later model saw shows the rollers all towards the motor.

Regardless, I will not be changing mine. It cuts dead nuts and I don't want to try to dial it in again.

SCOTTIE
 
Scottie,
I know what you mean about very straight. After a little tweaking on my guide adjustments I am typicaly seeing less than .005" variance in thickness cutting 4" bar stock. I find it impressive to be that reapeatably accurate after 70+years of use. These things must be like our Champion 2 stage air compressor at work. It has been pumping air daily to 200psi since 1933!! It has had belts put on and the starter had to be replaced but otherwise it is all original and just keeps pumping and pumping and pumping like the Energizer bunny. Oh and for what it is worth I don't think I will be changing the way my guides are set up either I guess they cut fine rgardless of how you put them together. lol
 
I think I would turn that rear guide (closest to motor) around. The way it is, the rollers are in the chip stream. Replacement rollers are $$$$.

SCOTTIE
 
I can't turn it around without the top of the guide plate hitting the long rib on the main guide arm. The previous owner said it has been set up this way for the last 20+years he has owned it and he never replaced a guide roller in that time. I believe it is set up as it left the factory right now and that it was later changed on other saws when they started casting the main guide arms the same. I see doall runs their rollers like mine are set up so it must not be to big a deal.
 

Attachments

  • Horizontal%20Band%20Saw%20-%20195.jpg
    Horizontal%20Band%20Saw%20-%20195.jpg
    49.5 KB · Views: 512


Back
Top