What's new
What's new

My Gibbs project.

ARB

Titanium
Joined
Dec 7, 2002
Location
Granville,NY,USA
I figured that I would start a thread of my own about my fun with my core.

Here is pic of what I have so far.

100_2982.jpg


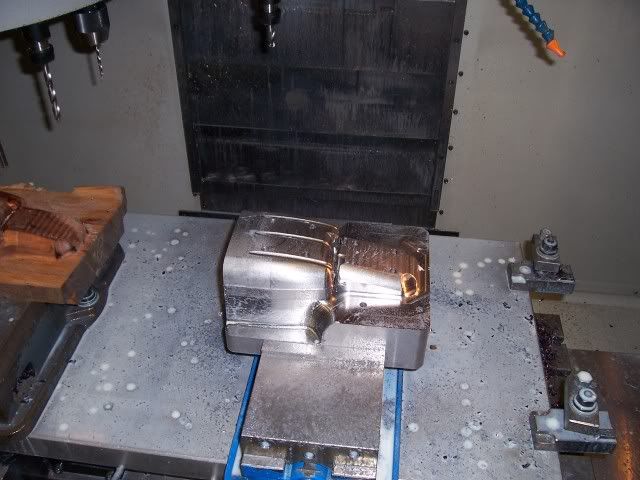
Things are starting to take shape.

So how do you guys think your software would fare roughing this part? There are 2 and they are made out of H13.

Prefered roughing tool is a Sandvik 200 series button cutter 2 inch diameter with 1/2" inserts.


ARbys.gif
 
Looking good..................I love the Gibbs software.............I would not use anything else......I like it so much that I model the tool in solid using Gibbs along with dim. in gibbs. I save so much time and eliminate error .........start in solid click on surface to be machined or extract geometry to be machined or wired........its as easy as 123..........I see you used some MDF and did a test cut first......I do the same thing...........
 
There's got to be a trick to the question :D

Arb, in what area and at what depth did you have some trouble with plunge moves over the part? What was your general roughing method: Z level waterline or planar?

The shallow ramp area would probably clean better with planar roughing, I suppose. With Z level it might be more difficult to specify exactly where the tool enters. Mind you, a ramp entry to every cut should not really cause a problem even if the tool enters 'on the part'.

Does this particular tool protest when ramping in to depth?
 
"That should be pretty straight forward with any 3D cam software.(I'm using RhinoCam)"

I really don't think I would have any problem quickly creating surfacing toolpath for this part in RhinoCAM or in Visual Mill. The part seems to have a quite a bit in common with the tutorials that are on the Mecsoft website.


Jon Banquer
Phoenix, Arizona
 
To tell you the truth my problem came from the part that would seem the easiest. I wanted to use a ZigZag zlevel rough strategy where the tool would start off the part and work its way in. Obviously reasonably constant engagement as well as climb milling is preferred. This worked reasonably well ex cept for a few renegade retracts and moves that were followed by plunges over unmachined areas. This was only an issue for the first .5" of z or so. This was happening in the semi flat area at the top of the part.


"Does this particular tool protest when ramping in to depth?"

The cutter loves ramping. The only problem came from the unexpected plunge moves.

In the end I used a contouring strategy with z steps. This actually gave me what I wanted. I just got frustrated by the software because of what seemed so obvious to me was not to the software.
:rolleyes:

The finishing is the easy part.

That is going well.
 
Mastercam will breeze through with surface rgh pocket with plunge outside tool center boundry checked. Finish with finish contour and finish shallow or many other ways.
 
maybe your post?

I also use mastercam. I like indicating a point to start from at every depth. makes me feel like i'm in control :D

is that semi flat area you are talking about above your Z zero?

if it is that maybe a problem?
 
"Are you Serious?"
Yes.
Sometimes it is just a good idea to be sure. It really sucks when you make a mistake and it is in an expensive part instead of a piece of wood. All you have to do is miss it on one check box or mis type a numeber and you can make junk.

Actually it is hardwood. It stands up to getting spashed with coolant much better but still grows.
 
If we cut a test block for every detail that needs CNC we would have been out of business a long time ago. I've never used (or even seen) Gibbs, but if your software doesn't inspire enough confidence to program and cut, I'd be looking for something else.

We cut details similar to your illustration everyday and, quite a bit more complex too, without test cuts. This includes 5-axis positional and the occasional simultaneous paths.

Dan


Back
Top