Elwood1968
Cast Iron
- Joined
- Jul 30, 2017
I have a 1-B Toolmaster that was factory equipped with the optional precision measuring attachments for all three axes. Before DROs were common, these attachments were a more accurate method of measuring travel than the micrometer wheels on each leadscrew. Sort of like a jig borer.


Unfortunately, someone along the way removed the X-axis longitudinal components on the front of the table (I'm looking to buy the assembly, if anyone has one for sale), but the Y- and Z-axis parts are all still place. The dial indicators and the barrel micrometers and standards are long gone, of course, so I'm working on identifying and sourcing replacements. Cincinnati's parts catalog refers to them only by their Cincinnati part numbers, and the descriptions are generic, e.g. "Dial - indicator".
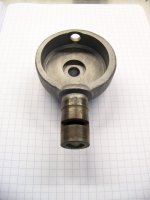
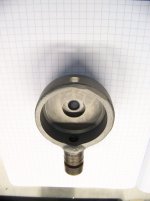
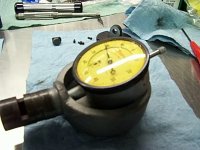
The barrel mikes and standards are easy enough to replace, but I'm having a hard time figuring out which dial indicators to use, and more importantly, how to install them. They are housed in cast iron "cups", and the inside diameter of the "cups" suggest AGD 2 indicators, probably something like a Starrett 25-111 (0.0001" increments, +/- reading from zero, 0.025" total travel).
The problem is that no AGD 2 size indicator body (at least that I can find) can be slipped into the cast "cup". The diameter of the body isn't the problem, it's that with the length of the stem, it can't be tilted enough to slide into the "cup". Starrett's customer service suggested that I enlarge the stem opening, but obviously these had indicators in them when they were new, so I'm reluctant to break out the carbide die grinder. Nor can I find an indicator with a removable stem, which would allow the indicator to be reassembled once the body is in the "cup".
Anyone know the secret to these things? Did Cincinnati have a special dial indicator with a short stem made just for these precision measuring attachments? I know that Bridgeports had a similar system, and the photos I've seen of the "cups" on those machines are just as baffling.
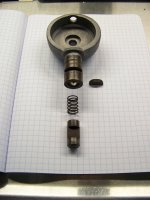
Here's what the cup for the Z-axis travel on my Toolmaster looks like (the third photo is the backside):
