What's new
What's new

K&T 2D Makeover!

Scuffy

Aluminum
Joined
Jan 13, 2007
Location
Shores of Lake Erie
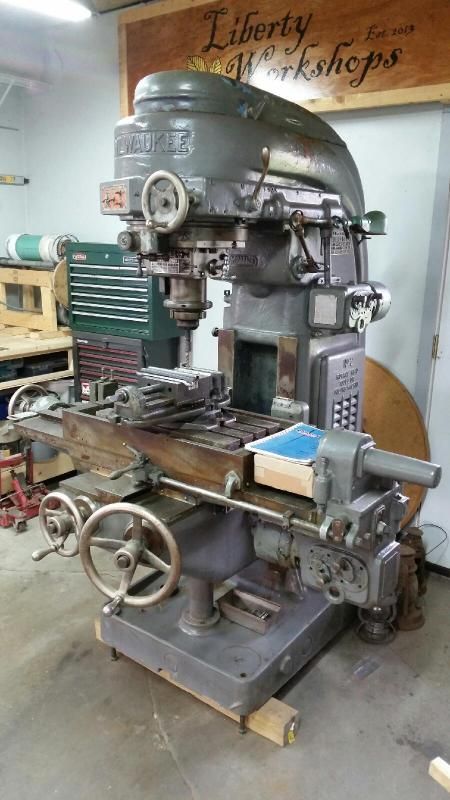
Several years ago I was given a 2D. Free of charge- if I could move it. Well being the first piece of shop equipment that I was to own I was more than determined to get it home. With the help of members here I put together a RPC and got her up and running. I took the time to knock the minimal rust off and get a temporary, protective coat of paint on it. Annnnnnnd then it sat in the garage at my parents house until I made room in my garage. That, along with pictures, are another thread. But now that I have my machine in MY garage/shop it's time to get a bit more personal with it. Over that past few weeks I have been stripping paint down as far as I can get in prep to repaint the 2D and restore it to it's former glory! No more quick paint jobs. I am going to do this the right way. Now I will admit, sadly, that I do not have the ability to strip it down to bare components and paint each separately... but I am trying to be as thorough as possible and doing this to the best of my abilities. So far it's not looking too damned bad! I can't believe how much paint there was to strip off!!! There is a filler or putty to smooth the casting- dark dark grey, a light blue, a pastel green, dark green, a brick red (paint not primer), cream, yellow on some parts, the thin coat of light grey I added... wow!! I have almost filled two 5 gallon buckets with nothing but paint chips. Admittedly this is a much bigger under taking than I originally thought it would be. Then again, according to my girlfriend... I never do things the easy way. lol

So here are a few pictures to whet your appetites....

This was how I found her, pulled from the back corner of an old hay barn, years of snow and rain taking their toll...


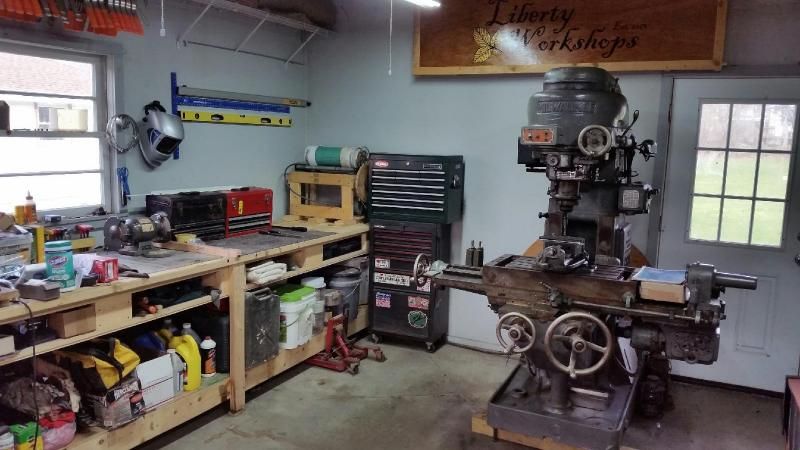
After the move to MY garage...


The stripper starting to peel away the many layers of paint that built up over the years..


At last! You can finally see the casting instead of yet another coat of paint!!


I have actually gotten quite a bit more paint off the smaller parts since taking these pictures. I am almost to the point where I can take some hot water and Simple Green to it in hopes of removing some of the accumulated oil and grease. Hopefully then, after drying thoroughly, I'll be able to lightly sand, clean up with solvent and start adding a fine coat of filler to smooth things back out. From there? Primer and a bit of paint should do the trick. I was going to go with a DARK grey but I think I have convinced myself of a blasphemous idea... I kinda like the idea of a brilliant red. Massey red to be exact. Its not set in stone yet. The idea of something that bright does make me nervous. I am very used to blacks, dark greens and greys. Time will tell. I figure with a bit of thinner and hardener my HVLP gun will be perfect for the application. Then a coat of clear on top.

But as I said- this is all up in the air. I may change my mind before I get that far. To be honest I am rather liking the bare surface of the cast and I'd also tossed around the idea of just adding hardener to an oil based clear and going eu natural.
 
For the first stationary tool in your shop that is quite the milling machine. Congratulations and good luck!

Rick
 
Yours looks alot like mine lol.. You even have the drive bracket for a rotab! You can use a 12 or 16 inch rotab under power..I was lucky to find a rotab drive bracket on ebay some years back but it is lacking the shaft cover and I have never been able to find one...Looks like your machine is lacking the power knee lift though and let me tell you, it is quite a task to raise the knee.. According to an old K&T factory man, that is one of the main gripes about the early machines..You have a machine that will serve you well for many years and will fill a bucket with shavings in a short period of time..

Ramsay 1:)
 
2D is a great machine for sure.. People who had them before cnc in the tool and die industry did not want to give them up! Mine was originally sent to Pontiac Division GMC in 1942..... Throughout the time the 2d was sold, it cost pretty much what a good sized house would cost ...Ramsay 1:).
 
Is there any way to see who the original owner of a 2D was? I don't know if shipping records or bills of sale were kept along with production notes or not. I know from my very first post about my machine and subsequent messages that this machine was number 19 of 20 produced in June of 1945. But that is about all I know. It'd be interesting to see what part of the country she was first shipped to or who originally owned her!
 
Giddings and Lewis last had what was left of K&T.. In fact, some K&T employees were given the opportunity to transfer to G&L when the transfer took place.. Check with them and see if you can find out anything..I did some years back and was successful...Ramsay1 :)
 
Nice unmangled hardware, good sharp corners on everything, complete, that will make a wonderful restoration. Was particularly impressed that those spring loaded detent controls did not have the ugly scrape/tracks that signal a high use machine.
 
Please do you and your machine a big favor when you start using it.. Please DO NOT use soluble as coolant! Get yourself five gallons of mobilmet 766 and forget about any worries with coolant...Ramsay 1:)
 
Ramsay- You have my word that I'll be purchasing some mobilemet! ;)

I have been putting in long hours and long days away from home with work but here and there I have made the time to get this mill project closer to where I want it to be!


Primer applied. The orange dots are foam earplugs I'd used to stop paint from filling the odd holes here in there- mainly allen head screws and such.


After seeing this mill all dressed up in white primer... the idea of white grew on me. It reflects soooo much light onto the table that it makes it a pleasure to use at any time of the day with minimal additional light needed. In the end I decided to with the bright white and added a few coats of Rustoleum Gloss White with a bit of clear and a small amount of hardener added. So far there aren't any regrets. It's not going to be used for a high volume of production so I don't mind the idea of being a bit OCD in cleaning her up after every project. lol As a side note- I did not use body filler on the whole casting. I pretty much tried to get the big mars, marks and other blemishes- leaving the small scars as marks of character. I don't mind the small things in that respect. Now all I have left to do is clean up a few edges where the paint bled under the tape. As soon as things are tidied up I need to top off the fluids and take here for a test drive!


Question to 2D owners, how close/easy is it to mill a circular pocket and how easy to hold .0002 on its Id.
I am trying to understand how sensitive fine setting the offset slide is.
Assume 2.000 bore, 0.500 deep counterbore in a 3 inch thick block of aluminum 6061 t6 that is 6 inch square that has a 1.000 hole dead center in the 6x6 that you are counter boring on the top surface.
I am not interested in using a 2.000 cutting tool or boring head rather trying to understand the capability of the machine.
I am considering buying one.
 
Hello: I do know that the maximum allowable run out in 360 degrees of head rotation when centered is .0003.. My machine was made in 1942 and it will still hold that.. Ramsay 1:)
 
Question to 2D owners, how close/easy is it to mill a circular pocket and how easy to hold .0002 on its Id.
I am trying to understand how sensitive fine setting the offset slide is.
Assume 2.000 bore, 0.500 deep counterbore in a 3 inch thick block of aluminum 6061 t6 that is 6 inch square that has a 1.000 hole dead center in the 6x6 that you are counter boring on the top surface.
I am not interested in using a 2.000 cutting tool or boring head rather trying to understand the capability of the machine.
I am considering buying one.

Hello! I've had a later model 2D for years. I had a friend that recently passed, who owned a nice one as well. My friend had run one where he retired from for most of 20 years. You might say he was one of the best die mill guys around. For a 2.000 hole like you describe, he would mike the end mill do the math and run the part. Anything over a half thou. He'd take the part out of the mill without checking it! They were both that good
 
Nice big machine and repair! Reminds me of my mill, also the first piece of heavy iron in my possession (still stored at my parents place so progress is slow haha, i recognize this).

A good start with such a stable machine.
 
Question to 2D owners, how close/easy is it to mill a circular pocket and how easy to hold .0002 on its Id.
I am trying to understand how sensitive fine setting the offset slide is.
Assume 2.000 bore, 0.500 deep counterbore in a 3 inch thick block of aluminum 6061 t6 that is 6 inch square that has a 1.000 hole dead center in the 6x6 that you are counter boring on the top surface.
I am not interested in using a 2.000 cutting tool or boring head rather trying to understand the capability of the machine.
I am considering buying one.

No machine has greater importance to me than a 2D, honored being placed in front of four such mills. If I should only have one mill...

The .0002 is outer envelope, but possible. You don't specify whether the expectation is size, roundness or both.
Two limitations for most owners; 3/4" collets and 5hp. But many 2 axis CNC can't either [as in no Z].
My solution is, despite eliminating a boring head, would mill the counter bore right to depth, the bore .005 or .010 under, then bore traditionally. The rotary head has a broad surface, yet without the long spindle for axial alignment, where boring works around the rotary function.
OTOH:
The finest slide adjustments are possible just as a boring head, use a .00005 test indicator. I doubt 5% available seasoned machinists can interpret 1/10ths [per side] of a .001 dial for .0002 tolerance repeatedly. 2D has no vernier.
Measure last roughing pass, affix indicator, divide required increase /2 and move PRECISELY that amount. At that time, only fine increment I had was test style. Now, so tasked, I'd use a modern digital gauge and a drill rod just as end measures were in the past.
Limits of gauging methods for a .500 depth another consideration.
Doing flat seal and O-ring compression molds, while size had importance, the real issue was parting line. No mismatch permitted in those high pressure systems, any fin or overhang was a BLT [yes, the sandwich]. Again, measurement was a serious undertaking, a non-existent concave 'shoulder'.
Duplication was eased via that .00005 indicator.


Back
Top