What's new
What's new

Rebuilding Cincinnati Toolmaster Spindle

Fal Grunt

Titanium
Joined
Aug 5, 2010
Location
Medina OH
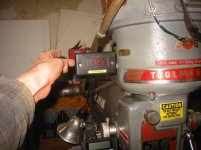
I am looking to start rebuilding my 1B Cincinnati Toolmaster starting with the spindle. After 58 years, albeit good well cared for years, the old girl needs reworked.

I would like any advise from anyone who has reworked this particular machine. Also any pointers for procuring the correct bearings, and advise on assembly, disassembly. One item that really concerns me is the proper preload on the bearings. How is this set?

I hope to rebuild the spindle, then start buying new screws, gibs, bushings, etc. with any luck I'll have it rescrapped and have a nice crisp mill to work on and teach my son with.

Please, before anyone jumps to tell me to scrap it, the mill has "sentimental" value to me. It was the first mill I learned on and ran. My grandfather was an employee at the company that purchased it new in 1956. He for the most part wore it out. He eventually became the owner of that company and when he retired and closed its doors I purchased it at auction. He presented me with all the original paper work including the bill of sale.

As it sits I can hold .001 if I work really hard at it, but time is money, and I need to be able to rely on this old girl.
 
I can see why. Good luck

When you take it apart. look at the old bearings and do a cross ref. to the new bearing. Let me know if you need any help from Cincinnat.
 
Fal grunt
Please take photos and post your project here. I took mine completely apart except for the spindle and bearings when I bought it.
Andy
 
I have one with all the options I beleive #JV1-151 which I think comes out to 1956. I got luckey this was one mile from me for $1000
from Maxium Fire Trucks when they went south back in the day. It runs perfectly Maxium bought it new and has "low Miles". I wouldnt
trade it for anything. I read somewhere direct replacement bearings possibly SKF? I'll check. Here is one of those cheap tackometers
from ebay it does work (how long i dont know) for $15. sam
 

Attachments

  • 117-1800_IMG.jpg
    117-1800_IMG.jpg
    86.3 KB · Views: 671
  • cincinnati 1B.jpg
    cincinnati 1B.jpg
    84.2 KB · Views: 1,269
I have one with all the options I beleive #JV1-151 which I think comes out to 1956. I got luckey this was one mile from me for $1000
from Maxium Fire Trucks when they went south back in the day. It runs perfectly Maxium bought it new and has "low Miles". I wouldnt
trade it for anything.

Funny the rigger who moved my shop is a part time machinery dealer and he told me that he has come across the Toolmasters and won't even take them for a $300 or so as he says no one wants them. Bridgeports on the other hand he can get rid of all day long! I told him the next one he sees for $300 give me a call. Like you I would be hard to part with my toolmaster. The Toolmaster was the machine I really learned how to mill on. Then I got a job running a Bridgeport and nearly got fired after crashing it a few times. Cuts that are no big deal for a Toolmaster wreak havoc on a crappy B-port.

I wonder what year they switched the ram on those machines to the square one like mine?
 
Ok guys, I'm resurrecting this thread as I started taking the head of my cinci apart.

Question is, should it document it here or start a new thread?
 
You've got a moderator-approved title, a clearly-stated rationale, and a captive audience. Go for it here.
Make a video of what it sounds like now, so you can compare when you're done.
Mine sounds like a banshee.

Chip
 
I have pictures and videos that I will post later.

Initial inspection, indicator on spindle taper, gives .001 runout, turning spindle by hand. Push pull on the spindle gives .002 at taper and strangely .001 at the very top of spindle. Now, I was pulling and pushing fairly hard., but, I'm a small guy, 6'1" 135 lbs, so I'm not applying much force.
image.jpg
image.jpg
Pulled the quill "cartridge" and removed the spindle. I snugged the top nut just a bit (was really tight) reassembled and found no improvement. There was no play between the two main bearings and the spacer. Tightening the top nut actually made them drag a little.
image.jpg

Removed the top nut and the top bearing came off easily. The bottom set of two were tight. For those of you who have done this work before, how do you remove bearings pressed up to a shoulder? I lightly clamped on the bottom nut and tapped the top of the spindle with a dead blow. The bearings started coming off without too much force until the bottom bearing separated from its inner race! Guess I will be replacing it now!
image.jpg

(Scribed)
Top bearing is: New Departure 3L06 (X5)
Bottom bearings (2 opposing) (Q) OL07 (DTX5)

My grandfather is dead now, so I cannot ask if they ever did any rework on it. I do know an employee (a friend/mentor) worked for my grandfather for 32 years. He doesn't remember them ever doing any spindle work in the time he was there.

So the search for bearings begins tomorrow. I'll be replacing the belts while I have everything apart.
 
Last edited:
Passing on some things that I got over the years. If you have loose bearing on the shaft, take a file and hit the edge of the file on the shaft to raise the surgace a little. I do that instead of using loctite. The push pull of bearings is for the cone and cup type bearings.
 
I'm going to take a step back and post a bit about the procedure to pull the spindle. WAY more involved than I had hoped for.

In the beginning:


First remove the motor cover
image.jpg
That reveals the pancake motor and a giant mess.
image.jpg
The pancake motor is attached by a few bolts. Remove these.
image.jpg
Now the pancake motor can be lifted up and off. BE CAREFUL! The motor was about my limit for weight. I left it wired up and set it to the side. (Trip your breaker!)
image.jpg
The belt housing is held on by two bolts that act almost like T nuts.
image.jpg
Pull the belt housing. The two motor side cogs remain.
 
Last edited:
Look on the right hand end of the table face for the serial number, I will look it up and get a book out.
 
image.jpg
Timing belt cogs remains.

Cogs are attached with 4 bolt accessed through the two holes in the cog. Once you pull them you have access to the top of the spindle. But don't get excited! You have a long way to go. Everything above was the EASY part!
image.jpg
Using the quill bump the feed gear a little, once it has moved up some spin the by hand to did engage the worm from the gear box.le, once it has moved up some spin the by hand to did engage the worm from the gear box.
image.jpg
Ok, second hardest, most irritating part. My quill handle would not come apart. When you go to pull the spring, put a rag over it, and, like the directions say, step away as you pull the spring out of its slot.
image.jpg
Ok, now, you have reached the MOST irritating and hardest part. This is the quill stop. I would like to meet the fine engineer that decided to put this item here, totally un reachable. Two SHCS's. Took forever!
image.jpg
Spindle comes out the bottom. Yay!
 
image.jpg
Top bearing

image.jpg
Tandem bearings on bottom

image.jpg
Plenty of nasty stuff in there!

Quoted $680 for replacement bearings, US made by Barden Bearing.

OR quoted $450 for a rebuild with bearings. Bearings are "probably" GMN or Nachi. Originals were class 5, new are 7. Runout spec'd at .0003 or better.

I want this mill to last another 58 years. Opinions?
 
This are not the bearings for the push and pull on setting the bearings. They have to be firm in the spindle. Does those bearings have a high mark on them. Its a mark on the O.D. of the bearing. The inner and outer spacers are the key to preload on the bearings.
 
Bill, I get the impression you find this a less than worthwhile endeavor? I certainly don't think myself or anyone here believes me to be building a SIP, but it stands to reason (to me) if ABEC-5 came out, ABEC-5 should go back in. The rebuilder said they actually use higher than ABEC-7 on most their rebuilds!

I understand if your point is that this is not a financially prudent task, though I suspect, that as the mill paid for itself in short order, so will this rebuild. In 30 years I'll get back to you on whether or not it was worth it :D

As to my son, he's partial to the K&T 2D, the B&S 2A comes second, with the Cinci trailing in 3rd. Here is a picture of him running the Cinci
image.jpg

Cmike, yes, they do have marking as I found today. I have no idea how they were positioned originally as the marks were obscured when assembled. I will try to get pictures tomorrow.

Does anyone have opinions on the options? Opinions relative to pricing? Seems odd to get a rebuild and labor for that much cheaper.


Back
Top