What's new
What's new

diagnosing "X Axis instant overcurrent alarm" (Hitachi Seiki VMC)

Ukraine Train

Cast Iron
Joined
Feb 10, 2014
Location
Ohio
I bought a used 1991 VK55 mill with Seicos III control recently and it throws this alarm. The previous owner said it happens once every couple months and they would physically reseat the boards in the control panel and it would be fine for a long while again. I'm getting this alarm pretty much daily, though, and would like to figure out what's causing it. It can happen whether the machine is physically running or just sitting with the power on. If I reset the alarm it'll trip again right away until I shut it down and reseat the boards. Then it's usually fine the rest of the day. Should I try cleaning the board contacts? That seems too easy.
 

Attachments

  • 2014-09-08 08.26.06.jpg
    2014-09-08 08.26.06.jpg
    96 KB · Views: 1,219
Last edited:
It may be worth the effort to re-seat them one at a time to try to determine which board is problematic. If re-seating them works then its more then likely a connection problem with the pins which some good contact cleaner will help with that.
 
Is there a risk of losing parameters if I disconnect the boards for too long, or remove the connectors on the front side?
 
Our VK55 with the Seicos III control had the same problem but it was on the Y axis. The problem was not the boards but rather the wire cables going from the drive axis to the drive motor.

After the machine is restarted and happy, open the cabinet and gently move the cables around and watch the machine freak out. There is an intermittent break in the wiring somewhere and this makes it a bitch to diagnose with a meter.

We call our VK55 the "Ice Cream Truck" due to the happy music it plays when the hydraulics are fired up and when the machine hits an M30. I absolutely love using the the tool probe and spindle probe on this machine. Setups are a piece o cake.

Awesome; I'll give this a try. My machine does not have the tool or spindle probe, unfortunately. It does make a cool sound, though. :)
 
Our VK55 with the Seicos III control had the same problem but it was on the Y axis. The problem was not the boards but rather the wire cables going from the drive axis to the drive motor.

After the machine is restarted and happy, open the cabinet and gently move the cables around and watch the machine freak out. There is an intermittent break in the wiring somewhere and this makes it a bitch to diagnose with a meter.

We call our VK55 the "Ice Cream Truck" due to the happy music it plays when the hydraulics are fired up and when the machine hits an M30. I absolutely love using the the tool probe and spindle probe on this machine. Setups are a piece o cake.

I second this. I have replaced many cables when getting an Overcurrent alarm. That is your best bet at this point.
John
 
Awesome; I'll give this a try. My machine does not have the tool or spindle probe, unfortunately. It does make a cool sound, though. :)

Tool and spindle probes for this machine are just "dumb" switches and nothing like a high dollar Renishaw.

The tool probe is just a magnetic block mounted on the table and has a spring loaded plunger pad. When the tool contacts the plunger, an electrical circuit is completed between the spindle and the table and the machine records the Z axis position and writes it to the tool file.

The machine as a REALLY sweet feature where you highlight the tool probe button and then push the cycle start. Machine scans your current CNC part program and grabs the necessary tools called out within the program and brings them to the tool probe location one-by-one. While the machine is in cycle, you manually wheel the Z axis down to touch the probe (tool length is recorded) and then push cycle start again and machine goes home, grabs the next tool in your program and so forth. The only issue is when probing floating reamer holders that do not conduct electricity through the spindle. The workaround is a jumper wire with alligator clips--one end clips on the reamer and the other end clips on a metal object next to the spindle.

The spindle probe is again just a dumb switch with no batteries or anything. The stylus sits on 3 points inside the probe with a spring pulling it down. The stylus will swing freely when it hits an object, but once continuity is made with the table, the position is recorded. You can set Z heights, X plane zero, Y plane zero or set center of a bore by manually probing 3 points. It is so much easier to use than a Renishaw probe running a macro program like I have to use now on a Fanuc machine.

Again, the only issue with this system vs the Renishaw is everything needs to conduct electricity. If you need to probe the surface of a plastic part or anodized fixture, just grab a piece of .001" Starrett shim stock. Place one end on the table under a weight and tape or hold the other end down while you crank the Z axis down to probe the surface. Done.

I miss the Ice Cream Truck. It still lives but it got moved to another building in a different dept. Fun machine.
 
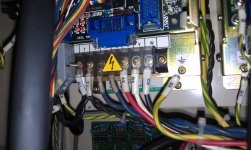
I spent a few minutes wiggling what I think are the power wires for the X drive and couldn't get the alarm to occur. I traced the wires from the motor back to the servo board. Looks like it's the red, white, black, and yellow/green wires here, right? I also tried wiggling the smaller wires going to the board. Any suggestions?
 

Attachments

  • 2014-12-11 08.45.16.jpg
    2014-12-11 08.45.16.jpg
    97.5 KB · Views: 584
  • 2014-12-11 08.40.56.jpg
    2014-12-11 08.40.56.jpg
    94 KB · Views: 368
You should remove the motor power connector from the servo motor and take it apart. Check for any evidence of coolant or oil. Check for evidence of any arcing, blackish residue, burnt smell. If you find any of those, then the connector will need to be disassembled and thoroughly cleaned/repaired/replaced as appropriate.
 
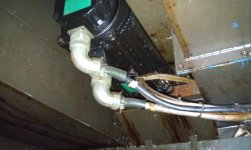
Took it apart and it looks pretty clean. No evidence of coolant, arcing, etc.:cryin:
 

Attachments

  • 2014-12-11 13.21.51.jpg
    2014-12-11 13.21.51.jpg
    87.8 KB · Views: 427
Next step requires a test instrument called a megohmmeter or sometimes "megger". Reconnect the plug and disconnect the cables at the drive. Check each leg to ground and each leg to other legs with the megger. This will test for insulation failure in the motor and cable.
 
Revisited this issue today after reseating the boards didn't help. I unhooked the motor power wires from the board and checked resistance between each leg and ground with a 1000v megger. Each leg was over 2000MOhm so it looks like the wires are ok. After some more attempts the machine started without the alarms and I was able to get it running. I tried wiggling all the wires on the drive servo board while it ran and nothing happened. Quite frustrating...
 
Last edited:
Thats the same alarm "well very similar" alarm I am getting with my yaskawa drive.
I borrowed a replacement from the local dealer so I could run.
But I think I will try to reinstall the old drive before I send it off to yaskawa.

Its a 1600.00 charge to have "rebuilt" what could take a hour to fix or it could take most of a day.
 
I spent a few minutes wiggling what I think are the power wires for the X drive and couldn't get the alarm to occur. I traced the wires from the motor back to the servo board. Looks like it's the red, white, black, and yellow/green wires here, right? I also tried wiggling the smaller wires going to the board. Any suggestions?

The three drives in a yasnac (x,y,z drives) are all the same I can swap
them with one another to see if the alarm goes to a different axis.
May be something to help isolate the problem?
 
The three drives in a yasnac (x,y,z drives) are all the same I can swap
them with one another to see if the alarm goes to a different axis.
May be something to help isolate the problem?

That's a good idea. I was thinking the same but wasn't sure if they're interchangeable. They do look the same. I have Mitsubishi drives I believe. Seicos III control.
 
That's a good idea. I was thinking the same but wasn't sure if they're interchangeable. They do look the same. I have Mitsubishi drives I believe. Seicos III control.[/QUOTE

ASK someone in the know.....It can get very expensive quick but its not rocket science either.

All that separates the X Y Z DRIVE is where two jumpers(tiny looking clips that plug into 2 pins, there is a row of these pins depending on which pins get the jumpers is what designates X or Y or Z .

(ON yasnac/yaskawa drives anyway) .TAKE PICTURES.. close ups of any drives you swap use a digital so you can zoom in on the picures.

Take pics from every angle and include notes ie "x axis drive etc.
.AND draw wiring diagrams all the wires are numbered.
Dont trust your memory even for the simplistic detail .ASK me how I know that ..lol
Good luck
 
So I swapped the X and Y drives and the alarm followed to the Y axis. I then had the brilliant idea to move the bad drive to the Z axis since that one moves the least and maybe it would reduce the occurrence of the fault. So I swapped Y and Z and when I tried restarting the machine I got this alarm: #904 "X AXIS PCU CIRCUIT PROTECTOR. PCU circuit protector in the 1st axis is in the OFF status." Is there a breaker I might have accidentally tripped? I didn't touch the X axis drive so I'm not sure why that's where the alarm is occurring now. The jumpers are set the same on all the drives, that I could see anyway. The manual mentions two possible settings for the gate resistor but I didn't see this anywhere.
 
Drive numbers are the same on all axes. I just figured out what I did... right above the Z drive is the power supply for the axis drives and there's a little black toggle switch on the bottom to reset the circuit breaker. I must have flipped it accidentally when removing the Z drive and didn't notice it. Spent a good two hours trying to figure out what happened lol.


Back
Top