What's new
What's new

single point threading: multiple starts: initial DOC question

implmex

Diamond
Joined
Jun 23, 2002
Location
Vancouver BC Canada
Good morning gentlemen:
I have a threading question for the lathe using the two line version of G76. (Fanuc OI)

Here's the problem:
Small diameter internal thread quite deep so skinny solid carbide bar.
Root dia is 0.104"
Depth is 0.460"
Material is 360 brass (thank God!!)

Tool tip flat is 0.001" (almost dead sharp)
60 degree vee.

Two profiles to cut:
The first is as pointy at the OD as I can make it (that's why such a pointy tool)
The second has an 0.006" flat at the OD.

I can make the pointy profile with lots of tiny passes and lots of spring passes and it comes out within tolerance when I section it using the wire EDM and check it on the shadowgraph.
If I put a flat on the tool tip for the second profile the tool springs too much to cut well.

So, I've programmed it in multiple G76 lines each with a 0.0005" offset in the Zstart position but with all of the passes for each G76 line so it cuts a LOT of air.

Here's my question:
Can I increase the first pass DOC safely on all the G76 lines after the first one without losing my registration of the tool to the developing thread?

We know that when the included angle is set to 60 in the first G76 line it will calculate a new Zstart for every pass as it works it's way down the trailing flank, starting from the first pass.
If I put in a big first pass DOC does it still make the same calculation, in other words would my tool tip end up in the same place when the thread is to depth regardless whether I cut it in 2 passes or 10 passes?

Another way to ask I suppose is to ask if I cut the thread in multiple passes using a single instance of G76 and one start position; then do a completely separate pass using a separate G76 line with the same Zstart position but coding for only one pass at full depth, will I trash the thread on the second pass from mis-registration of the tool in Z.

I know this is clear as mud, hopefully one of you understands what I'm asking and can advise me with confidence.
I don't want to just try it because I don't think the tool will survive if it doesn't work, but this threading is taking forever and I have 10 parts to cut.

Cheers

Marcus
Implant Mechanix • Design & Innovation > HOME
www.vancouverwireedm.com
 
once you start if you change anything your done...so no

and the Q in first line controls DOC of each pass

the R controls the DOC of just the finish pass

the second line the Q controls the DOC of the first pass only...so this is what you want to change

but I have a better idea...change your degrees in the first line P value to 55 and not 60

and run the Q in the second line at .0007 which is Q00070...or 8

the second line Q value you could probably set at .003 which is Q00300


but when I do threads this small I just run the program at .0007 per pass and live with it...and second Q value at like Q00150

hope that's what ya was lookin fer...good luck

PS....don't blame me if you up the 1st pass DOC and it breaks the bar.....I leave it low if its working....your on yer own on that one (disclaimer...LOL)you'll be walkin round the shop sayin this...LMAO

 
Hello Marcus,
As per usual, Johnny has it wrong.

The Q of the first block actually sets the minimum DOC.

When the calculation made in software by the control results in the following:

Q => d(SQR(n)-SQR(n-1))

Where
Q = minimum DOC set in the First G76 Block
d = First Pass DOC set in the Second G76 Block
n = the nth Threading Pass

The DOC increment is clamped at the value set by Q in the first G76 Block.

If you set a subsequent G76 cycle to cut the same thread previously cut and set the Q value of the Second G76 Block (First Pass DOC) to the same value as the P argument of the Second G76 Block (Thread Profile Height), it will track in the same Threading Pass as the Last Pass of the previous G76 cycle. I believe this is what you want.

Its easily seen that this will be the case if the Threading Tool Tip angle set via the last two character of the P address in the first G76 Block is set to Zero. When a Tool Tip angle other than Zero is set, the control shifts the Z Start position according to a calculation that includes the DOC and the Tool Tip Angle set.

To prove this for yourself, program a G76 cycles having quite a large Thread Profile Height. Program the First Threading Pass DOC (Q value of Second G76 Block) to be equal to the Profile Height specified by P in the second G76 Block. When this cycle is executed, you will see a shift in Z at the start of the Thread if a value other than Zero is set for Tool Tip angle in the First G76 Block.

Whether 60° or 55° is set for the Tool Tip angle is irrelevant, so long as the same angle is set for the subsequent G76 cycles as the first G76 cycle. Setting the angle less than the actual Tool Tip angle just make the trailing edge of the insert engage slightly with the trailing flank of the Thread profile.

Regards,

Bill
 
Last edited:
It USED to work just as you describe back when I ran fanuc lathes. That was one line G76 though.
I used to re thread with one depth of cut to deburr with no funkiness happening to the thread.
Probably doesn't help.
 
That is exactly what I used to do if I wanted spring passes before I was able to use the 2 line G76 cycle.

I'd run the thread as normal with multiple passes then call a separate G76 cycles to do it in one or two stabs to kinda act as spring passes and the machine tracked the previous thread perfectly as best I could tell.

But then you throw in the shift in Z? I'm looking at it like if I was making a multiple lead thread with 4 starts. Wouldn't all 4 threads be identical and the only difference would be the shift of Z starting position regardless how many passes it took? So it seems to me if all you do is shift the Z back .0005" run another G76 and take one or two stabs at it, then in my mind you'd just shave of the one side until you achieved your .006" flat. Good Idea! Wonder if it would work? Lol...

Wonder if a Pxxxx00 90deg infeed could be a workaround? Eliminating the indeed angle altogether? The fact you don't want to trash your only bar I'd try to test this theory by threading the OD of a piece with a regular stick tool and insert and see what it did?

Obviously I don't know I'm just thinking out loud.

You ask some interesting questions!

Brent
 
Good evening gentlemen:
So I tried Bill's (angelw) recommendation and as always, it worked beautifully.
Thank you very much!
Attached is a picture of samples of the two threads back to back and sectioned on the wire EDM so they could be measured and inspected.
You can see the differences between them, and why I had to do them the way I did.
The custom threading bar is only 0.050 wide across the body because I found it was dragging chips and scarfing up the bore before I necked it down to give a bit more chip room.
The body of the bar got an offset grind so it's oval in cross section which makes it relatively strong vertically so it resists chipmaking forces, but it's relatively weak horizontally which was why it cut so much better when it was pointy.
Anyway, the job's done; thank you all for your input.
As always it's appreciated greatly!!
Cheers

Marcus
www.implant-mechanix.com
www.vancouverwireedm.com
 

Attachments

  • DSCN4401.jpg
    DSCN4401.jpg
    90.9 KB · Views: 200
G32 with the Z start point shifted would also be an option for those final passes as long as your G76 was using 0 for the tool tip angle. That is how I adjusted the fit of square threads the one and only time I had to cut some.
 
Hello Marcus,
Should you have a similar job to do, rather than enter a number of successive G76 Cycle Blocks, a single G76 Cycle Block entry could be made inside a GOTO loop, or Conditional WHILE/DO Loop and use a Counter Variable, or a Terminal Z Coordinate as an exit strategy.

In the following examples, the Incremental Z Shift is added to the existing Z Start. If the parameters set in the First G76 Cycle Block for the initial thread don't have to change, the First G76 Block can be omitted in the Loop. If any of the parameters have to change, the First G76 Cycle Block can be executed just before the Loop, or included therein; the result will be the same.

WHILE/DO Example

#1 = -0.0005 (Z SHIFT INCREMENT)
#2 = 0.250 (Z START POINT)
#3 = 0.240 (Z START FINISH COORDINATE)

G00 X_ _ Z0.25 (LOCATE TO Z START POSITION)

WHILE [#2 GT #3] DO1
#2 = #2 + #1
IF[#2 LT #3] TH #2=#3 (PREVENT OVER-CUT IN Z)
G00 Z#2 (MOVE TO NEXT Z START POINT)
G76 X_ _ Z-1.5 P4600 Q4600 F_ _
END 1

or

GOTO Example

#1 = -0.0005 (Z SHIFT INCREMENT)
#2 = 0.250 (Z START POINT)
#3 = 0.240 (Z START FINISH COORDINATE)

G00 X_ _ Z0.25 (LOCATE TO Z START POSITION)
N10 #2 = #2 + #1
IF[#2 LT #3] TH #2=#3 (PREVENT OVER-CUT IN Z)
G00 Z#2 (MOVE TO NEXT Z START POINT)
G76 X_ _ Z-1.5 P4600 Q4600 F_ _
IF[#2 GT #3]GOTO10


Regards,

Bill
 
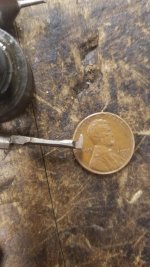
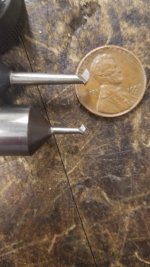
IMPLEX heres some of my bars I use...regular and acme...what value did you go with for the Q values in the 1st pass and subsequent passes?

20170606_155430.jpg


20170606_155523.jpg


Back
Top