What's new
What's new

FP3 CNC Horrible Z axis noise during fast move upwards.

repot

Plastic
Joined
Jun 28, 2019
I’m starting to use my fp3 cnc more and more for little jobs, just to get to know it better. The dialog 4 control is a nice control to use. The serial communication is also working, so I can download the jobs. Started to work at 50% feed and everything is working fine. I noticed that the lubrication of the ways was missing. So I spend a couple of days cleaning every valve and oil line.

Last week I was running a job with some fast G0 Z axis moves for the first time at 100% feed. Downwards worked fine, but upwards resulted in a horrible noise. After a couple of seconds the control stopped. I did some testing and fast moves work fine with a maximum of 60% feed. If I select a higher feed percentage, the Z axis stalls during fast upwards movements and the control goes down. I can use a G1 with maximum feed without any problem. There is no mechanical noise from the Z axis.

I found some topics on the forum which indicated that the tacho needed cleaning. I removed the covers, loosened the manual control and removed the top of the Z servo. This didn’t look very bad. I cleaned and de-greased it but without any result. I also re-calibrated the bosch servo driver. But this does not make a difference.

I also read that the axis are mechanically overload protected. The noise is really terrifying. But I can not differentiate if the overload kicks in because the table is moving badly, or the bosch servo driver is not very happy with the servo and tacho. I also loosened the key in the middle and some bolts at the back of the table to make sure the table could move freely. The problem remained.

To check the Z spindle I put some wood under the table and directed the table down. Once it reached the wood, I could hear the overload protection. Due to the very limited speed the noise was not very loud, but it sounded somehow familiar. I have loosened the Z servo and removed the belt. The belt seems fine. I can move the table upwards by turning the spindle by hand. The Z spindle and table are are moving freely.

At this point I suspect the overload protection of the Z axis. A bit strange because the table is empty and I removed the whole cover. There is not that much of weight to carry. Can it be that the acceleration of the servo is too much for the overload protection? Does anyone have experience in this area? Maybe some other options to check? Your help is much appreciated!

Regards, Rene.
 
Sounds to me as though your overload clutch is activating....
The clutch is made with two opposing plates, with a set of shallow pockets drilled in a circular pattern on both plates that face each other.
One plate is fixed to the motor shaft, and the opposite plate is fixed to the output drive.
There are balls between the plates nesting in the pockets. One plate is held in tension with spring washers that are tensioned via a threaded washer. (break away is adjustable)

When the drive force becomes high the balls jump from pocket to pocket the resulting noise sounds like a metallic machine gun firing off....
When this happens an E-stop condition happens. The control senses zero scale movement while the servo is turning (voltage from the tach)

The reason it happens at higher speeds is that the load on the overload clutch rises with increased speed of the slide....

Might try moving the slide up and down (slowly) while manually engaging the way lube cycle....Do this to excess to be sure there is oil on the slide.

Also run the table all the way to the upper limit switch (mind the vertical head).
Have a careful look at the inside way surface on the non operators side of the vertical box ways....Early (non flip) NC machines have a propensity for galling this surface and trouble here can
cause trouble when moving the slide.

If you can remove the table, try running the vertical at rapid to see if reducing the load will make things better...(confirm its the overload clutch)

Can you tell us which Bosch servo drive cards are in your machine? (part number on the spine of the board)

Cheers Ross
 
I could not resist to open the servo to take a look at the overload clutch. I was surprised by the amount of oil and dirt that I found. I cleaned everything and put it back together hoping this would solve the problem. Things got a little bit better, but not that much. I already cleaned all the oil lines and valves. The Z axis is now nicely shining with oil.

I have removed the table and checked the ways for galling. I can feel a little edge on the left way with my finger nail (opposite operator side) . I can not feel or see other defects. Removing the table seems to solve the problem. I can rapid move at maximum feed percentage.

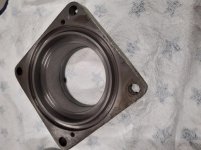
Some pictures:
20191212_184536.jpg

20191212_184546.jpg

20191212_184837.jpg

Next steps are to disassemble the servo again and take a better look at the overload clutch and investigate the Z axis more in detail. I could not find how to remove the Z spindle. On the top it is fixed, but so far I did not find a way to get it out. To be continued.....
 
The top of the "Z" lead screw is bolted to the slide casting. There is a secret to removing this.

First remove the sheet metal plate that covers the top way wiper on the "Z" slide.
This will expose the entire length of upper keeper gib that runs along the top of the "X" slide.
Close to the center of the plate gib is a rubber plug.
Remove the plug, and position the "X" axis so that the hole is centered on the vertical casting.
Use a very long Allen wrench through the hole and into the Allen bolt that secures the screw...You may need to move the "X" slightly to get your Allen to go all the way down as it must pass through an access holle
in the casting before it reaches the Allen....As i recall the Allen is 8mm.
The bolt will not come out, but you can unscrew it to free the screw.

On my FP4NC i was able to use a long Allen wrench that i owned, however on my FP3NC i needed a longer tool.Has to do with the geometry of the two machines...
On the FP3NC i needed to make a long wrench to get the length required. I made a simple Allen wrench by milling a hex on the end of some heat treated ETD150 round bar.

Once the bolt is unscrewed, raise the table almost all the way up, and block it in position using a wooden block.
Remove the two way oil catch trays (plastic)
Then remove the drive belt and unbolt the screws (4) from the base after removing the two taper locating pins...
Pull down the spring coiled cover and hold it compressed by inserting a small bolt rod into the hole in the screw support ..

The screw can then be lowered by rotating the drive pulley, allowing enough room to lift the screw up and out of the base of the machine.....


Caution !!!!!!! when reinstalling the screw, be sure to get the dowel pin that is on top of the washer that is on the upper end of the screw seated into its groove. This prevents the screw from turning when you go to tighten the top Allen bolt
If you damage this pin or washer the repair will require complete removal of the entire vertical casting.

Also, be aware that you can increase the break away torque on the clutch by removing the holding screw and tightening the threaded ring. Clutch shouldf be marked (perhaps) as to the torque value that it slips ,or jumps in reality.
Believe the break away torque can suffer if the clutch gets much action....

Also the 6 small Allen bolts that secure the clutch to the drive pulley are known to fail, so suggest you replace them while you are in there...

Cheers Ross
 
Removed the servo again this morning. Removed the overload clutch for testing. I found that the overload clutch was very easily to engage. It took very little power to get the balls jumping. Decided to increase the break away torque a little bit. Not too much to make sure the safety function remains! The overload clutch showed a text with 10 Nm written on it, but no further marks.

I also removed the Z spindle for cleaning. A lot of old grease and oil inside. Cleaned it all and put it back together. Do not believe this will make a lot of difference, but now I know that the spindle is moving freely.

After putting it all back together I did some testing. First without the table. Luckily this still worked fine! After mounting the table back, I started at 60% feed, increasing 10% steps. Increasing the break away torque seems to have solved the problem. Everything is working as expected.

Thanks for the support and explanation. You definitely need a long Allen wrench. Luckily I had some hex lying around with the correct size. This did the job to loosen the Allen.

Regards, Rene.
 
I am sure you are up to speed on this,but regarding safety, overload clutches, crashes and the like...be sure to always retract the vertical head and upper Y slide locating pins after using them
to position the slide or vertical head....Don't want a hard connection where things might want to move when involved in a crash...

Glad you got this sorted out.
Cheers Ross


Back
Top