What's new
What's new

Drilling & tapping 1"- 8 through hard weld

yardbird

Titanium
Joined
Jul 3, 2013
Location
Indiana
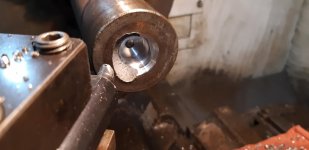
These support pillars had a 1"-8 male thread sticking out about 2 1/2" that got broken off. I need to drill & tap 1"- 8 about 2" deep for a threaded stud as a (half assed) fix. The (not mine) idea was to weld up the hole so it could be faced off to have a flat surface to work off of. In theory it's a good idea but in this case now the glob of shit on the end is harder than a brick. I got one faced off and was able to center drill it but it just tore up the 7/8" drill as soon as it made contact. Tried getting underneath the hard with a 3/8" carbide 80deg diamond boring bar which worked some and I was able to suffer through one without tearing up too much stuff but they are still PITA.

They are about 3" round and about 4' long. I'd rather make new but that isn't my call. When all said and done it'd probably have been quicker. There are 8 of them 4 have been welded on before I got him stopped.

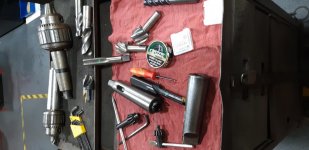
If it wouldn't walk all over the place plunging with a carbide end mill might help but all I have to hold it with is a drill chuck and 3/4" is as big as we have.

Wondering does anybody have any fantastic ideas for getting the these drilled & tapped?

It will be waiting on me when I get back tonight so I thought I'd run it passed you fellas to see what you've got to say. Thank you!

Brent

Edit: I don't know why the pictures are sideways?

20190515_041554.jpg
20190515_033516.jpg
20190515_033348.jpg
20190515_045039.jpg
 
I would definitely try to anneal the welded area as best as possible before stuffing a drill and tap in there.
 
The problem with sideways pictures: Digital cameras (including cell phones) store the image pixels in the same way regardless of how the camera is rotated. That is to say, if the camera is held sideways, the image is stored sideways. However, stored with/in the image file is "metadata" that indicates (among other things) how the camera was rotated when the picture was taken, so that when it is displayed, the image can be rotated accordingly as needed.

Unfortunately, forum software often strips out the metadata when an image is uploaded. Sometimes the forum corrects the rotation before doing this ... but sometimes not. The latter seems particularly true of images taken on Apple products (not sure why, but seems to be a consistent issue). The solution is to re-write the image before uploading, rotating the image as needed so that the image is physically stored in the proper orientation. At the same time, it is best to re-size the image to a more forum-screen-friendly size (say 1024x768). However, even for those who know how to achieve this re-sizing and re-formatting, the process tends to be a royal pain, because one generally has to work on one image at a time.

For just this reason, I finally wrote myself a program to allow batch processing of any number of images, simultaneously rotating and re-sizing as desired. The program reads the metadata on the original file of each image and automatically corrects the rotation as needed, then writes the re-sized and rotated image using a suffix on the name or placing it in a different directory (to avoid losing the original full-resolution image) as desired.

After I wrote it, I have found that I use it all the time, not so much for uploading pictures to forums, but especially for sending pictures via email. Whenever I have taken pictures of a wedding or family event or such, I want to send the pictures to other family members or to those who might want to see them. However, my email program won't allow more than 15 meg or so of attachments, which allows no more than 2-3 full-resolution pictures at most, and it gets very tedious to send a dozen or more emails with 2-3 pictures each. But with pictures resized to 1024x768 or so, with a lower setting on the jpg compression, I can send 50-100 pictures in a single email. The recipient can let me know which one(s) she or he wants printed or in full-resolution format, and I can then send just those.
 
Short of induction heating plants, build a big fire out in the yard, lots n lots of wood n charcoal, get em as hot as you can then cover with ashes and leave to cool. .........….and it will take time - a lot of it.
 
Don't tap the weld. Counterbore 1/4 to 1/2 deep to 1 1/16" diameter. The end result will be stronger as well.
 
How about coming in with a right hand carbide tool and use the compound as a way of getting your centering hole down beneath the weld build-up. Basically angle your way in towards the center as deep as you can reach. That might get you beneath the hardest of the weld crust.
 
Other than heating them up with a torch how would you do that?

Brent

Yup, I'd heat 'em up with a big torch. Probably, the hard zone is not all that deep so if you can achieve a dull red for the first half an inch, it might be annealed enough. Reason you want to heat that far down is to have enough heat sunk into the bar so it doesn't come right back and harden itself.

I like the counterbore idea as well. But you've still got the headache of drilling some distance in the hard stuff.
 
To be only slightly pedantic, you do not want to anneal the end of the shaft. You wish to temper the weld area to about 1200 degrees F., while ensuring your heat source does not get any part of the shaft above about 1300 F. As long as you stay below the critical temperature, you won't form a quench layer no matter how fast you cool it.

The weld raised the metal above the critical temperature, and the mass of the part self quenched the weld area, forming the hard layer you are fighting. Any heat will temper the area, the closer to critical the softer the weld area.
 
How about coming in with a right hand carbide tool and use the compound as a way of getting your centering hole down beneath the weld build-up. Basically angle your way in towards the center as deep as you can reach. That might get you beneath the hardest of the weld crust.

Essentially this is what I did on the first one after I #8 center drilled.

Brent
 
Yup, I'd heat 'em up with a big torch. Probably, the hard zone is not all that deep so if you can achieve a dull red for the first half an inch, it might be annealed enough. Reason you want to heat that far down is to have enough heat sunk into the bar so it doesn't come right back and harden itself.

I like the counterbore idea as well. But you've still got the headache of drilling some distance in the hard stuff.


The torch may be what it comes down to in hopes to soften them up a bit. I'm liking counter bore idea also. If I can poke a 1/2" hole in them then I'll try the counter bore route and see what happens there?

Brent
 
The other 3 welded up parts wasn't as much as a bitch as the first one. I was able to get underneath the hard with the boring bar then they drilled and tapped without too much trouble.

The 4 that weren't welded ended up being the PITA. When starting the drill in the uneven surface the drill wondered off and walked pretty bad, the tap of course followed.

Ended up boring the hole to the drill size before starting and it drilled fairly straight but when the tap hit the uneven surface it wiggled around like crazy and about broke the tap.

Finally in addition to boring a 7/8" pilot for the drill I also counter bored at 1" diameter just back far enough until it was a round hole. Then both the drill and tap went in dead nuts straight.

Thanks for the help!

Brent

20190516_044107.jpg
20190516_045553.jpg
20190516_061248.jpg
20190516_062815.jpg


Back
Top