What's new
What's new

Lagun FTV-2 Mill Questions

ptsmith

Cast Iron
Joined
Feb 15, 2018
Clueless hobbyist. I have many questions about my FTV-2 mill. I'll start with this.

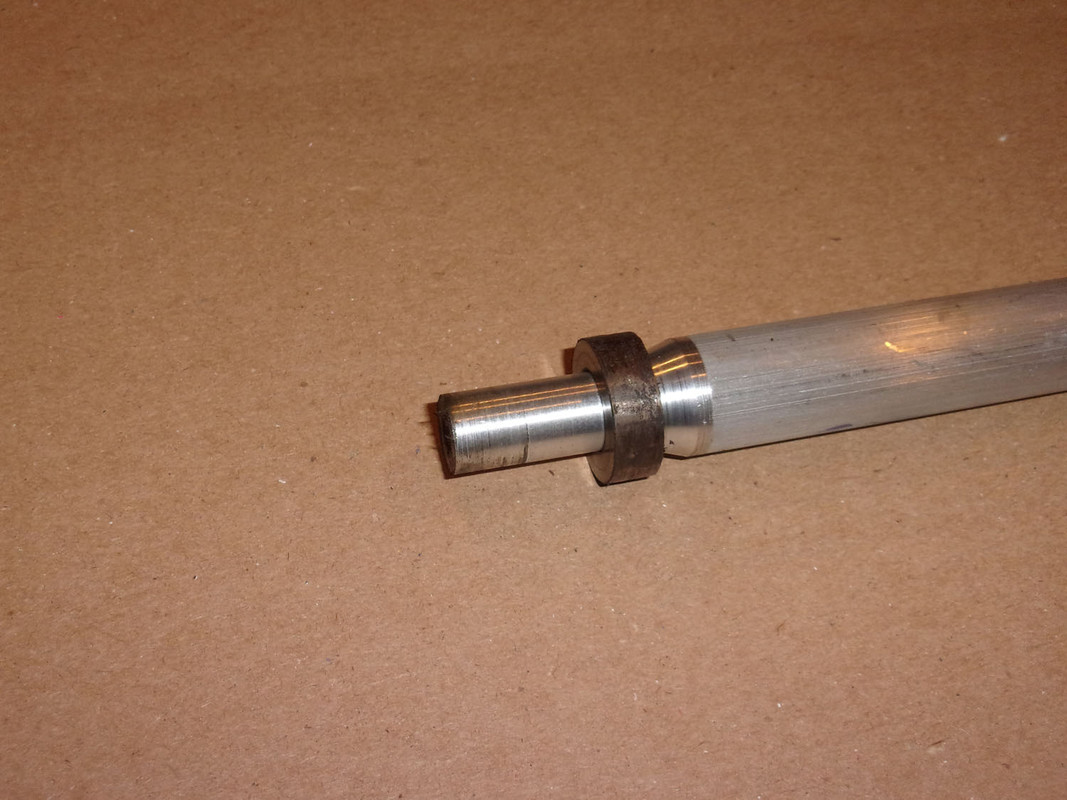
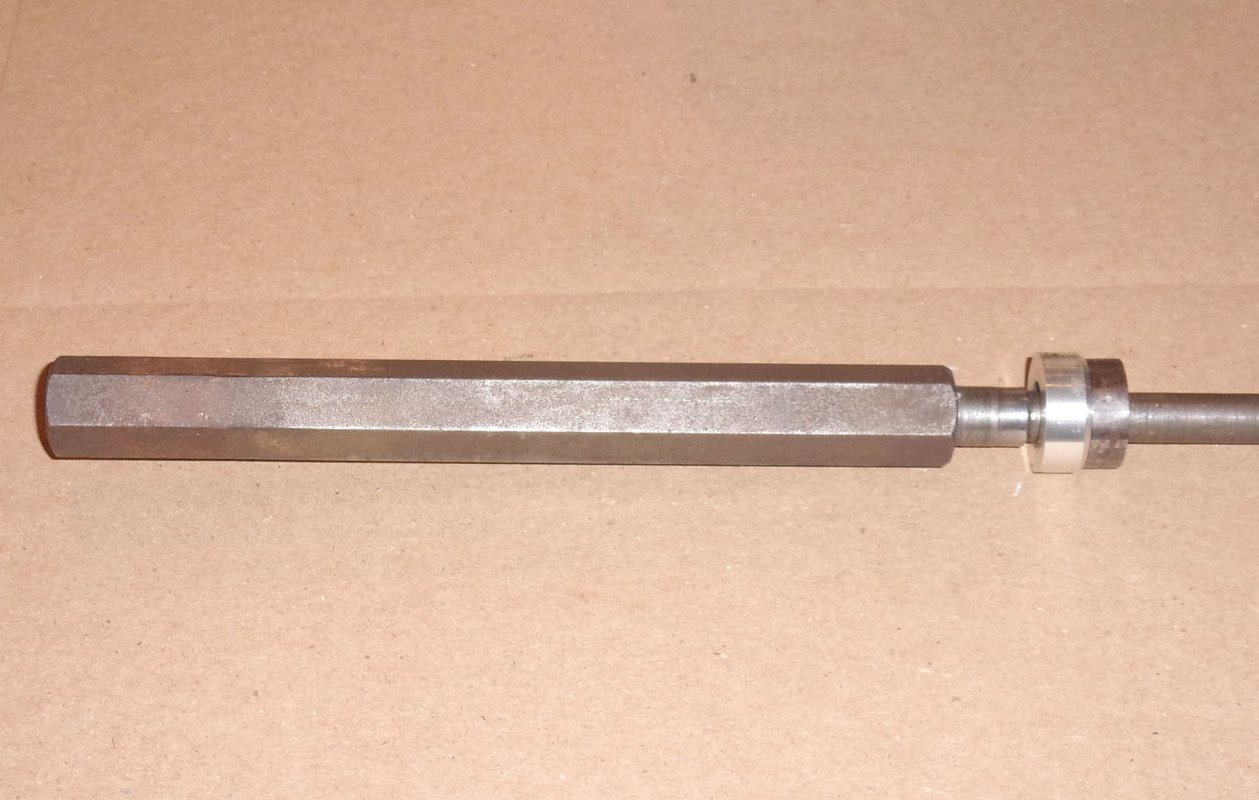
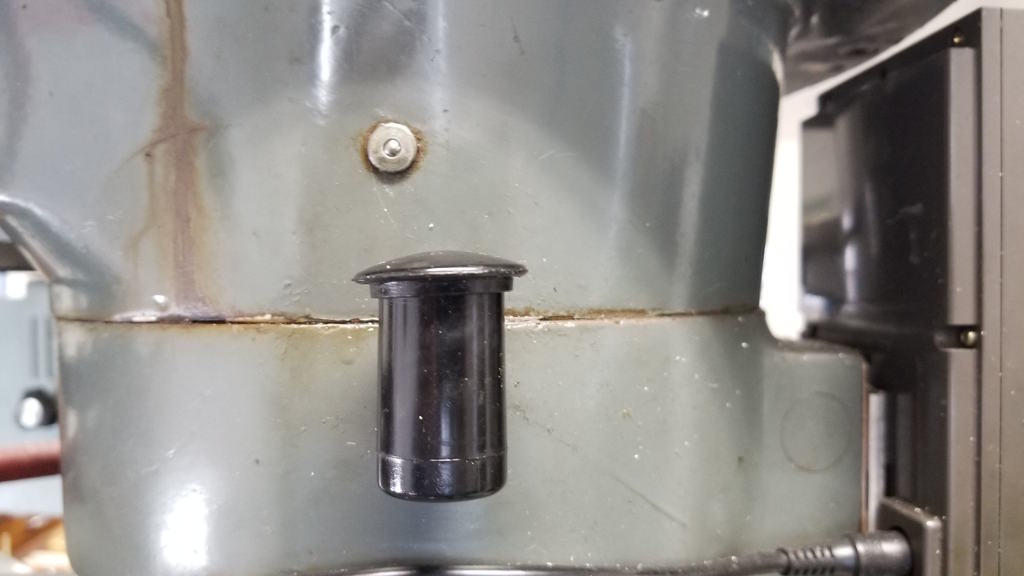
The drawbar has a lot of side play at the top. It causes harmonic vibration at several different RPMs. The bar has a slight step right below the bolt head that increases the dia. to what I measured to be .497". I decide to make a sleeve to eliminate the slack. I don't have any way of measuring the hole because it's too deep, so my plan was to turn a piece of 7/8" aluminum (it's what I have on hand) down in small increments until it fits in the hole. That will get me the OD measurement. The aluminum diameter gets to less that .600" and still isn't fitting in the hole. At .525" it's still a no go. It doesn't fit until it's below .500".

I'm confused. There is a *lot* of side play in the top of the drawbar. It seems the top of the spindle would have to be moving. There's no vibration when I remove the drawbar so that doesn't seem likely. And I guess the spindle bearings would have to be in very bad condition for that to be possible, and that doesn't seem to be the case. Plus the top of the drawbar loosely, freely rattles in the hole like it's floating.

I feel like it's something stupid I'm doing. What am I missing?
 
If it has a lot of play the .497 section can't be entering the top of the spindle. Are you sure that you're not using an extended length drawbar made for use with a right angle adapter? It's about 3-4" longer than the standard. I could measure mine if you need the sizes.
 
Thanks rke[pler. I think I figured it out, which is a relief because I know how stupid this question makes me look.

I came up with the idea of turning a long taper on the end of the aluminum, inserting the taper in the hole, and hold it while running the mill at low speed. The top of the hole would rub a mark on the taper that would give me the size of the hole. When I removed the aluminum, a steel spacer was stuck to it. The spacer is a pretty close fit on the ID. The slack is on the *outside* of the spacer.

This explains why I couldn't get the aluminum bar to go in util I turned it down to the same size as the bar. The OD of the spacer is where the slop is coming from, and what is causing the problem.

The outside of the spacer doesn't look worn. I guess it's not the original spacer.

Bushing-1.jpg
 
The outside of the spacer doesn't look worn. I guess it's not the original spacer.

Does the drawbar rattle with that out? The only thing at all like that on the original drawbar is something I think is intended to reduce the wear at the top of the spindle where the drawbar rests, so it should be at the bottom of the hole. It's normally retained below the thick section of the drawbar with a o-ring.
 
Does the drawbar rattle with that out?

It rattles with the spacer in. It rattles even worse with it out. But I turned a new spacer out of aluminum that fits without slack and the problem is solved. It doesn't sound like it's what you have, which I assume is factory original, but it seems to be working so what the heck.
 
Last edited:
I took a look at both of my drawbars - one that might be original and a second extended length that's made by Dorian. Both have the threaded length to the loose collar at 18" (18 1/4 on the original) and the 3/5" hex top. The original has a round section under the hex that's .825 where the extended length one is hex all the way down and across the points is .845. It still has a wrap of tape that I suspect was to reduce rattling (I added it some time ago, maybe as much as 20 year ago).

20180830_094306.jpg
 
Thanks for going to the trouble of posting that, rke[pler!

Mine is like the drawbar on the bottom. I'm at work now, but I'll take a pic of mine with both spacers on it when I get home this evening.
 
The bottom one is the one I think might be original. There's no way it would rattle with the spindle turning if it's tightened up on something in the taper. If you can rattle it around by hand when tensioned I'd look at the clearance through the collar at the bottom, maybe it's not centering the hex at the top or something.
 
Actually, I think my drawbar is like the top one but shorter.

You can see the old and new spacer on the bar. I didn't measure the old one, but it's at least 0.12" smaller, and the new one could stand to be a bit bigger. I don't think the spacer and possibly the bar are original.

Drawbar.jpg


This from the manual.

Drawbar-2.jpg
 
I'm still setting this thing up. Real life keeps interrupting my fun. But I'm getting close!

A couple of lubrication questions. Actually I have several but I'll start with the head.

1) The ball oiler fitting that I believe oils the spindle bearings via a piece of string, took some pressure to get oil in it. And as I understand it, if you heavily oil it, oil will leak out the bottom of the spindle on to the table. This never happened, so I oiled it once a day for multiple days. Eventuality it was very difficult to pump more oil in it, resulting in a slight amount of oil actually leaking back out of the ball oiler fitting. Oil never leaked out of the bottom, even though the total amount of oil I pumped in it was not all that much.

2) I haven't greased the back gear yet. I assume there is some already in there. Although it may be dried up, it would still be taking up some space. So it seems I shouldn't pump a complete tube of grease in it. So how much should I pump in there? And what happens if I pump too much, assuming that's possible?
 
You may want to pull the spindle. There should be oil felt in good condition. The string is a pipe cleaner. It needs to rest against the spindle. take the oil cup off and clean it (just unscrew it).

And if you have mess with that spacer, something is wrong or not original. what matters is the collet (NMTB/R8) is tight and seated. Check your runout with an indicator. Don't worry about the harmonic. just adjust speed to minimize if it bothers you.


spin-bar.jpg
 
I'm still setting this thing up. Real life keeps interrupting my fun. But I'm getting close!

A couple of lubrication questions. Actually I have several but I'll start with the head.

1) The ball oiler fitting that I believe oils the spindle bearings via a piece of string, took some pressure to get oil in it. And as I understand it, if you heavily oil it, oil will leak out the bottom of the spindle on to the table. This never happened, so I oiled it once a day for multiple days. Eventuality it was very difficult to pump more oil in it, resulting in a slight amount of oil actually leaking back out of the ball oiler fitting. Oil never leaked out of the bottom, even though the total amount of oil I pumped in it was not all that much.

The cup goes to the spindle inside the quill via a pipe cleaner, I think the ball oiler oils the quill. I can't see how the ball oiler would generate back pressure but am not completely sure what path the oil follows after getting in there.

2) I haven't greased the back gear yet. I assume there is some already in there. Although it may be dried up, it would still be taking up some space. So it seems I shouldn't pump a complete tube of grease in it. So how much should I pump in there? And what happens if I pump too much, assuming that's possible?

I try to put a couple of ounces of EP lube in there every couple of years (home shop, low usage). No idea what happens when you pump too much in there, likely it'll come out the case somewhere enabling the motor to fling it everywhere.

I'm pretty sure that the one in this thread got enough:

https://www.practicalmachinist.com/...ted/lagun-ftv-mill-head-parts-rebuild-281983/
 
I've been avoiding this thread because I discovered I made a big, stupid F up and I'm embarrassed to admit it. Events that led to it:

While there seems to be a lot of Lagun mills around, no one makes videos about them, other than to sell them. So there's little if anything on youtube that helps a novice like me.

The manual kind of sucks.

I erroneously think that the quill power feed is lubed with Lubriplate. (I have no idea why I think this.)

The oil cup on my mill is broken off. I did not know this. The stub that's left looks pretty crude, but I assume it's suppose to be that way, and it nicely fits the Lubriplate nozzle.

So what do I do? I squeeze almost a whole tube of Lubriplate into the oil cup stub.

I learn in an old thread on this forum that the oiler ball fitting is for lubing the quill, not the spindle bearings.

So this explains the lube problems I'm having. It seems I need to squirt some thin oil in there to hopefully thin the Lubriplate so the spindle get lubed.

I F'd this up pretty good.
 
I've never been able to get a decent amount of oil through the ball oiler on mine.

Here's the lube plate on the side of the head.

lube schedule.jpg
 
The oil cup on my mill is broken off. I did not know this. The stub that's left looks pretty crude, but I assume it's suppose to be that way, and it nicely fits the Lubriplate nozzle.

So what do I do? I squeeze almost a whole tube of Lubriplate into the oil cup stub.

I would pull the whole quill assembly and try and clean out that area. The grease is not an appropriate lubricant and will likely block the light oil that is. So - get the replacement oil cup, rotate the head 90 degrees and pull the whole quill assembly out. You might be able to get the grease out by warming the whole head for a while (maybe tent the hard and run a space heater?) but likely you'll want to get it out mechanically. After it's done you can install the replacement oil cup, making sure the wick is going to touch the spindle, and reinstall the quill and assembly.

I don't envy you this cleanup.
 
You may want to pull the spindle. There should be oil felt in good condition. The string is a pipe cleaner. It needs to rest against the spindle. take the oil cup off and clean it (just unscrew it).

Should I be able to see the pipe cleaner through the hole? I do not see one.

Is there any chance of leaving the cup like it is and squirting oil hard into the hole and hitting the right spot? With the cup broke off I can stick the oil can nozzle inside the hole. That wouold be a lot easier than tearing it apart.

And if you have mess with that spacer, something is wrong or not original. what matters is the collet (NMTB/R8) is tight and seated. Check your runout with an indicator. Don't worry about the harmonic. just adjust speed to minimize if it bothers you.

That dawned on me not long ago. The drawbar does not seem to be original and the spacers lift it up too high. I need to use a thin one and possibly shorten the bar.
 
The cup goes to the spindle inside the quill via a pipe cleaner, I think the ball oiler oils the quill. I can't see how the ball oiler would generate back pressure but am not completely sure what path the oil follows after getting in there.

I read that elsewhere but I missed that you had already mentioned it. When you say oils the quill, does that include the power and manual feed parts?

I try to put a couple of ounces of EP lube in there every couple of years (home shop, low usage). No idea what happens when you pump too much in there, likely it'll come out the case somewhere enabling the motor to fling it everywhere.

I'm pretty sure that the one in this thread got enough:

https://www.practicalmachinist.com/...ted/lagun-ftv-mill-head-parts-rebuild-281983/

Thanks, that pic helps me understand it a little better. That looks like the top plate and it looks like it totally encloses the back gears. It seems overfilling wouldn't leak into other areas, so maybe that's not a concern
 
I would pull the whole quill assembly and try and clean out that area. The grease is not an appropriate lubricant and will likely block the light oil that is. So - get the replacement oil cup, rotate the head 90 degrees and pull the whole quill assembly out. You might be able to get the grease out by warming the whole head for a while (maybe tent the hard and run a space heater?) but likely you'll want to get it out mechanically. After it's done you can install the replacement oil cup, making sure the wick is going to touch the spindle, and reinstall the quill and assembly.

I don't envy you this cleanup.

When I screw up, I really screw up. Not only did I Lubriplate the wrong area, I bought the wrong Lubriplate! I don't remember all the details because I bought it a long time ago, but I read on this forum to use 105. So that's what I bought. The right stuff is *B* 105. Regular 105 is assembly lube for car engines.

That's turned out to be a plus because motor oil breaks it down and/or mixes with it. I should be able to eventually wash it all out.

The heat sounded like a great idea, so I put some in front of a space heater that gets over 200F according to my temp gun. It thinned a little but not near enough.

Right now I have some Lubriplate soaking in spindle oil and some soaking in WD40. So far nothing but it's only been an hour. If they don't work I'll try some motor oil.
 
I figured to put a couple of image up - my oiling label is a little different and I thought I'd put up a shot of the oil points on the left side of the head.

So the label:

lagun_label.jpg


Interesting that it suggests grease through the ball oiler (is that right? I've been using spindle oil), and heavy medium for the cup, again I've been using spindle oil.

The point in question:

lagun_oil_points.jpg


The ball at the top is what the label seems to be suggesting as a grease port. I've never seen a grease inlet as a ball oiler but almost always a zerk. Of course the zerks on the ways are for way oil and not grease so it kind of makes an obscure sense to have a ball oiler as a grease point.

The black cup below is the cup with the pipe cleaner leading to the spindle above the quill. Oil here should make it to the spindle and spindle bearings. But heavy medium in spindle bearings? I might try and ISO 68 here instead of the ISO 24 I've been using.

Around the left on the back of the head there's a grease zerk for the grease referenced.


Looking at the other label the instructions seem a lot closer to what I've been doing. I think I'll keep doing that, maybe go to a slightly heavier oil.


Back
Top