What's new
What's new

Lathe Leveling Bed twist issues Harrison M300

leedawg

Plastic
Joined
Feb 7, 2016
Hey guys so i have been at this for the better part of the afternoon today. I have a Harrison M300 lathe circa 2000 era think Colchester 13 inch by 40 pretty much the same machine. Any way It tends to cut tapers even though I have no taper attachment so figured its time to level it up and get the twist out of the bed. So I first threw my 12 inch Starrett level on the machine and got the lathe dialed in level both longitudinally and then across the ways as well on the headstock and tailstock end. This was easy just four jack screws at all four corners of the cabinet.

SO I then took a piece of 1.5 inches by 1414 inches aluminum bar to be a test piece and chucked it up into my 3 jaw chuck. Took some .020 passes to get the bar true and running concentric with the spindle. I then took a very light pass at about .002 depth the length of the bar. I then got out my micrometer and measured the tailstock end as well as the headstock end. Well, I noticed there was about a .003 inch difference in diameter with the tailstock end smaller than the headstock end. No problem I just loosened the tailstock front jack screw and took another pass. The measurements improved but still about .002 inches difference with the tailstock end smaller than the headstock end. Well at this point the jack screw at the front on the tailstock end was pretty light I could move it by hand so the machine was pretty much just resting on the two feet back and front on the headstock end as well as the back foot on the tailstock end. So I am out of adjustment I decided I would unbolt the tailstock end of my lathe from the cabinet and put a shim under the backside to try and add more twist forward to improve the measurements. I unbolted the four bolts on the tailstock end and then put a hydraulic bottle jack under the tailstock end and lifted it up ever so slightly and slide a .008 inch piece of aluminum flashing under the back part of the tailstock mount point to the cabinet. I then bolted it back down with the four bolts and took another test cut.

So now the measurments from both ends was off by about .001 inches and the tailstock side was larger than the headstock side. This was good I then lowred the front foot on the tail stock end to compensate for this and took another test cut. Finally I got both sides to be within about .0003 inches of each other over a 12 inch bar. Then I thought to myself the middle should be about .00015 inches between the two. I took a measurement at the middle and to my surprise, it is .0009 inches larger than the tailstock end of the bar and the headstock end of the bar.

I have been scratching my head on this now and am unsure if I can do anything about this. I think this points to wear in the machine as I get closer to the headstock. What I don't understand is how I can be almost the same at both ends of the bar but the middle is almost one thousands of an inch larger than the tailstock and headstock end. Should I worry about this or call it good? I am just a home shop hobby guy making one-off parts for whatever arises. I am no journman machinest hence im asking these questions. Is it unrealistic to be expecting my machine to be able to hold .0001 inches across a 12 inch peice of stock? Is it bad to shim the tailstock end of the lathe to help reduce the twist in the bed?

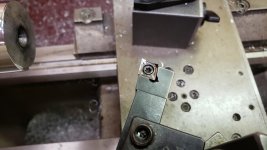
I have attached a few photos to show what I was doing. Really appreciate any insights or help. Thanks again!

Lee20190623_174349.jpg20190623_174406.jpg20190623_174417.jpg20190623_174445.jpg20190623_181413.jpg
 
Have you tried with a different insert, or may be even with a good old ground HSS one? It is possible that you have slight deflection in the middle from the cutting forces. It will get much worse if cutter is dull or angles are not right for the material.
Another possibility is a bed wear near the spindle end, where the lathe was used the most.
That said, most parts do not require 0.0001" precision, especially over entire 12" length. One place I can think off is ball bearing fits, but then again you only need to maintain the tolerance over the width of a bearing, not the entire shaft.
 
Spec for most new lathes is (and has been) .0005 over 12". Sound to me like you're golden for a home shop dude. A guy could spend his whole career in job/repair shop and never worry about anything less than .003".

Many folks maintain that the twist would have settled out if you left that foot off the floor for a couple of days and you could have avoided the shim. I've never had a chance to test it.

This is literally The Book (Schlesinger) on machine inspection, with recommendations on tolerances. Good for some perspective. 🙂 Small PDF download Dropbox - 404
 
Hey guys so i have been at this for the better part of the afternoon today. I have a Harrison M300 lathe circa 2000 era think Colchester 13 inch by 40 pretty much the same machine. Any way It tends to cut tapers even though I have no taper attachment so figured its time to level it up and get the twist out of the bed. So I first threw my 12 inch Starrett level on the machine and got the lathe dialed in level both longitudinally and then across the ways as well on the headstock and tailstock end. This was easy just four jack screws at all four corners of the cabinet.

SO I then took a piece of 1.5 inches by 1414 inches aluminum bar to be a test piece and chucked it up into my 3 jaw chuck. Took some .020 passes to get the bar true and running concentric with the spindle. I then took a very light pass at about .002 depth the length of the bar. I then got out my micrometer and measured the tailstock end as well as the headstock end. Well, I noticed there was about a .003 inch difference in diameter with the tailstock end smaller than the headstock end. No problem I just loosened the tailstock front jack screw and took another pass. The measurements improved but still about .002 inches difference with the tailstock end smaller than the headstock end. Well at this point the jack screw at the front on the tailstock end was pretty light I could move it by hand so the machine was pretty much just resting on the two feet back and front on the headstock end as well as the back foot on the tailstock end. So I am out of adjustment I decided I would unbolt the tailstock end of my lathe from the cabinet and put a shim under the backside to try and add more twist forward to improve the measurements. I unbolted the four bolts on the tailstock end and then put a hydraulic bottle jack under the tailstock end and lifted it up ever so slightly and slide a .008 inch piece of aluminum flashing under the back part of the tailstock mount point to the cabinet. I then bolted it back down with the four bolts and took another test cut.

So now the measurments from both ends was off by about .001 inches and the tailstock side was larger than the headstock side. This was good I then lowred the front foot on the tail stock end to compensate for this and took another test cut. Finally I got both sides to be within about .0003 inches of each other over a 12 inch bar. Then I thought to myself the middle should be about .00015 inches between the two. I took a measurement at the middle and to my surprise, it is .0009 inches larger than the tailstock end of the bar and the headstock end of the bar.

I have been scratching my head on this now and am unsure if I can do anything about this. I think this points to wear in the machine as I get closer to the headstock. What I don't understand is how I can be almost the same at both ends of the bar but the middle is almost one thousands of an inch larger than the tailstock and headstock end. Should I worry about this or call it good? I am just a home shop hobby guy making one-off parts for whatever arises. I am no journman machinest hence im asking these questions. Is it unrealistic to be expecting my machine to be able to hold .0001 inches across a 12 inch peice of stock? Is it bad to shim the tailstock end of the lathe to help reduce the twist in the bed?

I have attached a few photos to show what I was doing. Really appreciate any insights or help. Thanks again!

LeeView attachment 259545View attachment 259546View attachment 259550View attachment 259547View attachment 259548

Yes it's unrealistic to expect to be able to turn a bar stuck out of the chuck 12 inches to within a tenth on a twenty year old " Harrison " lathe. Yes it's bad practice to put loose shims anywhere near a lathe. Especially shims with a sharp corner stuck out far enough to cut your hand.

Have a read of the Schlesinger book, it shows you how to set up a centre lathe correctly

Regards Tyrone.

I agree with Tyrone and fciron You have a 20 year old machine and are expecting new specs. How many times will you ever turn a 12" shaft with-out the tail-stock center? most of the work is done by the chuck. The center is .0009" because of wear. I also thought the sharp edge will cut fingers. also cut 2 collars on the bar and do not turn the cross-slide dial between cuts. after the .002" cut crank it back with out turning the dial and move the tool past the TS end and I bet it will leave a scratch mark that is push away. Did you replace the spindle bearings? I bet no. 20 year old spindle bearings can also cause this too. Dremel off the sharp edges and live with it. Better then new china lathes, right.
 

Attachments

  • 20180518_154705.jpg
    20180518_154705.jpg
    91.7 KB · Views: 220
  • 20180513_111348.jpg
    20180513_111348.jpg
    95.1 KB · Views: 264
I agree with Tyrone and fciron You have a 20 year old machine and are expecting new specs. How many times will you ever turn a 12" shaft with-out the tail-stock center? most of the work is done by the chuck. The center is .0009" because of wear. I also thought the sharp edge will cut fingers. also cut 2 collars on the bar and do not turn the cross-slide dial between cuts. after the .002" cut crank it back with out turning the dial and move the tool past the TS end and I bet it will leave a scratch mark that is push away. Did you replace the spindle bearings? I bet no. 20 year old spindle bearings can also cause this too. Dremel off the sharp edges and live with it. Better then new china lathes, right.

This subject must come up at least once a month Rich. It could well be the subject that has been discussed at length the most. I'm getting too long in the tooth to keep responding with long and detailed responses. Life gets too short I'm afraid.
You, I, lots of other people have contributed hours of their time to the subject. Surely the answer is to look back through the relevant threads.

Anyway.

Briefly - level up your lathe accurately. Ensure the axis of the lathe spindle is true to the axis of the lathe bed ( test bar, two collar test, either will do ), ensure that the tailstock spindle/barrel is a) true to the axis of the lathe bed, b) ensure that the tailstock spindle/barrel is in line with the headstock spindle.

Do not make several wrongs equal a right. Step away from the roll of shim and nobody gets hurt.

Regards Tyrone
 
I agree you're in the realm of perfectly good enough and expecting to hold 0.0001" on a 12" is likely not a reasonable expectation and better than factory new spec. Having said that, you do have some interesting result that are worth questioning, both a test cut with a small TS end on a skinny workpiece and then a football shaped piece held only in a chuck. You've also knowingly twisted a 40" bed based on a 12" test cut on a 8.5xD (pretty skinny) workpiece.

Referring to your first test cut, typical thinking is that workpiece deflection would make the TS end larger, however some tools may tend to pull the work into the cutter. Or perhaps the workpiece is whipping a little, which would also result in a small TS end. A stout test piece helps eliminate the error either way, but the small TS end would have me scratching my head on a just leveled lathe. I might look for a 2.5"-3" heavy wall tube for further investigation, but while waiting for it to arrive...

My first question is does the HS sit on the ways or is it adjustable. I believe most modern lathes are adjustable as it's easier to manufacture. So before twisting a just leveled lathe, I'd have investigated HS alignment in both the vertical and horizontal axis.

A small TS end suggests the HS is pointing towards the front of the lathe. Assuming a lack of a test bar that fits in the spindle taper, the easiest first step is to take a facing cut (with the carriage locked) on a large disk or face plate and then run an indicator across the entire face with the cross slide. This will test the horizontal alignment, which is somewhat likely to have been "bumped" out or never aligned properly compared to the vertical.

On the front/cutting side you should read zero as this was the path the tool followed. Once you cross center you'll start reading double the error of the HS alignment. On most lathes the spec for a facing cut is something like 0-0.0005" in the swing of the lathe, concave only. Basically zero. If you are out even a couple though in a few inches, you should be aligning your HS before twisting your bed. If the HS points towards the front as your test cut suggests, you'll see more concave than you should. This was the condition my used lathe came to me in.

The football shaped cut is even more odd. Workpiece whipping could explain this, or you could have combined factors of wear/twist/HS alignment, but I'd take a step back before worrying too much about it.
 
" I think this points to wear in the machine as I get closer to the headstock."

Not a surprise - consider where most of the work on the lathe is done: Near the headstock.

From what you say, I would call it done. Another point often neglected is, be sure the machine
is on a solid base - if the floor moves more than the shim thickness over time, you will see errors
re-appear.
 
Have you tried with a different insert, or may be even with a good old ground HSS one? It is possible that you have slight deflection in the middle from the cutting forces. It will get much worse if cutter is dull or angles are not right for the material.
Another possibility is a bed wear near the spindle end, where the lathe was used the most.
That said, most parts do not require 0.0001" precision, especially over entire 12" length. One place I can think off is ball bearing fits, but then again you only need to maintain the tolerance over the width of a bearing, not the entire shaft.

Great points and I thought this to myself I really dont need that kind of accuracy, I was just reading this book by Harold Hall and he mentioned in there you should be able to turn over 100mm .002mm which comes out to about .0001 inches. Any way I will grind a HSS tool.

Spec for most new lathes is (and has been) .0005 over 12". Sound to me like you're golden for a home shop dude. A guy could spend his whole career in job/repair shop and never worry about anything less than .003".

Many folks maintain that the twist would have settled out if you left that foot off the floor for a couple of days and you could have avoided the shim. I've never had a chance to test it.

This is literally The Book (Schlesinger) on machine inspection, with recommendations on tolerances. Good for some perspective. �� Small PDF download Dropbox - 404

Thank you for the link I am going to give this a read however the link leads to a 404 error so I will have to find the book elsewhere. I think I am going to remove the shim given what others have said here. I just could not think of a better way to put more twist into the lathe in that direction to get the numbers to line up. I guess I could bolt it to the concrete floor then it would literally pull the frame down. But I will let it just sit for a few weeks and see how it does.

Yes it's unrealistic to expect to be able to turn a bar stuck out of the chuck 12 inches to within a tenth on a twenty year old " Harrison " lathe. Yes it's bad practice to put loose shims anywhere near a lathe. Especially shims with a sharp corner stuck out far enough to cut your hand.

Have a read of the Schlesinger book, it shows you how to set up a centre lathe correctly

Regards Tyrone.
Thank you for your insights Tyrone and I am sorry to waste your time with a subject that is talked about alot. I did not find the exact answer to my questions in this case so I posted. But based on what you have said and others I think I am going to remove the shim leave it as is hope for the best.

I agree with Tyrone and fciron You have a 20 year old machine and are expecting new specs. How many times will you ever turn a 12" shaft with-out the tail-stock center? most of the work is done by the chuck. The center is .0009" because of wear. I also thought the sharp edge will cut fingers. also cut 2 collars on the bar and do not turn the cross-slide dial between cuts. after the .002" cut crank it back with out turning the dial and move the tool past the TS end and I bet it will leave a scratch mark that is push away. Did you replace the spindle bearings? I bet no. 20 year old spindle bearings can also cause this too. Dremel off the sharp edges and live with it. Better than new china lathes, right.

Rich thanks so much for replying, I really want to take one of your scraping classes next time you are up in Northern Ca would be an honor to learn from a master such as yourself. I am going to just live with it the way it is I think and probably just pull the shim out to put it back the way it was. I figured the .0009 was probably wear up near the chuck since that is where most of the work is done. I have not replaced the spindle bearings but they were lacking preload when I first acquired the machine had to set the preload on them per the manual. And you are right I have seen a few brand new chinese machines and they leave a lot to be desired. Seems like the detail and finish work is totally left out of Chinese machines. This thing is well put together and you can tell they took the time to attend to all the small details. I think the reality is the machine spent the first 15 years in a semi-production environment and now resides with me just a simple hobby home gamer good enough for what I use it for.

So even with both sides not being the same diameters on your test cut with the two rings would you then simply move on to verifying alignment of the tailstock without compounding problems. I was going to just put a bar between centers and test cut that to dial in the tailstock as best as possible after I got the machine cutting as parallel as possible.

This subject must come up at least once a month Rich. It could well be the subject that has been discussed at length the most. I'm getting too long in the tooth to keep responding with long and detailed responses. Life gets too short I'm afraid.
You, I, lots of other people have contributed hours of their time to the subject. Surely the answer is to look back through the relevant threads.

Anyway.

Briefly - level up your lathe accurately. Ensure the axis of the lathe spindle is true to the axis of the lathe bed ( test bar, two collar test, either will do ), ensure that the tailstock spindle/barrel is a) true to the axis of the lathe bed, b) ensure that the tailstock spindle/barrel is in line with the headstock spindle.

Do not make several wrongs equal a right. Step away from the roll of shim and nobody gets hurt.

Regards Tyrone

I have put the shim material away and am going to remove my shim I placed the other day :)

I agree you're in the realm of perfectly good enough and expecting to hold 0.0001" on a 12" is likely not a reasonable expectation and better than factory new spec. Having said that, you do have some interesting result that are worth questioning, both a test cut with a small TS end on a skinny workpiece and then a football shaped piece held only in a chuck. You've also knowingly twisted a 40" bed based on a 12" test cut on a 8.5xD (pretty skinny) workpiece.

Referring to your first test cut, typical thinking is that workpiece deflection would make the TS end larger, however some tools may tend to pull the work into the cutter. Or perhaps the workpiece is whipping a little, which would also result in a small TS end. A stout test piece helps eliminate the error either way, but the small TS end would have me scratching my head on a just leveled lathe. I might look for a 2.5"-3" heavy wall tube for further investigation, but while waiting for it to arrive...

My first question is does the HS sit on the ways or is it adjustable. I believe most modern lathes are adjustable as it's easier to manufacture. So before twisting a just leveled lathe, I'd have investigated HS alignment in both the vertical and horizontal axis.

A small TS end suggests the HS is pointing towards the front of the lathe. Assuming a lack of a test bar that fits in the spindle taper, the easiest first step is to take a facing cut (with the carriage locked) on a large disk or faceplate and then run an indicator across the entire face with the cross slide. This will test the horizontal alignment, which is somewhat likely to have been "bumped" out or never aligned properly compared to the vertical.

On the front/cutting side you should read zero as this was the path the tool followed. Once you cross center you'll start reading double the error of the HS alignment. On most lathes the spec for a facing cut is something like 0-0.0005" in the swing of the lathe, concave only. Basically zero. If you are out even a couple though in a few inches, you should be aligning your HS before twisting your bed. If the HS points towards the front as your test cut suggests, you'll see more concave than you should. This was the condition my used lathe came to me in.

The football shaped cut is even more odd. Workpiece whipping could explain this, or you could have combined factors of wear/twist/HS alignment, but I'd take a step back before worrying too much about it.

Great points the headstock is bolted down to the lathe ways I do not think this can be adjusted at least to the best of my knowledge. I won't lie I'm a little intimidated to do anything with the headstock because fixing it is way beyond my skill level. I am no machine rebuilder Scraping in ways and all that is black magic to me still at this point. I do want to take a class on it someday think I would learn a lot.

I am as most of you suggested going to just pull the shim re aling the feet to get it as close as possible to two individual cuts and call it a day and keep using the machine for the small projects I work on.

Thank you so much to for everyone's inputs really appreciate it helps with those of us that are just home gamers learning on their own without any mentors.

Lee
 
Ok so we can go through this in a little bit of detail again,

This isn't a popular view in the US for whatever reason but I always liked to bolt the lathe to the foundation if there is provision for this procedure in the base. This enables you to " bend the bed straight ", this is especially effective on the longer bed lathes.

Having bolted the lathe down you can level up using a combination of the jacking screws and holding down bolts. Avoid the temptation to keep leveling up and up.

When the lathe is level you need to ensure that the axis of the lathe spindle is pointing straight down the bed. I prefer to use a test bar in the spindle nose but the " two collar test " is OK for this purpose. If my memory is correct you need the free end of whatever bar you use pointing towards the operator by about 0.001", this to counter push off from the cutting forces. I think Schlesinger also requires the bar to be pointing up in the other plane by a similar amount to counter the weight of the workpiece and chuck etc. I suspect this isn't quite as critical. It's a few years since I last installed a lathe so unfortunately some things get a little blurred.

Most headstocks on British lathes like the " Harrison " are adjustable by means of a " Push me pull you " type device fitted at the back of the headstock nearest the change gears. I used to loosen all the holding down bolts barring one at the front nearest the operator, just release this one slighty so you can pivot the headstock off it. Look out for any dowels that may be fitted to line up the headstock. These will have to be removed and re fitted later. Fix your DTI on the feed box top with the stylus on the headstock so you can accurately estimate how far to move the headstock over and also you know your starting point.

When you've got the headstock aligned to the state quoted above you can go on to aligning the tailstock with the headstock. More about that later as I've got to go out now.

Regards Tyrone.
 
Last edited:
Great points the headstock is bolted down to the lathe ways I do not think this can be adjusted at least to the best of my knowledge. I won't lie I'm a little intimidated to do anything with the headstock because fixing it is way beyond my skill level.

That's fine I was not suggesting any scraping etc. if your headstock was fitted permanently at the factory, which it may have been. Many are not, and though the v-ways may go underneath the HS, the HS actually sits on the flat ways and is bolted down and can be pivoted horizontally. A close inspection should tell you which you have, and if you have one that can pivot, it's certainly worth inspecting.

I think you're on the right track to pull the shim and trust your level over the bed length vise a relatively short test cut on a skinny work piece. Also keep in mind most people do a two collar test cut rather than cutting the whole length anyway. After you re-level I'd do another test cut with two collars and if you use your 1.5" stock only do 7-8" vice 12" and let us know what you get.
 
Leed
Not to blame your .0009 belly on the tail but I so despise trying do any close work on a live tail I suggest the next time you use the live tail: Turn a part on the live and then hold the live and rotate your part on that center with it acting dead under an indicator. I have seen grinder hands fight parts with no resolve until they began respecting dead centers.

I pretty much do closer than .001 work between dead centers. Once you learn how to go quick to centers it takes perhaps 6 minuets to go there.

Done is done but would have turned the test between two dead centers so the gauge part could be used as a future use gauge.

Agree most grinders tail-tweak easier than a lathe tail stock.
 
To return to my previous post

Once the lathe is levelled and the headstock is set up correctly you need to align the tailstock. This is were the test bar from the headstock comes in handy. If you haven't got a test bar you'll have to use the tailstock barrel. Again this wants to be 0.001 " high at the free end and 0.001" towards the operator.

When you've got the tailstock set up correctly you then need to align the tailstock to the headstock. Normally you would use a longer parallel test bar between centres for this test. Obviously it should read 0.000" along the bar in both planes.

You can normally throw the tailstock over in the horizontal plane. Regarding adjustment in the vertical plane, in the unlikely event the tailstock is too high it'll need scraping to correct the error. If as is usual the tailstock is lower the tailstock needs separating and the upper face of the bottom of the tailstock needs machining to accommodate a permanently fixed " shim" of around 3/16" or 1/4" thick.

Regards Tyrone.
 
your results make perfect sense if you are using the tailstock for support....are you?? sturdy at each end, bowing under cutting pressure in the middle.

you should not be if you are getting the lathe set up, and if you are, 12" of 1.5" stock is too much...4-5x diameter max stick out.

If the machine does have an adjustable head, I'm with Tyrone, a taper mounted test bar isn't really that expensive and will come in handy from time to time.


BTW- by the condition of the center hole on the end of your stock, too much pressure from tailstock center allowing stock to bow once it heats from cutting and "grows"??
or just a dull center drill or both? ...might be my eyes but seems to be a lot of galling in addition to burrs...not saying it's related to your problem but it *could* be depending.
 
Last edited:
Lets talk some more, answer the question in another 100 ways, lets ask the whole membership to offer their opinion and go on and go on for years asking and answering the same question that is answered in the manual the OP says he has. Lets form a think tank and debate the points of "true Mechanics" of why we can't get millionths on a 20 year old lathe. New machine Studer spec's on a lathe. I can see this thread lasting for years.. How about a moderator close this thread before it drives us insane.
 
Lets talk some more, answer the question in another 100 ways, lets ask the whole membership to offer their opinion and go on and go on for years asking and answering the same question that is answered in the manual the OP says he has. Lets form a think tank and debate the points of "true Mechanics" of why we can't get millionths on a 20 year old lathe. New machine Studer spec's on a lathe. I can see this thread lasting for years.. How about a moderator close this thread before it drives us insane.

off your meds again?


Back
Top