What's new
What's new

One Way to Repair Cast Iron- How I fixed the tractor case

ponderingjunkman

Cast Iron
Joined
Dec 9, 2003
Location
Cairo, NY USA
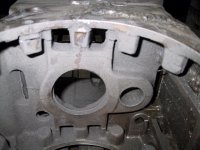
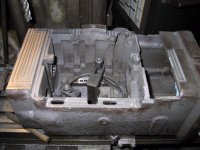
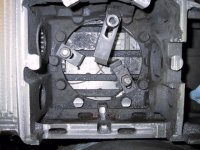
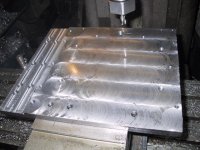
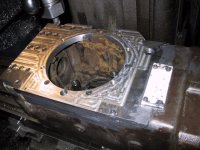
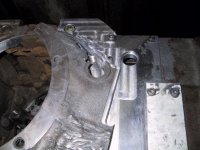
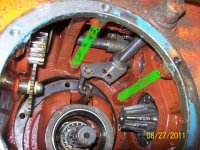
Here is a repair to a gearcase. The details are in my thread in the welding section, so I wont repeat them here. Basically, I did not trust myself to weld it, so I hogged off the side of the cracked and previously welded case, and bolted a steel plate on. I'll try to let the pictures help explain. The first shot is the case as it looked after disassembly. It had cracked and been repaired before we got it, then it cracked as we were using it. I slit it with a thin blade in a grinder to avoid having to machine thru the hard welds. Nice looking table on the Index 845 mill! (Marks from previous owner-I tend to acquire junk...) The axles are held onto the case with 6 bolts, and all the holes except for the top ones were either cracked or partially stripped out. Surprising it held together at all! The third shows internal cracks next to the pinion gear bearing. The teardown was sad:nopity:
 

Attachments

  • tractor repair 004.jpg
    tractor repair 004.jpg
    55.9 KB · Views: 1,796
  • tractor repair 002.jpg
    tractor repair 002.jpg
    34.1 KB · Views: 1,589
  • tractor repair 005.jpg
    tractor repair 005.jpg
    52.1 KB · Views: 1,651
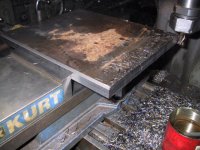
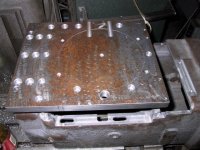
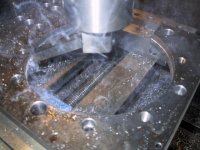
So here is the repair in progress. Photo 1 is getting the old funk out of the way, #2 is machining to good metal, 3 is the hold down scheme, 4&5 is holes drilled and tapped.

The case was first fastened down so the top surface was parallel to table travel, and reference surfaces picked up with an edge finder so as to repeat the location of things. As machining commenced, dimensions and hole locations were recorded, so as the make the replacement plate expediently.(large word for the day)
 

Attachments

  • tractor repair 019.jpg
    tractor repair 019.jpg
    74.1 KB · Views: 1,411
  • tractor repair 022.jpg
    tractor repair 022.jpg
    63.5 KB · Views: 1,358
  • tractor repair 024.jpg
    tractor repair 024.jpg
    71.2 KB · Views: 1,333
  • tractor repair 029.jpg
    tractor repair 029.jpg
    70.1 KB · Views: 1,334
  • tractor repair 032.jpg
    tractor repair 032.jpg
    61.4 KB · Views: 1,382
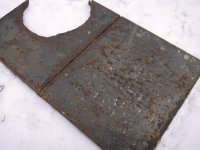
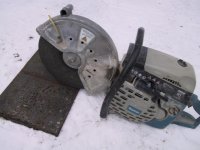
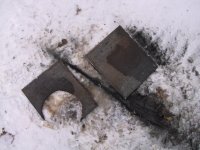
Progress continues. I have come close to scrapping this 3/4 inch plate of steel many times. Don't throw anything away!! Where I cut it with the demo saw, it had been poorly torched. Guess whoever tried to cut it got frustrated and gave up. It turned out to be the perfect size! Holes were drilled and counter bored, and...
 

Attachments

  • tractor repair 035.jpg
    tractor repair 035.jpg
    48.9 KB · Views: 1,092
  • tractor repair 036.jpg
    tractor repair 036.jpg
    44 KB · Views: 1,086
  • tractor repair 037.jpg
    tractor repair 037.jpg
    54.6 KB · Views: 1,097
  • tractor repair 044.jpg
    tractor repair 044.jpg
    75.2 KB · Views: 1,131
  • tractor repair 045.jpg
    tractor repair 045.jpg
    71.2 KB · Views: 1,151
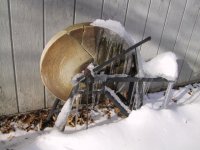
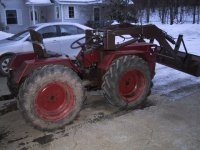
...The back of the plate machined to a more precise surface than mill finish.Then to the old bandsaw to cut out the axle hole. It should be mentioned here that I left the top axle mounting hole for a reference surface, and there were no cracks up there. The plate is cut around it. The hole was then bored to size- 7.323". Slow and smoky, but it got done despite the long overhang of the half inch toolbit. Then a random outside shot!
 

Attachments

  • tractor repair 046.jpg
    tractor repair 046.jpg
    61.1 KB · Views: 1,069
  • tractor repair 048.jpg
    tractor repair 048.jpg
    70.5 KB · Views: 1,163
  • tractor repair 051.jpg
    tractor repair 051.jpg
    63 KB · Views: 1,146
  • tractor repair 056.jpg
    tractor repair 056.jpg
    57.6 KB · Views: 1,171
  • tractor repair 064.jpg
    tractor repair 064.jpg
    59 KB · Views: 1,134
Looks like that case had a hard life! You took the right approach. Your repair will still be there when the rest of it falls apart.
 
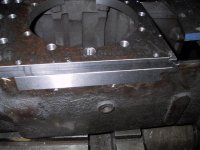
pieces of the puzzle had to be made- The plate couldn't cover all the bad areas. Guess it wasn't the perfect size... After proper cleaning and gasket shmooze application, it was bolted all together and let sit overnight. Then it was lashed back to the table of the Index, and Machined down to proper width and a shift shaft hole put in.

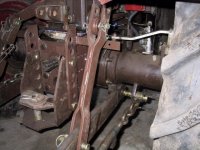
Now take a look at photo 5- here is the case back on the tractor. There are important strengthening details visible here. Most obvious is the long thru-stud. This goes thru both axles and ties them together. Also there are two cross bars that hold the bottom of the case together-they are bolted in from both sides. These three things were not part of the original design, but should add lots of strength. I hope! It HAS to be stronger than before!
 

Attachments

  • tractor repair 067.jpg
    tractor repair 067.jpg
    55.2 KB · Views: 1,132
  • tractor repair 069.jpg
    tractor repair 069.jpg
    57.1 KB · Views: 1,111
  • tractor repair 072.jpg
    tractor repair 072.jpg
    65.7 KB · Views: 1,120
  • tractor repair 073.jpg
    tractor repair 073.jpg
    55.6 KB · Views: 1,113
  • tractor repair 081.jpg
    tractor repair 081.jpg
    68.5 KB · Views: 2,936

Attachments

  • tractor repair 082.jpg
    tractor repair 082.jpg
    35.6 KB · Views: 1,125
  • tractor repair 084.jpg
    tractor repair 084.jpg
    64.5 KB · Views: 1,118
  • tractor repair 085.jpg
    tractor repair 085.jpg
    64.6 KB · Views: 1,322
  • tractor repair 075.jpg
    tractor repair 075.jpg
    45.6 KB · Views: 1,069
Last edited:
What kind of tractor is it? Are no spare parts available? seams like a lot of work if you could just get one out of a tractor junk yard.

I sure wish that was the case(no pun intended! Haha) Steve sums it up well- It is a Pasquali tractor- made in Italy. It is 38hp, 4wd, locking diffs front & rear, articulating and plain unstoppable! Well, till the case breaks....
 
I'm impressed. That was good, creative, fix-it work. That had to take how many hours? A shop charging for it couldn't do that, could it? Nice looking tractor.
 
Very impressive. When I saw the plate with all those holes, it reminded me of all the book chapters I've seen on layout and transfer and dimensional checking. Must have taken some focus to get all those holes right.

Thanks for sharing this - very cool story.
 
To Moonlight: It looks like a skidder , used here in the midwest by timber cutters to snake logs out of the woods.
Great repair job. Looks like it was built a little on the light side or was abused . Maybe just too much power for the drivetrain.

JH
 
Thanks for the kind words!:Ithankyou:

"It looks like a skidder" -Just smaller! I would love to rattle on about these machines, but this may not be the appropriate place. Look here for more details:
Italian Tractors

"When I saw the plate with all those holes, it reminded me of all the book chapters I've seen on layout and transfer and dimensional checking. Must have taken some focus to get all those holes right." - It is really no problem with a digital readout!

"That had to take how many hours? A shop charging for it couldn't do that, could it?" -I have about 45 hours into the repair- which includes periods of just staring at it pondering and figuring. Remove and replacing was more time.

Would a shop do this? For me, It would depend alot on the customer. Deep pockets and no hesitation to pay are important, as well as an understanding that I could not possibly provide a guarantee- especially if the person was known to be hard on equipment... If there is no other recourse, this is, as the title of the thread says, One way to fix it. A repair like this has to be taken on an individual basis. This approach worked for me, but may not work for others. Ok I'm talking too much again.
:blahblah:

Sure is nice to have it back together again
:cloud9:


Your bravery Sir, is only exceeded by your ambition!

In the 70's, my wife and I traveled some, (as much as we could) of the Alpine region, particularly Austria and Switzerland. In one of the first very steep little dairy farms that we visited in Austria, we were charmed by the husband and wife team and their Pasquali tractor. They had a good array of the many implements, the hay mower working that day.

I was in awe of the steep terrain that the little ultra-low C.G tractor could negotiate without rolling over. On that day, he was cutting hay in the dozens of little, I have to call them pens, not big enough to warrent the designation "small pasture". Perhaps 35-40 meters square. All linked with gates.

She was following and pitching the mown hay onto the fences. Off season the cattle were let into the closest pen and when they'd consumed all the hay on those fences, the next pen would be opened. In spite of snow, the hay was easily aquired by the cattle, high on the fence. I don't know but I imagine that they covered the "fenced" hay after drying.

We were also charmed to discover that Tyrolian dress was alive and well in the Alps, he in Lederhosen and she in that charming style of dress, including flowers. Unfortunately, false alarm, they were the only farmers we found in other than modern clothing on the rest of our journeys. Never knew what the deal was with them.

Back home in the Victor Valley, where I still live, there used to be a hardware store owner that was the good kind, had everything, so of course I was there often. It was called Victorville Hardware and also had a good line of small tractors. I mentioned the Pasquali to him with enthusiasm and he said he'd look into them.

A few months later he had a couple of Pasquali's and the following 4th of July, he pulled a hay wagon with lovely lasses in the local parade. That became an annual event for he and his beloved Pasquali.

He became an almost obsessed enthusiast and eventually drove his Pasquali across the U.S!

Nice to hear of them again and thanks for the links, and the photo essay of good work on a worthy little tractor, good memories......

Bob
 
A excellent thread, good repair and explanation of the process.
I too will spend a bit (lot of )time staring, muttering "what the @*&^% do I do now?"
A great machine, I want one.
 
Ponderingjunkman,

I had noted a while back at the impressive work you had done on your Pasquali tractor. I am curious if you have any further thoughts on the repair itself.

I said at some point I would be using some of your ideas to beef up my Pasquali 997 transmission case.

It turns out not only did I destroy the pinion gear I also cracked the inside of the case as noted by the yellow line in the photo.

I am reluctant to go the welding route on the crack... that would involve tearing the case apart completely and a lot more expense…i.e. finding someone who can “really” weld. Its not out of the question …I’m just reluctant. This tractor has been out of commission for over two years and i was in the process of putting it back together with a new pinion when I found the crack.

I was hoping that machining up a number of cross ties would by it self add enough strength to do the job. Somewhat like the green lines in the photo.


Have any thoughts?

Joe


Pinion Repair 2014.jpgPasquali Crack 3.JPG


Back
Top