What's new
What's new

rotary broaching depth

modlbtr

Plastic
Joined
Jul 9, 2019
Location
San Diego
I am new to rotary broaching. I just ordered my first wobble broach tool and I would like to know what to expect.

I need to broach a .250" square hole, ideally .75" deep but I'll take all the depth I can get. The tool data sheet says it can reach .505", but also that it requires a 45° lead-in chamfer at diameter .360 minimum.
broach lead-in chamfer diameter.jpg

If I turn this last .042" of material off after initial broaching, is it possible to re-insert the broach with spindle off and continue on to get that .042 back for a final depth of .505?
broach depth after turning off chamfer.jpg

material = annealed maraging 300
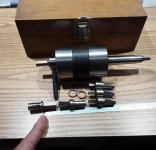
tool = Polygon solutions BT-075-B with S02525B broach
 
My understanding is that with wobble broaching a slow helix is formed due to the clearance geometry the broach needs to function. As you go deeper the helix gets more prominent.

If you're running a close tolerance to the mating part you should discuss your needs with the broach vendor, you could get a custom tool made to maximize depth and control the twist as much as possible.
 
Never tried to go back in a hole that was broached, my first inclination is that it will be difficult. After facing off the chamfer my guess, impossible.
That said I think I would modify the tool by grinding a 45 on the shank to clear the chamfer and get as deep as you can with one pass. As Milland mentioned the correct clearance on the broach will minimize the tendancy to spiral.
 
Really you should just talk to Steve at polygon about what exactly you want to do, and have him send you the right tool for the job. He makes and ships customs pretty much as fast as he ships off the shelf broaches.
 
It is possible to reinsert the broach. As long as you can do C-axis positioning and get their rotary broach brake, you should be fine. Stop the spindle and position the caxis before pulling the broach out. Then after facing off, you should be able to re orient your caxis and insert the broach, then kick the spindle on for the last bit.
 
It is possible to reinsert the broach. As long as you can do C-axis positioning and get their rotary broach brake, you should be fine. Stop the spindle and position the caxis before pulling the broach out. Then after facing off, you should be able to re orient your caxis and insert the broach, then kick the spindle on for the last bit.

They have one with a brake? Neat, haven't seen that one. I've seen some homemade ones that are pretty ingenious though.
 
It's just an add on that they sell. It's basically a collar with nylon tipped set screws that put enough pressure on it to keep the broach stationary until the spindle turns on. I think it's about $150.
 
It's just an add on that they sell. It's basically a collar with nylon tipped set screws that put enough pressure on it to keep the broach stationary until the spindle turns on. I think it's about $150.
I did not even consider a brake was possible either. I do not really like the idea of a continuous drag though, as it would slow the broach down when it is trying to accelerate to RPM and give a little more damage at the entrance and more of a tendency to spiral as mentioned by Milland. The damage on the start could be fixed on a CNC easy enough but on a manual lathe or screw machine it would be extra trouble to fix.
 
Never tried to go back in a hole that was broached,

We do it all the time. Brass part, square hole, limited overall part length. We turn the face .060" away from final face and cut a 45 degree bevel at the hole entry, as normal practice. I made a double arm device that attaches to the collet holder very near the working end, (Each arm at 180 degrees sticking out about 3") and the broach holder has a similar collar with arms that have projections screwed into them that stick out toward the spindle so they cause the broach holder to turn the second it makes contact with the spindle arms. The ends of these extension rods each have a bevel cut so they can't deadhead against the arms on the spindle.
We have to do this because chips get jammed into the relief groove at the back end of the hole, the chip relief. We pull the rotary broach out after going part way in, move a water nozzle to a local turret location to blast the hole as the RPMs drop to 150 or so, so centrifigal force doesn't hold the chips, that blasts the hole for 2 seconds and the broach comes back around, and at that same 150 RPM as the broach approaches the face of the part the arms with extensions contact the arms on the spindle nose to synch the two together.

When the hole is broched full depth we face the face back so the square hole has sharp edges. Many thousand of parts we've made that way.
 
We do it all the time. Brass part, square hole, limited overall part length. We turn the face .060" away from final face and cut a 45 degree bevel at the hole entry, as normal practice. I made a double arm device that attaches to the collet holder very near the working end, (Each arm at 180 degrees sticking out about 3") and the broach holder has a similar collar with arms that have projections screwed into them that stick out toward the spindle so they cause the broach holder to turn the second it makes contact with the spindle arms. The ends of these extension rods each have a bevel cut so they can't deadhead against the arms on the spindle.

Great idea! How beefy do those arms need to be? Any chance you could post a photo?
 
I knew someone would want a visual. The problem is we don't leave it set up except once every few years to replenish our stocks, these are brass plugs about 1 1/2" diameter and total length about 3/8", done in two ops, the broaching is done in the first op from barstock ("Billet" to car cultists and now days gun makers. :rolleyes5:) because that way the broach doesn't push a dent out the back as happens if done in the 2nd op.
The spindle nose adapter is simply an aluminum collar that slips over the collet nose and is locked in place with brass nosed set screws. Two arms stick out 180 degrees from each other like a two bladed airplane prop, but made in one piece just band sawn out of 1/2" 6061 (I may have cookie cut it in the CNC mill).
The broach device is similar but sized to fit the broach holder just behind the broach itself, again with setscrews to lock it in place. The ends of the arms in this one have drilled and tapped 5/16-18 holes parrallel to the longitudinal axis of the lathe, these have the rods screwed in and locked using jam nuts, the forward ends have bevels milled on them so they won't hit the flats of the spindle arms. And AFAIK they never have done so. These feelers make a clicking sound as the turret feeds the feelers into first contact with the arms, the fedrate set pretty high so they don't make partial contact, but instead solid contacts with the arms, the feelers tend to bounce and that makes the sound. The feelers are long enough so all that has damped down by the time the broach gets back to the hole.
 
If I am following your explanation correctly that bringing the broach up to speed before contact would eliminate the mark the broach makes in conventional applications as is accelerates. Also would eliminate potential spiraling mentioned earlier.
I for one would not mind seeing a photo the next time you run that job.
 
I knew someone would want a visual. The problem is we don't leave it set up except once every few years to replenish our stocks, these are brass plugs about 1 1/2" diameter and total length about 3/8", done in two ops, the broaching is done in the first op from barstock ("Billet" to car cultists and now days gun makers. :rolleyes5:) because that way the broach doesn't push a dent out the back as happens if done in the 2nd op.
The spindle nose adapter is simply an aluminum collar that slips over the collet nose and is locked in place with brass nosed set screws. Two arms stick out 180 degrees from each other like a two bladed airplane prop, but made in one piece just band sawn out of 1/2" 6061 (I may have cookie cut it in the CNC mill).
The broach device is similar but sized to fit the broach holder just behind the broach itself, again with setscrews to lock it in place. The ends of the arms in this one have drilled and tapped 5/16-18 holes parrallel to the longitudinal axis of the lathe, these have the rods screwed in and locked using jam nuts, the forward ends have bevels milled on them so they won't hit the flats of the spindle arms. And AFAIK they never have done so. These feelers make a clicking sound as the turret feeds the feelers into first contact with the arms, the fedrate set pretty high so they don't make partial contact, but instead solid contacts with the arms, the feelers tend to bounce and that makes the sound. The feelers are long enough so all that has damped down by the time the broach gets back to the hole.

Perfect description, thank you.
 
Maraging steels in the 300 condition are going to be pretty tough with a wobbler I think, and the .505 length to tool shoulder prolly could be fudged for brass but not this stuff.

I liked starting with a square bore face & chamfer after the dirty deed.

If you are turning the part then the tool holder spins & I suppose it could possibly helix but I never inspected for that??? For mine it would require something turning with and protruding past the part to use the rod opposite the toolholder lock screw (I never did that).

With a live spindle just about anything to hard stop the tool from rotating will work (these will wiggle a bridgeport like a wet noodle BTW).

For size control… you might need some spacers or collars (maybe lots of them).

Good luck,
Matt
 

Attachments

  • Rotary_Broach.jpg
    Rotary_Broach.jpg
    93.6 KB · Views: 182
  • Really_NoAccess.jpg
    Really_NoAccess.jpg
    96.5 KB · Views: 80
success! almost!

Thanks for the advice everyone. I tried this for the first time last night with say "80%" success. The part came out great, but I chipped all 4 "teeth" of the broach.

Here is detail about what I did. As you can see I did some not-recommended things.

Broach geometry: square, .252 across flats
Broach material: high-speed steel, uncoated
Part material: maraging 300 steel, annealed. Probably around HRC 30.

1) drilled .277 (J letter drill) to .657 deep (plus tip).
2) chamfered 45° to diameter .356. This should have been outside the broach tips.
3) ran the lathe at its slowest setting, which was 200 rpm. This is faster than the Polygon recommended engagement speed of 50 rpm to 100 rpm.
4) engaged the broach. Later I noticed it did leave skip marks on the face.
5) after going .050 or so, increased machine speed to 600 rpm
6) noticed the tailstock was not holding the ways tightly enough and was scooting back.
7) stopped the spindle without retracting the tool to fix the tailstock scooting problem.
8) started the spindle again at 600 rpm and continued.
9) made it to about .457 deep. I think it was packing the burrs at this point, but not sure.
10) slowly retracted the tool at about .005 IPR
11) re-drilled with the J drill to remove the four burrs
12) with the spindle off, gently advanced the tailstock while adjusting the angular position of the tool by hand to slip in. It went in smoothly with no resistance.
13) started the spindle again and continued to final depth of .510
14) retracted the tool slowly again around .005 IPR

It's not clear to me when or why the teeth chipped. I did not check it on first removal before reinserting.

Some other not-recommended things that might matter
1) used a broach made from ordinary high-speed steel while the Polygon's more advanced PM M-4 material is recommended for tough materials
2) did not use any special cutting fluid. I used what was sitting there but frankly I don't know what it was. For what it's worth it did not have any sulfur smell.

I'm still struggling to understand why C-axis position or a stop is required for reinsertion. Given this lathe application where the part is turning and the bearing is held stationary in the tailstock, the tool will be spinning. Is it a bad idea to re-insert like I did, even gently?
 
I've read in the manufacturer's info that the holes will twist if too deep, but that the remedy is to stop the spindle and reverse occasionally.

When you think about the proccess methodology it's pretty beautiful, and I haven't found any indication of where it was invented.


Back
Top