What's new
What's new

Aligning and Inspecting my small G&L HBM

BrianB

Hot Rolled
Joined
Aug 24, 2006
Location
Shelbyville, Ky
This is a playlist of the videos I did regarding the alignmnet and inspection of my small G&L HBM.
Giddings and Lewis Horizontal Boring Mill Alignment and Inspection - YouTube

The machine is I believe a late 40's 340T. It appears to be in pretty good shape. I hope to put it into service soon and then I will know more about how it performs. I go over the best methods I could come up with to get the machine in alignment using fairly standard shop tools. I would love to be able to use lasers or optics to cover the large area but since I don't have access to that type of stuff this is what I did. I appreciate any feedback or ideas on doing this job as well.
 
There's a limit to what you can do with a level, a small square and a DTI. Having said that you've covered the basics. Getting the machine level and the column vertical is a good start. I would have expected the table to be slightly down at the front given the age of the machine. People tend to put work towards the front of the table so the cross travel ways wear more at the front than at the rear. The long travel ways can wear at the front also.

If you do have the column leaning then slightly leaning forwards towards the table is better than leaning back but no more than 0.001" in the length of travel. This is to compensate for the tool cutting forces pushing backwards. One test you could do is to swing trammel your square with the spindle to see how the spindle frame is sitting on the column. We had devices that allowed you to swing trammel back to the column which is the correct way to check for spindle frame alignment but the devices took a little bit of making.

Regards Tyrone.
 
I suggest you listen to Tyrone , not many people with genuine hbm fitting experience.
Erecting, setting and driving one is more than just like a big mill
 
There is no good surface really to mount to for a sweep on my spindle sleeve. I guess I could make a split collar type of deal to go around the spindle sleeve to mount too but there are no bolt holes in it to attach anything to now. The book said not to do a sweep using the spindle itself as the droop gives inaccurate results. I think I will just have to see how it performs in operation to make any evaluations about that. Squaring from the table to the spindle face with my precision square the face of the spindle sleeve looks pretty square, it can't be out more than .0015" checked with my feeler gage.
 
On nearly all British machines you had a built in facing slide. You mounted your swing device on the facing slide. With Timken bearings on the spindle the droop was negligible. After bolting the extension bar to the facing slide you positioned the spindle frame in the middle of the column and inched the facing slide around to bring the bar into the correct position.

We had an aluminium block that carried a DTI sticking straight up. You could use an inside micro to measure from the bar to the column but the aluminium block was better.

Regards Tyrone
 
I wish mine had the facing slide attachment. I think if I take the spindle collar off used to tighten the telescoping spindle for milling there are mounting bolts on the outer spindle. I could probably take it off and have a good surface to put a sweep on. I see about .010" droop in my telescoping spindle between all the way in and all the way out 24"
 
I wish mine had the facing slide attachment. I think if I take the spindle collar off used to tighten the telescoping spindle for milling there are mounting bolts on the outer spindle. I could probably take it off and have a good surface to put a sweep on. I see about .010" droop in my telescoping spindle between all the way in and all the way out 24"

That’s how it’s done ^, use a square bar, light tube or box beam fastened to the outer main spindle. IIRC the hole pattern is 8” & the drive keys are 1 1/4”. Anyway all the sweeping happens to the table face (60 or 72” wide sweep) or from table to top of any knees you have stuck on there.

For checking the spindle tilt to the column ways the bar goes to the sky and a surface gage (on the ways, plus indicator) is used with the pins down to work your way up & down.

In my experience when the lasers show a sweep test @ .0001” per foot a manual sweep test will often show .002”ish at 5’???

Good luck,
Matt
 
There is no good surface really to mount to for a sweep on my spindle sleeve. I guess I could make a split collar type of deal to go around the spindle sleeve to mount too but there are no bolt holes in it to attach anything to now. The book said not to do a sweep using the spindle itself as the droop gives inaccurate results. I think I will just have to see how it performs in operation to make any evaluations about that. Squaring from the table to the spindle face with my precision square the face of the spindle sleeve looks pretty square, it can't be out more than .0015" checked with my feeler gage.

Don't use the travelling spindle to trammel back to the column, use the fixed spindle. Running up and down your square only tells you your column is square to the table top. Trammeling back to the column tells you if the spindle frame is sitting square on the column. Lots of old machines develop a sag with the tailbracket lying downwards. If this is the case on your machine you will be able to mill a face square to the table but you could have a saw tooth effect if you mill horizontally and a scalloped effect if you mill vertically.

Regards Tyrone.
 
That’s how it’s done ^, use a square bar, light tube or box beam fastened to the outer main spindle. IIRC the hole pattern is 8” & the drive keys are 1 1/4”. Anyway all the sweeping happens to the table face (60 or 72” wide sweep) or from table to top of any knees you have stuck on there.

For checking the spindle tilt to the column ways the bar goes to the sky and a surface gage (on the ways, plus indicator) is used with the pins down to work your way up & down.

In my experience when the lasers show a sweep test @ .0001” per foot a manual sweep test will often show .002”ish at 5’???

Good luck,
Matt

If you're looking to swing trammel the table edge you should swing trammel the master way on the saddle first.

Always go back to basics. When we set the column on the base we powered out the travelling spindle with a device that held a DTI that went against the master way on the bed long travel. You need to lock the spindle radially.

Regards Tyrone.
 
That’s how it’s done ^, use a square bar, light tube or box beam fastened to the outer main spindle. IIRC the hole pattern is 8” & the drive keys are 1 1/4”. Anyway all the sweeping happens to the table face (60 or 72” wide sweep) or from table to top of any knees you have stuck on there.

For checking the spindle tilt to the column ways the bar goes to the sky and a surface gage (on the ways, plus indicator) is used with the pins down to work your way up & down.

In my experience when the lasers show a sweep test @ .0001” per foot a manual sweep test will often show .002”ish at 5’???

Good luck,
Matt

Sorry, double post.

Regards Tyrone.
 
In order to tram to the saddle way wouldn't I have to have a sweep long enough to extend past the table so I could indicate to the saddle way?
 
In order to tram to the saddle way wouldn't I have to have a sweep long enough to extend past the table so I could indicate to the saddle way?

In an ideal world yes. Failing that you can move the table from side to side just as long as you ensure the saddle doesn't move at the same time. Having a facing slide helps in this respect, you can secure your long trammel bar much more safely. Don't try to touch the way directly with your DTI, use a slip gauge between way and DTI. Also don't press the " Spindle run " button instead of the " inch " or " jog "button. On old machines you can just take the spindle out of gear and pull it around by hand.

I remember spending a morning getting the column set to the master cross travel way. I managed to get the trammel down to a 0.0015" in about 8ft. The operator said " Can't you get it any nearer Tyrone ? "

Regards Tyrone
 
Fortunately mine is a manual spindle clutch machine and I can easily just put the spindle in neutral so I can have power feeds without the spindle moving.
 
Bryan came in for a lot of grief over " The Case Of The Broken Wire Rope ". I wasn't too impressed with the rope but unfortunately I didn't get to see the video of the wire rope before the accident. If I had I would have said " Don't use that rope Bryan, it's gone".

Having said that I have seen film of the drill running again so I take my hat off to Bryan for having the determination and skill to weld and plate the broken drill up and get it running again. Most of us would have possibly thrown the towel in there and then so top marks for him picking himself up and going again. I like his attitude, we used to say " Failure Is Not An Option "- Bryan is out of that mould.

It's a tribute to the drill makers also that the drill could be got running again after the accident.

Regards Tyrone
 
Last edited:
Not everyone can say they welded a 10,000lb casting back together without a furnace to do it in. I am just glad it worked out. It is a great smooth machine to use so saving it was certainly worthwhile. Getting one of these mills all set up is a big job. After I thought I had everything good when I went to level the outboard supports I found that when I had them level it was running the end of the table tipped up at the outer end of the saddle travel so I had to go back and re-tweek the level of the main machine to get them running parallel.
 
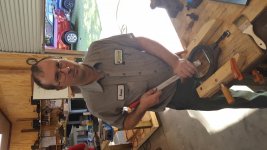
One GREAT thing Brian did was to show his rigging mistake so people could learn from his mistake. Not many would have done that. He can be congratulated as a one of a kind for doing that. I is my honor to have taught him a few tricks of my trade and he promised to keep passing on what I taught him during the scraping class. ((((Brian)))) guy hug. Rich
PS: Give the Bailey a pet from me...:-)

A close up....lol only the first part ...lol

A Trip to visit Keith Ruckers Shop - YouTube


Back
Top