What's new
What's new

Identifying Straight Edge Patterns

M.B. Naegle

Diamond
Joined
Feb 7, 2011
Location
Conroe, TX USA
So I just got back from a week-long drive out to Georgia and back to visit family for the holiday. On the way there, I stopped by akajun's place in Louisiana and we struck a deal on the straight edges he had for sale on here (https://www.practicalmachinist.com/vb/tooling-parts-and-accessories-for-sale-or-wanted/48-scraping-straigtedge-dovetail-parrallel-blotter-sale-356582/#post3260052)

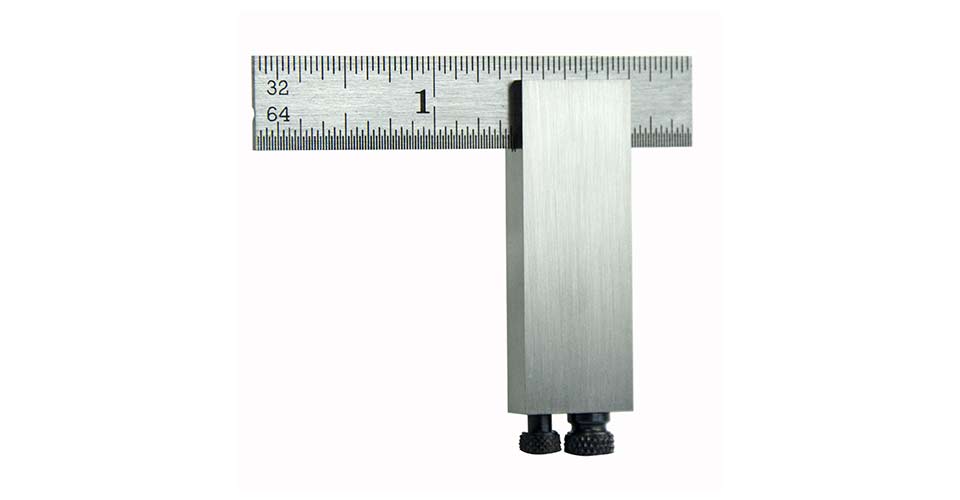
So the main one I was after was this 48" Parallel straight edge made by Challenge. I looks to have been a surface-ground one and I still need to check it out for squareness and parallelism, but my plan is to use it for machine inspection (levels, indicators, etc.), not printing. Given it's weight-to-length ratio and lack of a dovetail, I don't want to lug it around any more than to use it for things that your standard camelback straight edges can't do. Happy with the investment though! Even if it'll need to be reground or scraped into spec, it's a good core.
20181125_193352.jpg

Now, for the point of this thread: He had these two straight edges he thought were for spreading ink, but I'm fairly certain are patterns. They don't have any identifying marks other than looking similar to some "unknown" straight edges than turned up via web search. The small one is an 18" with dovetail, and the big one is a 48" without dovetail. akajun has a finished 18" straight edge very similar to the small one but without the vertical ribs, and I also bought a 48" that looks like it was cast from the 48" pattern (casting defects match pattern defects), but someone milled the dovetail off of the pattern afterwards so it's now a non-dovetail pattern but has a very thick base. I'm thinking that the 18" pattern might have been made using akajun's straight edge as a pattern, and the foundry added the ribs. Does anyone know who might have had these pattern's made? Given the cost of pattern-making, I doubt someone made these just to do their own straight edges.

Just to be clear too: I don't plan on getting into casting straight edges anytime in the foreseeable future. IMO the market's not big enough to support any more makers than we already have, and these patterns don't look "special" compared to what's already out there. Just trying to fill in the blanks here.

20181125_192803.jpg
20181125_192831.jpg
20181125_193023.jpg
20181125_193116.jpg
 
20181125_193207.jpg
The 48" does have a strip of wood along the bottom that MIGHT indicate it was cast from an existing straight edge, and then beefed up to allow the face to be milled/planed flat. One side of the top end is aluminum while the other side is wood though. Not sure if they initially were making a board pattern and changed their mind or what.
20181125_193713.jpg
20181125_193840.jpg
This is the finished 48" that I bought. It looks like it was scraped in with a power biax in some places, and hand scraped in others. Probably the work of another student(?) It'll need to be re-scraped before I get any use out of it, and it does have some voids that I'll need to repair or work around. I'm certain it was made from the above pattern, I just wish I knew why they buzzed the dovetail off of the pattern! I guess it could be replaced with wood or an aluminum strip if it was going to be used again.
 
Replacing the buzzed-off prism edge on the pattern with a screwed-on wood piece would be a simple matter. I would not recommend using aluminum unless the pattern were to be in very heavy use. Unless handled by a ham-fisted foundry mold maker, wood would hold up to a hundred mold rammings easily. Just be sure to account for draft and fill screw holds with Bondo or the like.

Denis


View attachment 242997
The 48" does have a strip of wood along the bottom that MIGHT indicate it was cast from an existing straight edge, and then beefed up to allow the face to be milled/planed flat. One side of the top end is aluminum while the other side is wood though. Not sure if they initially were making a board pattern and changed their mind or what.
View attachment 242998
View attachment 242999
This is the finished 48" that I bought. It looks like it was scraped in with a power biax in some places, and hand scraped in others. Probably the work of another student(?) It'll need to be re-scraped before I get any use out of it, and it does have some voids that I'll need to repair or work around. I'm certain it was made from the above pattern, I just wish I knew why they buzzed the dovetail off of the pattern! I guess it could be replaced with wood or an aluminum strip if it was going to be used again.
 
No definitive thoughts on identification. There are some similarities to a Mike Morgan straightedge I've got, but not identical. Mine has a similar low rise arc to the bow, but the arc extends all the way to the ends rather than just short as yours do, and it has no ribs. The camel back of the Morgan might be somewhat thicker and has more cross holes, smaller ones towards the end. I believe this also has a name cast in on the backside of the base.
 
In my search's, I've started collecting images for a "who's who" collection. It seems that some makers do a better job at poring their iron without voids than others, and some geometric designs tend to be more reliable at holding their flatness.
 
Just out of curiousity- which design does a better job of staying flat?

L7

Everyone has their opinions, which was a big reason why I started doing all the tests on my 72" Brown and Sharpe. I havn't had my hands on a great many straight edges yet, but I've liked and I've heard alot of good reviews on the King design as it's not too heavy but it's stiff.

IMO it becomes a balance between weight and rigidity. A heavier straight edge has more mass to keep it stable, but is a pain to move around, while a lighter one will move around more, but be easier to handle. To get the best of both worlds you rely on the physical shape of the piece to help out.

I'm not a structural engineer so I can't say which shape is best. I like my Brown and Sharpe as it's one of the lighter designs out there and it DOES move side to side, but springs back and so far I haven't seen any flatness deviations, but I'm still playing with it. I also like my King straight edge as the design "makes sense" and everyone I've talked to about them loves them. Fosters new straight edges also seem to be getting good reviews.

A lot of these other "unbranded" straight edges designs haven't had a lot of feedback, which is one reason why I'm trying to figure out who made/makes what. I don't think all "straight edge shaped" pieces of iron will work the same, but again, I'm no engineer. I'm in the same hands-on school as the rest of us.
 
That parallel one on the first picture looks like a Challenge brand. They used to rivet small brass plate to the inside on a brace. They also made camelbacks. They went out of business for a while, but someone picked up the brand and are making them. Challenge Precision|Workholding|Angle Plates|Lapping Plates|Precision Manufacturing

Yep, It's a Challenge. I emailed them asking if they had specifics for what tolerances they build them to (squareness of sides, flatness and parallelism of faces) and they advertise calibration services, so I asked what they would charge to check it out and regrind it if needed. I also asked for literature on what straight edges they currently have available and pricing. The website only shows a few and someone posted on here that they were all custom orders.

From my understanding, you could verify how flat and parallel one of these is by mic-ing it all the way across and if it's all the same dimension, see if it hinges correctly on a surface plate. It does have some deep scratch's but otherwise I haven't done much inspecting it yet. When I get some time, I'll see about getting an appropriate sized micrometer and see how good it is.
 
Re-scraping that Challenge parallel SE back in would be an emjoyable exercise in flat parallel and square. Personally I wouldn't grind unless out by more that two thou. Did the same exercise last winter with two Coreprint 24" SE's. One was easy. Getting both to match took a little longer.

L7
 
Just an update:

I'm going to have a local pattern shop pour me an 18" casting off of the above pattern. I'm not interested in selling them, it's just a personal endeavor, BUT discussing it with the pattern-maker, he doesn't think the 18" was a professional pattern. Best we could figure is that someone made it off of an existing straight edge, but it doesn't have any way to pull the pattern out of the mold and some of places need more draft, so it wasn't really finished. I still need to show him the 48" pattern.
 
Those straight edges look super heavy??? You may want to thin the rib. Also wood patterns cost an arm and a leg. Check around and find someone who can do it on a 3D printer. That's the best way to make patterns now-a-days and they make 2 sides and they mount one side on one side of a board and the other on the other side. Makes pouring them so much better. Gary Cude uses a foundry in Texas I believe. You met him at Steve's class.
 
Just an update:

I'm going to have a local pattern shop pour me an 18" casting off of the above pattern. I'm not interested in selling them, it's just a personal endeavor, BUT discussing it with the pattern-maker, he doesn't think the 18" was a professional pattern. Best we could figure is that someone made it off of an existing straight edge, but it doesn't have any way to pull the pattern out of the mold and some of places need more draft, so it wasn't really finished. I still need to show him the 48" pattern.

Looking at the wood pattern you show I am GUESSING that tuning that pattern up by adding some draft where needed and simply pulling it with a couple of draw spikes (can be as simple as drywall screws or purpose-made screws that are a little more convenient) should not be very difficult. You might want to make a follow board for the pattern though an experienced mold maker can hand cut a parting line in the sand to the marked centerline of the pattern. If it is to be a one-off, just mark the centerline with a pencil. That line should simulate a bandsaw kerf that would be created if you were to split the pattern by sawing it sitting on its sole and running it through the saw so that you split the ribbed portion down the center the long way of the pattern.

You can check for draft with a machinist's square being sure that there are a few degrees of taper on the surfaces that are more or less at right angles to the centerline with that taper oriented so that the pattern surfaces converge like a shallow wedge. As an example, a truncated cone 4 inches in diameter 5 inches tall with a flat top 3.75" diameter and sides that converge toward that top by a couple to 4 degrees would pull easily from the mold if the narrow (top) side is deep in the sand and the wide part is on the surface. Not much draft is needed---a couple degrees at a minimum and a few degrees if you want to make pulling the pattern easier to pull. If you just check to make sure the pattern has adequate draft everywhere and add it where needed with a sanding block or carefully used disc, it will pull.

A little bondo can be used to make sure there are no abrupt inside corners as sand tends to stick there. I hope you get to see the mold poured. Seeing iron white hot and running into a mold is interesting and exciting. But, overcome your curiosity and desire to shake it out of the sand immediately. Wait overnight and shake it out the next day to reduce retained stresses. Don't be surprised or discouraged if you find it does not pour perfectly the first time. You and your foundry guy may need a few tries to figure out how this pattern behaves. There is an art to cutting in runners, gates, and risers. If he is quite experienced, he might get it right the first time. But maybe not.


Let us know how you come out. Be careful, though---you could get hooked on casting!
Denis
 
The 48" casting is pretty heavy. The 18" shouldn't be too bad.

Beings as the 48" casting needs to be re scraped anyway, I might set it up on the mill and cut some excess material from around the heel and ends. Not losing any area off the base and dovetail sides, but trimming and hollowing out the heal. Afterwords I'll see if Steve can stress-relieve it before I start scraping on it.

IF I end up casting another 48" SE off of the pattern, it would need some repairs anyway, so I'd update it too. Don't know how many 48" straight-edges I need though.:D

I don't think I'll make any new SE patterns, but I'm still brainstorming about the adjustable square I posted about awhile back. It's essentially a 12"x18" CI square that can be calibrated or set to other angles using Trig and length measuring tools. It'll also have a dovetail along each face that an indicator mount can slide along. That prototype will be one of my next jobs with the foundry.
 
Looking at the wood pattern you show I am GUESSING that tuning that pattern up by adding some draft where needed and simply pulling it with a couple of draw spikes (can be as simple as drywall screws or purpose-made screws that are a little more convenient) should not be very difficult. You might want to make a follow board for the pattern though an experienced mold maker can hand cut a parting line in the sand to the marked centerline of the pattern. If it is to be a one-off, just mark the centerline with a pencil. That line should simulate a bandsaw kerf that would be created if you were to split the pattern by sawing it sitting on its sole and running it through the saw so that you split the ribbed portion down the center the long way of the pattern.

You can check for draft with a machinist's square being sure that there are a few degrees of taper on the surfaces that are more or less at right angles to the centerline with that taper oriented so that the pattern surfaces converge like a shallow wedge. As an example, a truncated cone 4 inches in diameter 5 inches tall with a flat top 3.75" diameter and sides that converge toward that top by a couple to 4 degrees would pull easily from the mold if the narrow (top) side is deep in the sand and the wide part is on the surface. Not much draft is needed---a couple degrees at a minimum and a few degrees if you want to make pulling the pattern easier to pull. If you just check to make sure the pattern has adequate draft everywhere and add it where needed with a sanding block or carefully used disc, it will pull.

A little bondo can be used to make sure there are no abrupt inside corners as sand tends to stick there. I hope you get to see the mold poured. Seeing iron white hot and running into a mold is interesting and exciting. But, overcome your curiosity and desire to shake it out of the sand immediately. Wait overnight and shake it out the next day to reduce retained stresses. Don't be surprised or discouraged if you find it does not pour perfectly the first time. You and your foundry guy may need a few tries to figure out how this pattern behaves. There is an art to cutting in runners, gates, and risers. If he is quite experienced, he might get it right the first time. But maybe not.


Let us know how you come out. Be careful, though---you could get hooked on casting!
Denis

This shop isn't using green sand, but some kind of chemically bonded stuff. He showed me some parts that were about to be poured and some that were recently poured, and the casting medium was practically as hard as concrete. So that's one concern he has in making sure they have a solid way to pull the pattern out with appropriate drafts. Otherwise the pattern or mold could be damaged. At lease on their bigger pours, they like to leave them in the medium until they are cool to the touch to keep them from warping and cracking. One that was poured 24 hours ago was still hot enough to cook an egg.

Casting parts is interesting to me. I don't think I'll get into any of it on my own, but it's still a necessary process in some of the machines we make at work, and I'd prefer to replace cast parts with cast parts on my own equipment projects when able.
 
This shop isn't using green sand, but some kind of chemically bonded stuff. He showed me some parts that were about to be poured and some that were recently poured, and the casting medium was practically as hard as concrete.<Snip>

I know the bonded sand you are talking about. Medium and large scale foundries almost exclusively use furan-based binders for their molding process. It does indeed cure hard as a rock which offers many advantages for them in terms of reduced loss of molds when moving them, they can store those molds if desired for quite a while prior pouring them or even ship them to a remote facility for pouring, and the sand can be reused many times. But you do have to be careful about not getting the pattern stuck in the mold. That was a problem with my patterns as they are pretty intricate and fragile as patterns go and the large scale foundry I used was far more familiar with casting 500 pound or 2000 pound pieces that had big chunky proportions. So, I would often get my pattern back damaged and the quality of casting varied. That is why I made the decision to melt my own iron and cast my own patterns. (Little did I know how much I was undertaking.) But the principles of draft are pretty much the same for green sand and furan-bound sand.

So, I do think your pattern can be tweaked to make it usable without a large investment of time and it looks fairly durable.

Earlier,I mentioned use of a machinists square for checking draft, but I will also mention a pattern-makers (or die-makers) square made for decades by Starrett that is very handy for this purpose. I own 4 or 5 of these squares and find them very useful and, because of their small size, often preferable for many tasks in the shop. I have one in my pocket most of the time. I see Lie-Nielsen is making a similar if not identical one:

2-st-453a.jpg

This style of square is interesting as it is possible, using the second smaller screw, to make the square not square! You can set it a few degrees out of square intentionally to check draft in dies or patterns. And, of course, you can relax the canting screw and it is now very accurately square. I love using it partly because it is so clever and partly because it gets into places that are awkward to check using a full-size square, and thirdly because the first one I owned was given to me by a cherished friend and mentor who was a tool and die maker of the first order. It was his personal square he used for 50 years in the trade and is engraved with his initials.

Denis


Back
Top