What's new
What's new

Quick Change Gearbox Rebuild

ewlsey

Diamond
Joined
Jul 14, 2009
Location
Peoria, IL
I thought someone might like to see a job I recently completed. I was asked to look at a Polish made Haco TUR lathe. The exposed gears that drove the quick change gearbox had broken a few teeth and ready to be replaced. Apparently it's happened before. That seemed really odd to me.

I tried turning the input shaft on the box and it would turn but seemed to catch intermittently when shifted between two gears. I figured there was something floating around and jamming the gears or the forks were bent and allowing two gears to engage at the same time.

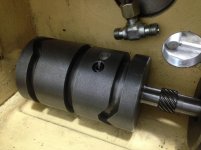
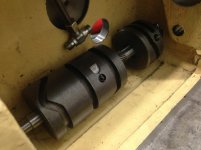
I pulled the gear box and it was immediately obvious what happened. The center section of the gearbox has two barrel cams that shift the sliding gears. The barrel cams are keyed to a shaft. Rotating the cam slides the forks and in turn slides the gears. These are straight spur gears so there is no side load on the shift forks.

The cams are keyed, but the only thing that locates them axially on the shaft is a dog point set screw that engages a spotted hole drilled in the shaft. After many many hours of use the set screw had backed out allowing the cam to slide freely. As a result, the gears could slide over and engage two ratios at the same time. When that happens, something has to give...

Here is a video of the problem.

 
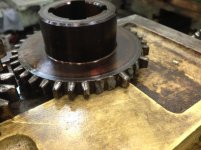
Here is the damage that was caused:

IMG_0877.jpgIMG_0878.jpgIMG_0879.jpg

Three gear clusters were damaged. Unfortunately, to get the center part of the gearbox apart that whole damn thing has to be stripped. I counted 24 gears in about 18 clusters not counting the spiral gears for the barrel cam.

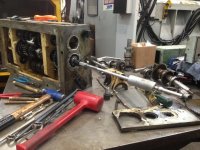
Here we go:

IMG_0873.jpg

If you've never used a slide hammer you probably don't know you need one. I don't leave home without one.
 
This gear box is clever. If you look at the gear clusters above you can see that the clusters have two gears with the same diameter but different numbers of teeth. They use a really strange looking gear tooth shape to allow two gears with different numbers of teeth to mesh with the same mating gear and share the same center line. I've never seen anything quite like it.

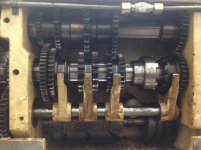
The gear box has three sections. The input section is fed by the headstock. It has three gear ratios.

IMG_0871.jpg

The center section has 12 different ratios accomplished by 4 shift forks and 2 barrel cams. The damaged gears are right at the center of this section.

IMG_0870.jpg

The output section has 4 gear selections. Two are for feed ratios, and the other two select metric or inch threading.

IMG_0869.jpg

This gear box can do something like 30 inch threads, 30 feeds, and 30 metric threads. Curiously, it cannot cut 13tpi as far as I can tell. It also cannot cut metric threads finer than 1mm pitch.


Once the gear box was stripped, I had to make sure the barrel cam would stay where it should be. I made new set screws and this time I cross drilled them and used safety wire.

IMG_0875.jpgIMG_0876.jpg
 
Toolmex had all of the parts to fix the gearbox in stock in Chicago except one seal. I thought the price was pretty reasonable too. It took me about 12 hours to rebuild this box not counting the time to remove it or install it. I thought that was pretty good considering I didn't even have a manual or any drawings.

If you have never worked on a gear box like this, it's not for the faint of heart. There's a big pile of parts on the bench and they all have to go back in. But, it can really only go together one way. You just have to be patient.

A few things to watch out for:

Pretty much every gearbox like this I have seen uses set screws to hold the bearings in the bores in the middle of the box. Most of the time there will be two set screws on top of each other. The bottom set screw will have a dog point that engages a shallow hole in the bearing or spacer or whatever is in that bore. Those are typically drilled in place, so you need to put every bearing back where it was. If you mix and match you may have too much or not enough end play. Also, don't try hammering out the bearings before taking out the set screws. If you do you will jam the set screw and you may not be able to get it out.

Putting those bearings back in is also a challenge. You have to line the spotted hole up perfectly so that the dog point will engage it. Sometimes you have to do that a few times to get it right. Also, it's impossible to see that the dog point has engaged the hole, so you need to give the bearing a gentle tap to make sure everything is where it should be.

Here it is all buttoned up and ready to go back into service.

IMG_0881.jpgIMG_0880.jpg

Hopefully that was interesting to someone.
 
A big WTF on those gears with the same pitch diameter and different tooth counts. I wouldn't have thought that would work. Nice job.
 
You can't beat a good slide hammer for these jobs. I had a home made one that I had cyanide hardened. The handle flange must have had a trillion blows against it in the 40 odd years I had and it still looked brand new !

I lent it to a workmates once, twenty minutes later he was on his way to the ER. He'd got his thumb between the flange of the handle and the sliding weight. Ouch.

Regards Tyrone.
 
There was an article or a discussion thread four or five years ago about gears with the same diameter but different tooth counts. I could be remembering incorrectly but I thought it might have been John Stevenson demonstrating it. One standard gear and then one each with one more and one fewer teeth.
 
You can't beat a good slide hammer for these jobs. I had a home made one that I had cyanide hardened.

Slide hammers are dirt simple. Any machinist could cobble up something that would work in 10 minutes with bits from the hardware store. But they are so useful.

I bought a set of 3 attachments for the end that let me grip a socket head cap screw. Goes from #6 up to 1/2 (M4 to M12). My actual slide hammer is a little 2.5lb OTC that was sold as a pilot bearing puller. I find it works fine for what I use it for.

I had ends on mine from 3/16" Whit up to about 7/8" Whit. I also had another set that went from about 5mm to 24mm. They were grooved on the side so I could identify them. Plus some ends for BSP threads, I also had a special end made for withdrawing gib head keys.

Regards Tyrone.


Back
Top