Hi all, My greatest apologies for not getting around to uploading the instructions, my diabolically poor memory combined with not logging on to check notifications got the best of me!
Currently our printer has decided to stop working along with its ability to scan, so I'll manually write out all of the calibration instructions for now and upload a scan of it when it decides to work again,
The instructions are as follows;
Zero adjustment of sleeve
1. Clean the measuring faces,
2. Carefully close the measuring spindle against the anvil - Or, For measurement ranges above 25mm (1") against the standard gauge inserted. In doing so, the locking
ring must not be fixed.
3. The two threaded pins are loosened on the sleeve and then the latter may be turned, until the zero mark on the thimble coincides with a zero mark on the sleeve,
In the instructions there's a diagram of the micrometer which contains numbered detail bubbles identifying the parts to be adjusted, these numbered bubbles are also referenced in the zero adjustment instructions. When I get our printer working and can upload a scan with the diagram it should be a lot clearer if the above instructions have left you all completely baffled,
All the best,
James
James, thank you for posting these instructions. They are quite helpful and basically correct.
However, having figured out how to fix my own Mauser digital micrometer, on my own, I believe there is a mistake in the 3rd step.
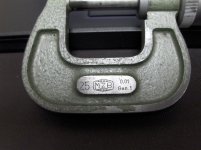
There are 2 tiny set screws on the THIMBLE, not on the sleeve, that need to be loosened. Once these are loosened, the thimble can be rotated until its 0 line aligns with the 0 on the fixed sleeve (barrel). Then just tighten the thimble set screws. (One of these two thimble set screws is visible in the OP's right most photo at the start of this thread)
As far as the locknut is concerned, it doesn't seem to make a difference, whether it is locked or not. The spindle is non-rotating, and isn't accidentally going to move. (In fact, why do they include a lock nut on this mike? For example, the Mitutoyo 106-102 and the 169-103, both with non-rotating spindles, have no lock nut option.)
The 2 larger screws on the fixed sleeve can be used to adjust your feel preference for movement of the spindle. Again, this is a non-rotating spindle; so it shouldn't need adjustment for wear purposes.
Additional observations:
I must say that besides the surprise that this Mauser has a non-rotating spindle, I was surprised by this mike's size and weight.
This mike was built like a German tank (or maybe a canon), with a large diameter thimble, spaced out easy to read vernier graduations, large diameter carbide measuring faces, and a giant lock nut. (Could an old German arms manufacturer have built a micrometer in any other way?)
In fact, I would say the build quality of this Mauser is probably the best of any micrometer I have ever handled, even though it would be a bit too hefty for some people. It, in some ways, reminds me of the heavier, high build quality build of my Etalon 23C and Etalon MicroRapid, even down to their smooth feel.
Perhaps, these shared qualities are no coincidence since the unprofitable Mauser mike division was eventually sold to Roche, which later made Etalon. Of course Roche was bought by Tesa/Brown Sharpe only to be bought by the Hexagon group.
Again, thank you, James, for reopening this old thread. While these scarce, largely unknown Mauser micrometers aren't on everyone's wish list, it's important to have this kind information available to the collector community. As long as there is interest in owning vintage tools, these tools, even the scarce ones, will change hands. Fortunately, there is the Practical Machinist for a new owner, like me, where he can share, learn, and appreciate more what he just aquired.


")
")