What's new
What's new

Basket case 10EE -- Episode 2: Evaluation, Cleaning and Assembly

CowDriver

Aluminum
Joined
Sep 19, 2015
Location
Salem, OR
As you may recall from Episode 1, I acquired a "basket case" 10EE that had been mostly disassembled. http://www.practicalmachinist.com/vb/monarch-lathes/basket-case-10ee-episode-1-acquisition-moving-315292/

When I first saw it, it looked like this:
IMG_6774b.JPG

IMG_6774c.jpg

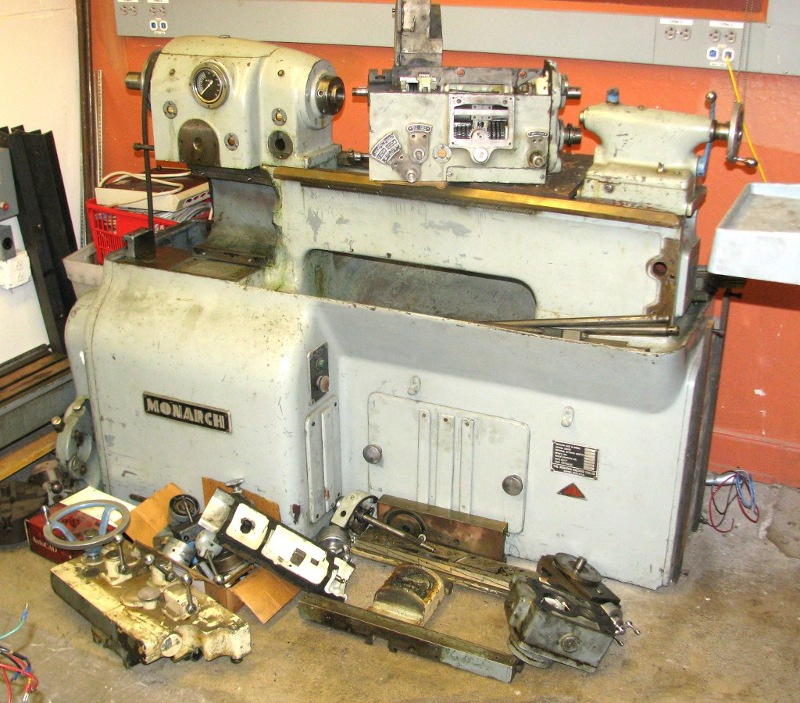
Note that the gearbox is partially disassembled and sitting on top of the ways (thankfully on top of a wooden board), the apron is sitting on the floor, the saddle is completely disassembled, and there boxes of random parts.

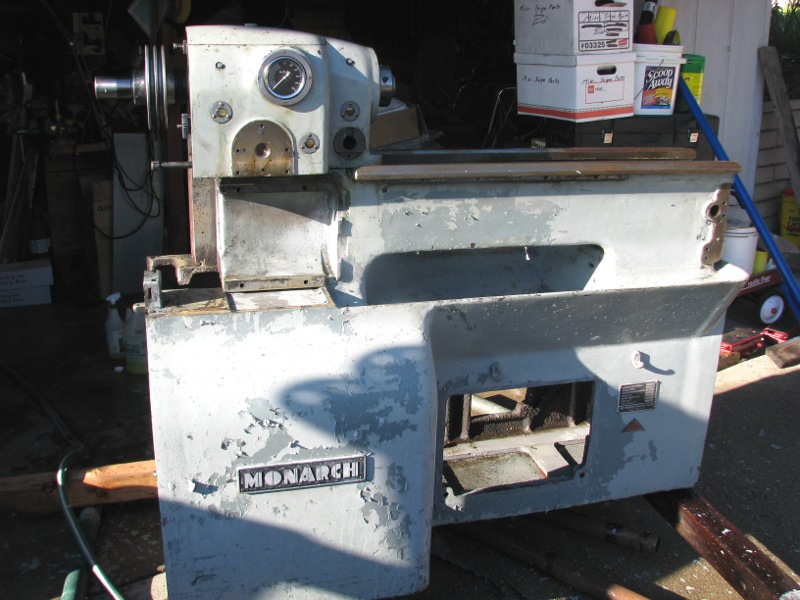
After getting it home, the first thing I did was spray it with Harbor Freight degreaser and a garden hose nozzle. This immediately removed much of the crappy aftermarket paint job:
IMG_7318b.JPG

IMG_7318c.jpg


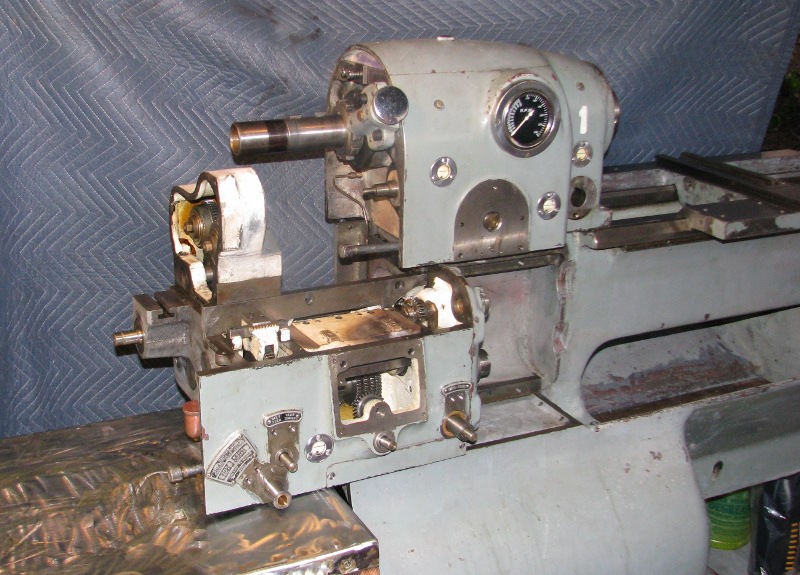
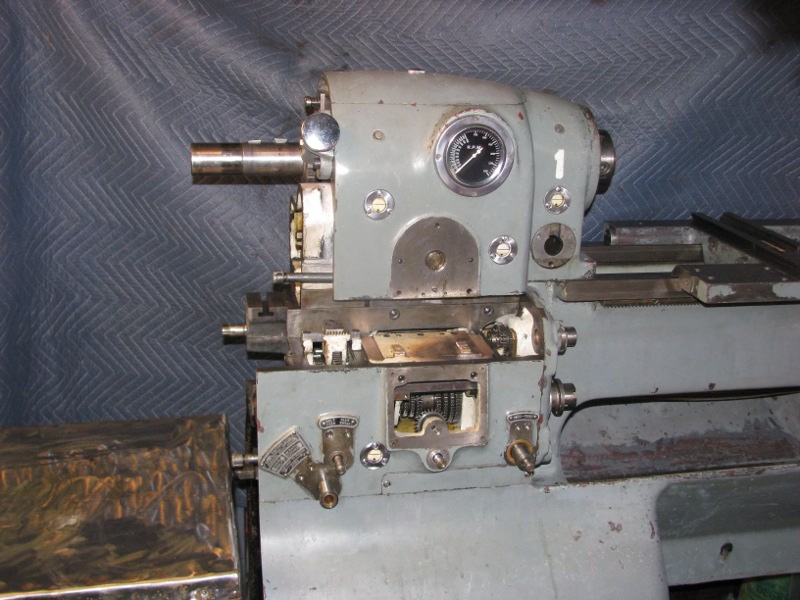
Since my ultimate goal is to refinish the lathe to "showroom" condition, I figured that now is the time to do the preparation. At the same time, I enrolled in an auto body refinishing class at Los Angeles Trade Tech so that I can "do it right". Meanwhile, I set about scraping and cleaning. The base now looks like this:
IMG_7551b.JPG

IMG_7551c.jpg


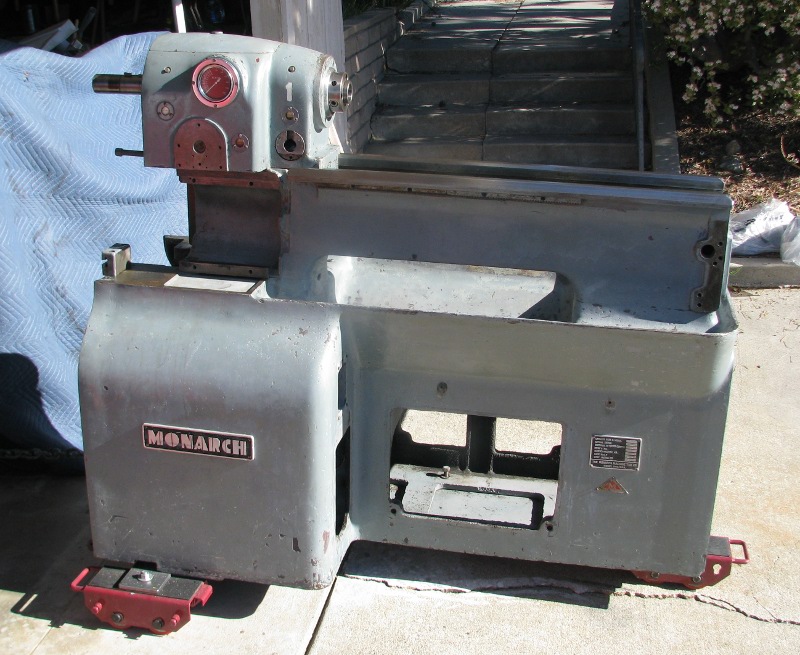
Note that I have it mounted on skates so I can easily (sort of) move it out of the garage and into the driveway to work on it. Being paranoid, it has a stout chain limiting how far it will go! :)


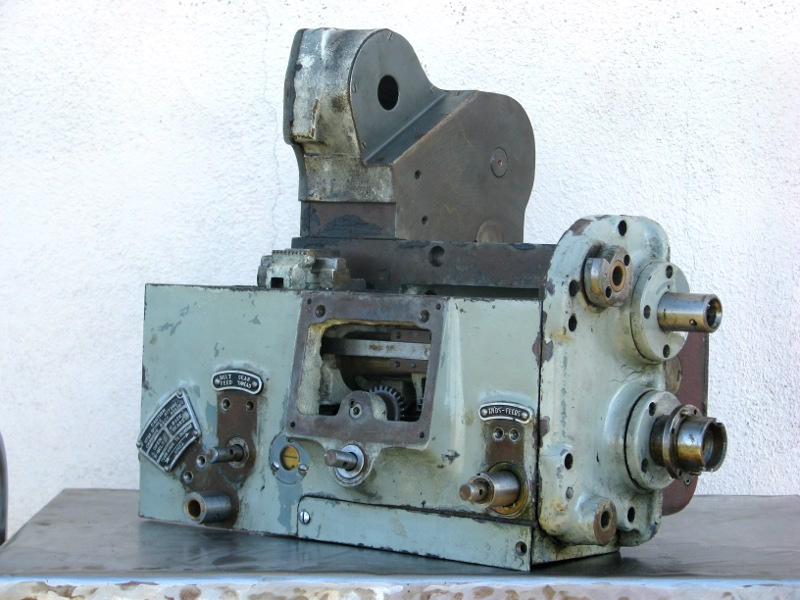
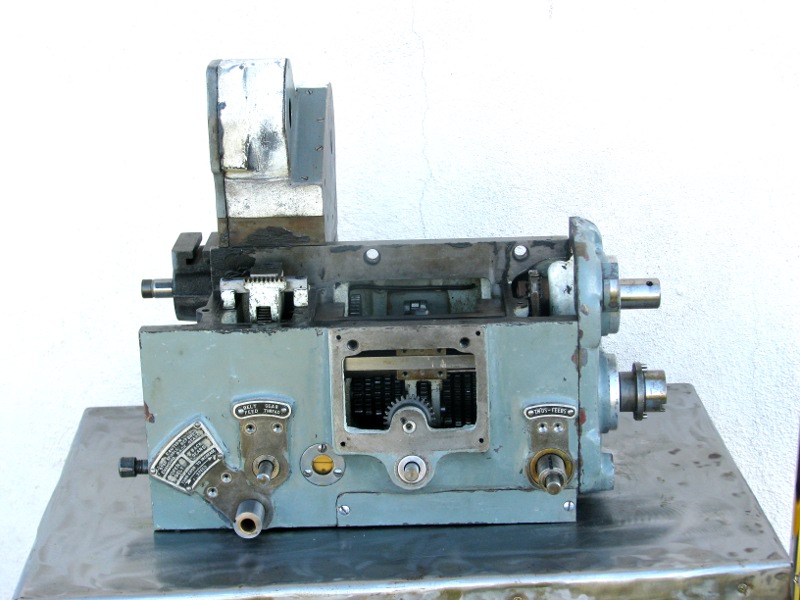
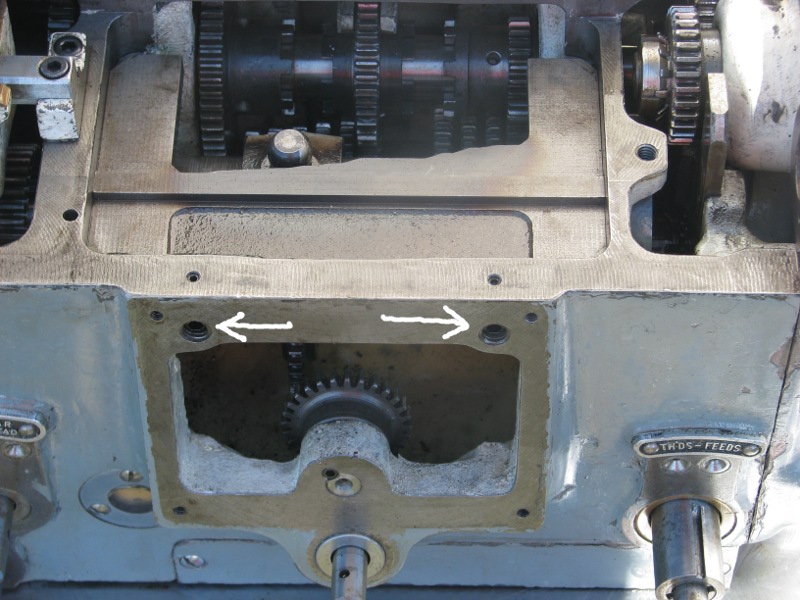
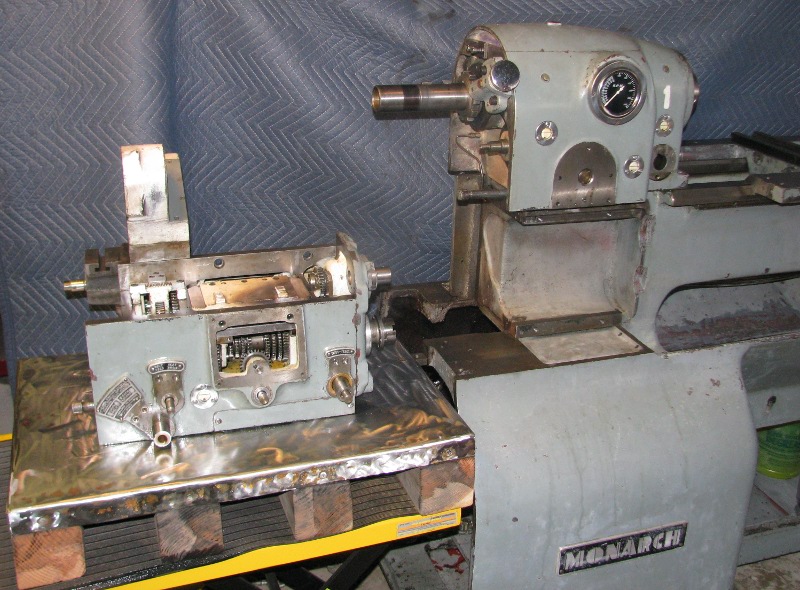
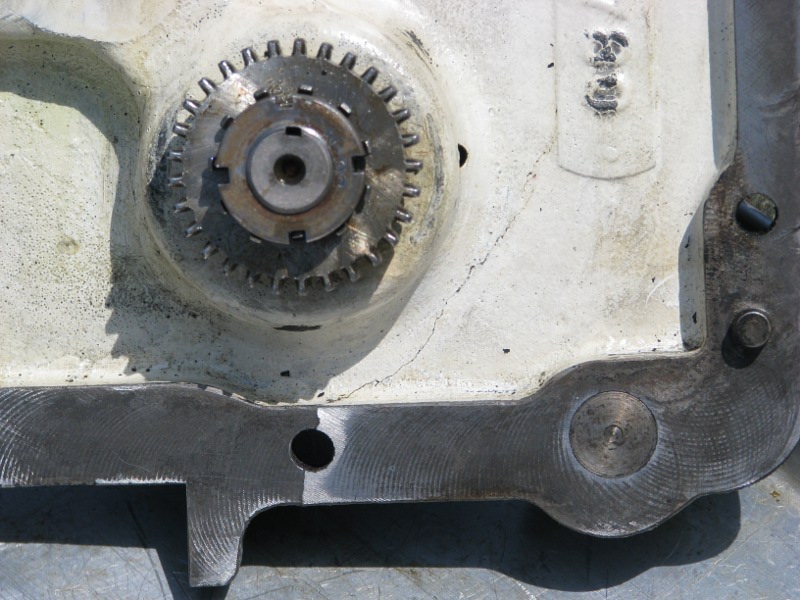
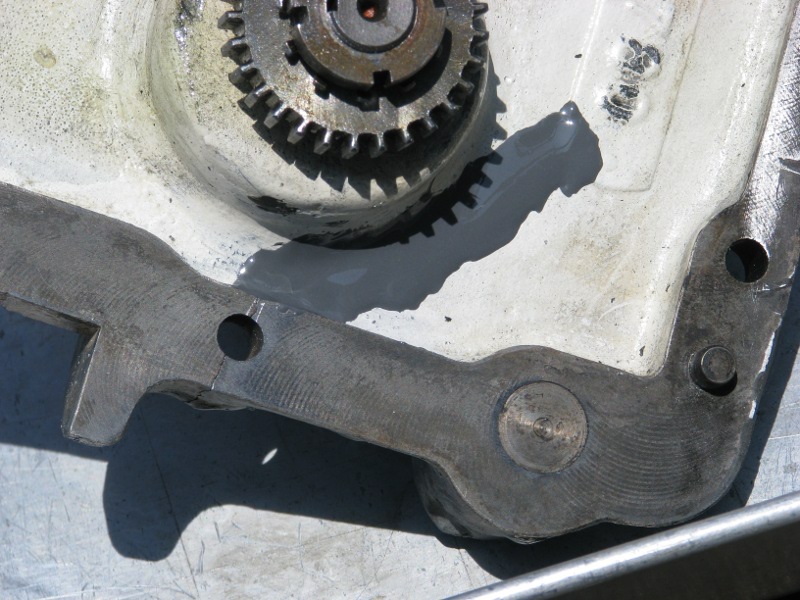
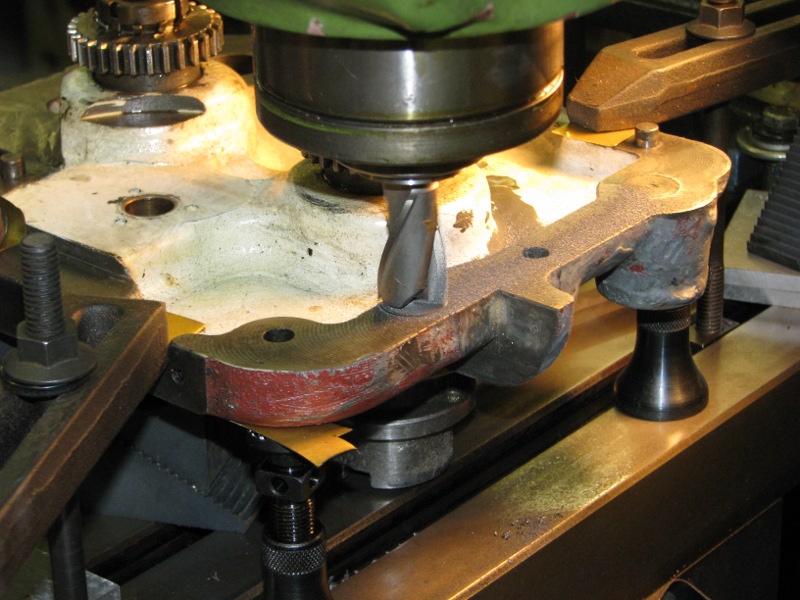
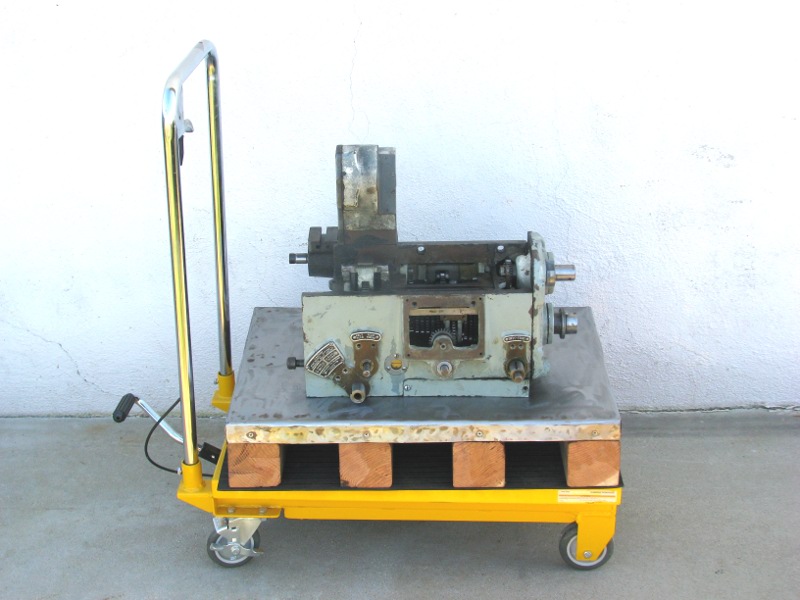
The next task was to work on the gearbox. It is a heavy beast and I needed a way to move it around and raise it to a good working height. A Harbor Freight hydraulic lift table was just the ticket. But because the lathe is on skates, it is now about four inches too high for the table. No problem, just add a platform made from scrap wood, topped with a piece of sheet steel (for lower sliding friction). The result:
IMG_7512b.JPG

IMG_7512c.JPG
IMG_7514b.JPG

IMG_7514c.JPG


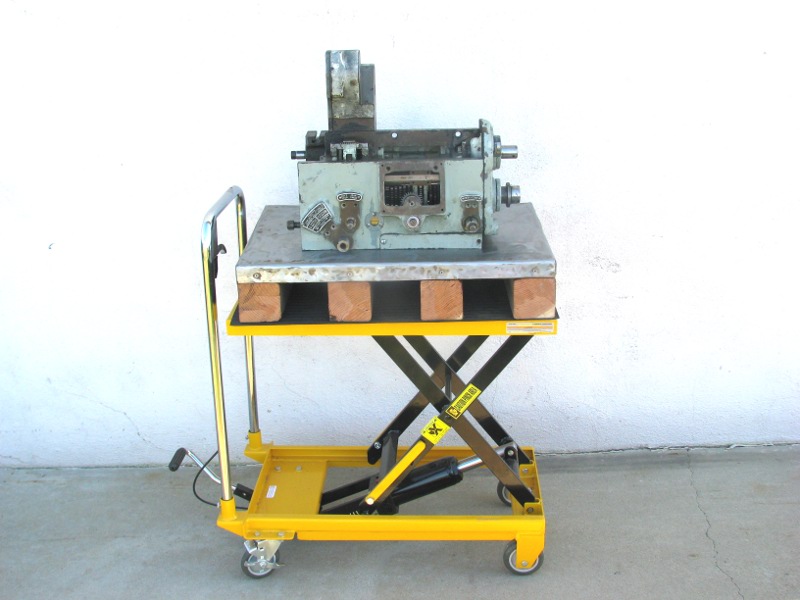
Next post: Dealing with the gearbox...
 
It immediately became obvious that the gearbox had been removed and partially disassembled by someone who didn't know what they were doing. I figured that a couple of afternoons chipping and scraping the top layer of paint would give me plenty of time to study it before possibly making things worse. I have also found that cleaning things is very therapeutic. In addition, I spent several evenings studying this forum, which has been invaluable.

I took *lots* of photos at every stage, so that I could always go back and see what it looked like before I messed with it. Here are the before and after frontal views:
IMG_7519b.JPG

IMG_7519c.JPG

After:
IMG_7597b.JPG

IMG_7597c.JPG


One item in the box of miscellaneous parts obviously went with the gearbox as part of the gear selection mechanism. Unfortunately, several of the brass gear teeth has been severely mashed.
IMG_7673b.JPG

IMG_7673c.jpg


Figuring that it would cost a small fortune to buy one, I took the old time route. Using my oxy/acetylene torch and a brazing rod, I built up the teeth and then used tiny files to restore the teeth to their original profile. It isn't a perfect job, but it is certainly adequate for the purpose, given the low speed and limited motion it experiences.
IMG_7727b.JPG

IMG_7727c.jpg


Now comes the part where I need your help. The person who partially disassembled the gearbox, for reasons totally unknown, removed two adjustment screws. These screws, shown below, are used to set the gear mesh adjustment. The tiny set screws above them secure their position. I have absolutely no idea how to make this adjustment. Can anyone help me?
IMG_7704b.JPG

IMG_7704c.JPG
 
Gearbox installation!

With the gearbox cleaned inside and out, it was time to install it back on the base. The gear adjustment (see above post) could wait until later. I wheeled the hydraulic table up to the lathe and set the height, just as planned. With almost no effort, it slid right into place:
IMG_7736b.JPG

IMG_7736c.jpg
IMG_7738b.JPG

IMG_7738c.jpg
IMG_7741b.JPG

IMG_7741c.jpg

Happily, the 7/16"-14 socket head cap screws were found in the box of miscellaneous parts, so the gearbox is now solidly in place. All that remains is to make a new gasket for the gear train cover at the left end of the headstock, and re-install the knobs and levers. There is still a tremendous amount of work yet to do, but this is a major milestone (millstone? :) ) for me.
 
Good Grief!....now, That is a basket case!

You sir have taken on a major project!

Congratulations on taking on a worthwhile endeavor. One hell of a lot of work yet to be done, but it looks as if you have the drive and determination to pull it off.

As far as the gear adjustment is concerned, it is not something that I have encountered, so I cannot help. I don't remember if "The Wreck" thread covers it or not.

Good luck and hang in there.

Lee (the saw guy)
 
As part of the cleaning process, I wanted to clean the oil level sight glasses on both the headstock and gearbox. But from reading the forum postings, I knew that the metal rings would be stuck, and very difficult to remove. My solution, as at least one other person has done, was to make my own 3-pin face spanner.
IMG_7723b.JPG

IMG_7723c.JPG

It worked like a champ and the rings came right off. Without this tool it would have been a hard job, so the time spent making it was well spent.

If anyone else needs to do this same job, I would be happy to loan them my spanner.

The plastic windows were also slightly scratched, so I polished them (inside and out) with Micro-mesh finishing sheets from Micro-Surface. This is what is used to polish things like aircraft canopies, and it does a fantastic job. The sheets aren't cheap, but they seem to last forever. You can find them at Micro-Mesh Types -MICRO-SURFACE FINISHING PRODUCTS, INC

As an experiment, instead of replacing the original cork gaskets with new ones, I used an o-ring. I just happened to have some with a small diameter that just fits around the edge of the plastic window. We'll see how well that works. Tip: Use a very tiny dab of Vaseline to keep the o-ring in position while re-assembling the sight glasses.
 
An update, and a question at the end...

It has been quite a while since I last posted any progress, but I have not been idle. I have spent many days sitting on the patio, cleaning 10EE parts, scraping off the poor paint job the previous owner did, and slowly identifying the box of "mystery parts". This has been a very pleasant way to spend time on a beautiful day. I will post before & after photos of everything as I do the assembly, but first a problem...

Not long after I installed the gearbox on the bed (above), I ordered all the necessary oils (one gallon each) for the lathe from McMaster-Carr. After vacuuming the old oil from the headstock and carefully cleaning the minor amount of residue, I filled both the headstock (3 chambers) and the gearbox.

The next day, I found a small puddle of oil on the floor. It appeared to be coming from the right-hand end of the gearbox, but I wasn't sure. Over the next few days, I cleaned and examined the area, and determined that it was coming from the right end cover. Eventually it stopped, in the same manner that a British car stops leaking -- it was out of oil.

I was pretty sure of the reason: the previous owner had made a ham-fisted attempt to remove the cover, not knowing of the three screws on the rear cover that go into the end cover. In the process, he bent the cover. I had thought that simply tightening the screws down would be sufficient. Wrong!

Last weekend, I removed the gearbox from the lathe (thanks again to DaveE907 for his excellent tutorial!) and pulled the end cover off. My plan was to remove any burrs and re-install it with a gasket.

After a thorough cleaning, however, I found a crack:

IMG_8783b.JPG

IMG_8783c.JPG

Since it is non-structural, I simply cleaned the area and sealed it with J-B Weld epoxy:
IMG_8788b.JPG

IMG_8788c.JPG

The next day I attempted to re-fit the cover. To my dismay, there was still a sizable gap, even with the gasket I had made. Laying a straight edge along the cover showed that the lower edge was 0.015" high in the middle, right where the crack was. There was only one solution: machine it flat. I was very nervous about doing this, as the cover is unobtanium. But with a careful setup and measuring several times before cutting, I took a light cut which removed 0.015" from the center, tapering to zero at each end:
IMG_8804b.JPG

IMG_8804c.JPG

Even with the cover now flat, I installed it with my home-made gasket and liberal quantities of Hylomar Universal Blue sealant. In retrospect, I think I should have used a thinner gasket than I did (0.024"). When I torqued down the screws, I got a nice even bead extruded all the way around. But when I installed the quarter-round top cover, the gasket pushed it enough to the left that installing the top screws was tight. Hence my wish that I had used a thinner gasket (yes, I could have simply cut out that portion, but I didn't think of it until later).

Yesterday, I re-installed the gearbox on the bed and today I changed all the bearings in the idler rollers and installed them. That's when I discovered yet another possible problem.

After installing the feed pulley, I rotated it back and forth and found what I think is excessive backlash. It rotates four or five degrees before engaging with a distinct "clunk". Is this normal? I am suspicious because everything else on the 10EE is so precise. I want to be sure of this before I fill it with oil, in case I have to open up the gearbox again.

Thanks,
Alan
 
Thanks for the informative update. I wonder how it became cracked?

I am only beginning the process of checking over my 10EE. Oil levels and staining suggest there are likely leaks. I wonder if it would be okay to use cheaper hydraulic oil for the cleaning and eval phase, until the static leaks are resolved?
 
I wonder if it would be okay to use cheaper hydraulic oil for the cleaning and eval phase, until the static leaks are resolved?

Made sense to me to start with GOOD kerosene, migrate directly to two flushes with the 'Real McCoy' DTE & such before 'final' fill.

There just isn't much to be saved at the price diff with the modest capacity of a 10EE's each and several lube reservoirs.

The mandated MULTIPLE flushings of a ZF six or 8 speed automatic transmission would be a different ball-game.

Bill
 
The feed input shaft engages the gear train via a dog clutch which selects either thread or feed drive input. That's where your getting the backlash from.

Sent via cell phone.
 
That feed pulley( as in the the one at the rear of the gearbox?) as I remember...or not, uses driving dogs and has a bit of play between the dogs, that may be the play you are seeing. Gernoff beat me to it. A quick glance at the parts brakedown should confirm this...I hope. The adjustment you are seeking in post #2 is rather simple. You'll have to have the box and levers fully assembled, with top 1/4 cover removed. Adjust the plate so that everything meshes optimally, and doesn't hit stuff its not supposed to, as you drop the tumbler lever down and you're good to go. I found that everything in that box is assembled by feel. After you're done, you should be able to turn every shaft by hand easily...if its right. Something else and it maybe too late, The gearbox feed shafts that go into your warped cover originally had labyrinth type seals and on mine, allowed years of coolant to enter the box causing quite a mess. I installed CR type seals, in standard configuration with no modification to shafts, cover, etc.
 
Thanks for the info about the dog clutch; that would certainly explain it. Everything else is so precise and smooth that it had me worried.

Aside from the cracked end cover, everything else associated with the gearbox is in beautiful condition. My guess is that the previous owner was trying to get the cover off while the gearbox was still attached to the bed. He didn't realize that there are three screws in the back that you can't see in that position, so he pried and/or hammered (I can see little nicks around the edge) on it.

This is why this forum is so valuable; expensive mistakes like this can be easily avoided with a little searching and asking some questions.

Daryl, I noted the labyrinth seals and will probably replace them if I ever have to take the gearbox off again. I don't know what CR type seals are; could you educate me? This machine never had coolant, and I don't plan on using it, so I'm more concerned about oil leaking out than coolant leaking in.

Thanks,
Alan
 
I call CR seals from Chicago Rawhide, the single neoprene lipped seal that is just about ubiquitous on every type of machinery, auto, etc. If you ever replaced the wheel bearings in your car, they probably used this type of seal. You'll install the seals with the lip toward the oil.
 
Take this opportunity to also replace the three shaft lip seals on the front of the gearbox. I did a thread on doing it in 2009 I believe. It has the seal details and how to accomplish it without doing damage. You'll find the original seals are trash.
 
You'll find the original seals are trash.

.. or if not, they have surely earned the privilege by this late stage in time.

Thanks for those reminders, Dave.

Sometimes concentrating so hard on just getting the 'big rocks' into the jar, any among us can overlook the easy and cheap in the same zone, same tear-down, until they are no longer easy OR as cheap.

Bill
 
Thanks to Daryl and Gernof for the info about the dog clutch. Now I won't worry about the backlash, and can move on to the next item.

I call CR seals from Chicago Rawhide, the single neoprene lipped seal that is just about ubiquitous on every type of machinery, auto, etc. If you ever replaced the wheel bearings in your car, they probably used this type of seal. You'll install the seals with the lip toward the oil.

Thanks! I didn't recognize the term "CR", but am very familiar with that type of seal, having recently replaced one on the pinion shaft of my Super Snipe's differential. It was a real oddball size which was in everyone's catalog, but nobody had in stock.

Rather than replace them right now, I think I'll just order a set and keep them until I accumulate enough reasons to open it up again. Otherwise I'll have a 10EE that keeps approaching perfection but still doesn't run. :) I can see the light at the end of the tunnel and am anxious to see this beautiful machine running.

Thanks,
Alan
 
Otherwise I'll have a 10EE that keeps approaching perfection but still doesn't run.

Could be worse.

You could have one IMperfect in nearly every respect - also pigsty-dirty indoors - that runs only when yet-another weird/contrariian/historically-classical DC Drive mod is being tested. DAMHIKT.

:)


Back
Top