What's new
What's new

EE Tailstock fun

daryl bane

Titanium
Joined
Mar 12, 2002
Location
East Texas
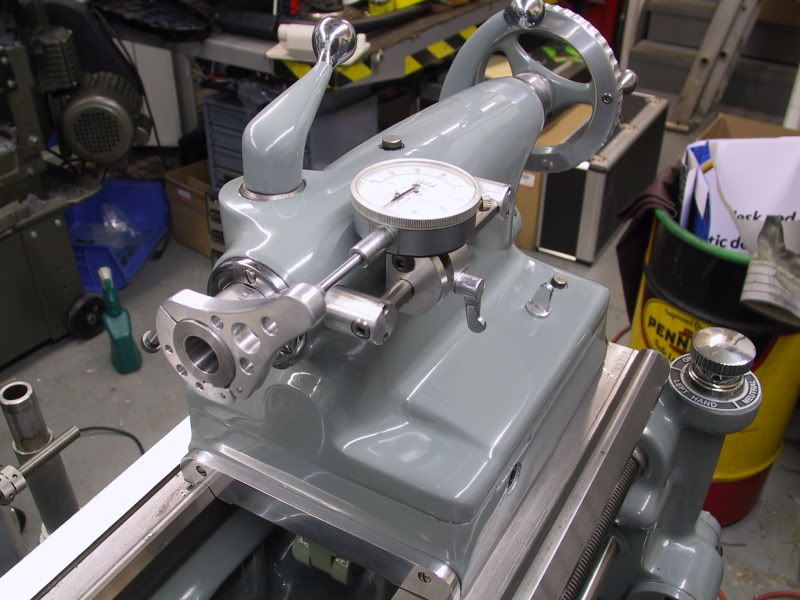
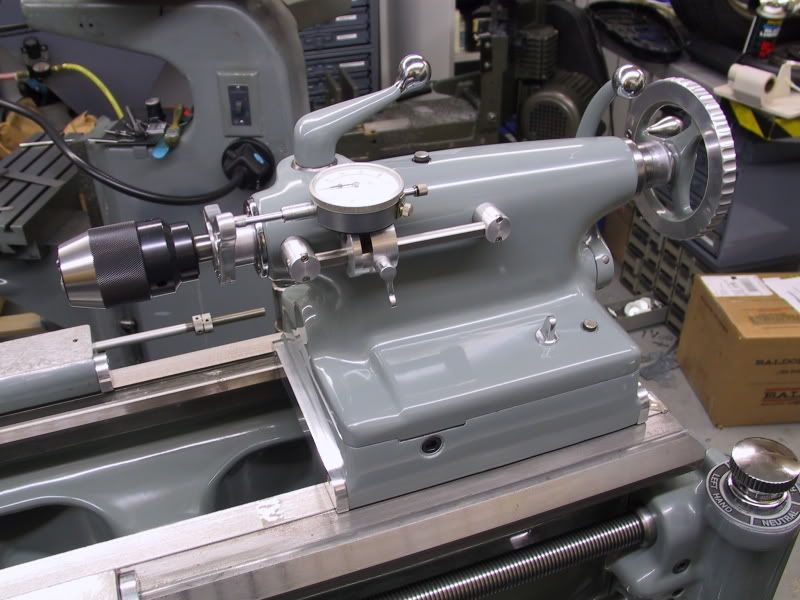
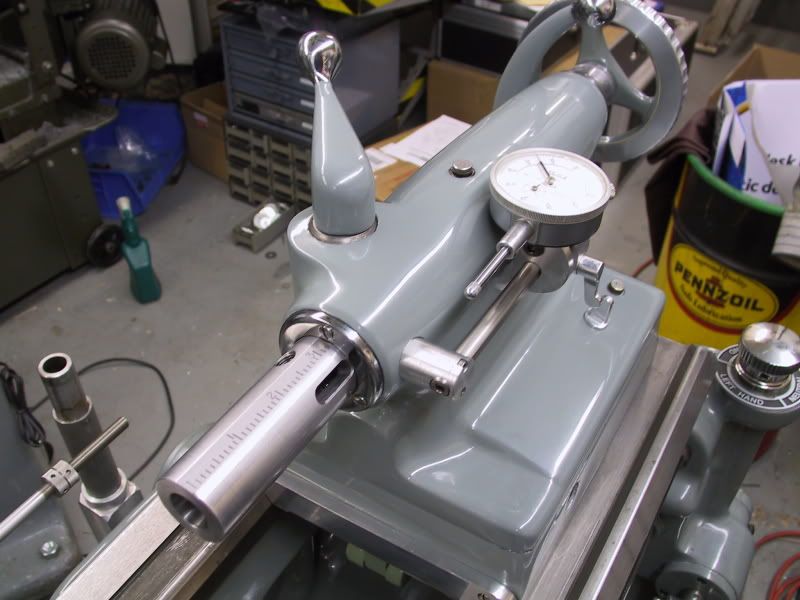
Here are some pics of the finished tailstock. I added a dial indicator to the ram. Some people like the digital style but I'm partial to a dial. Here are some specifics:
1) New homemade tailstock ram. After a very unsatisfactory
hard chrome job, I decided to make a new one myself. Turned it up, ground with my K.O.lee and then lapped to the oversized honed and lapped bore. Looks like I'm getting factory fit .0002. New key was made and lapped to the keyway in my ram. The key was originally pinned to the tailsock but I modified the casting, so that the key was held by a allen bolt.

2) The two halves of the tailstock were scraped, as they looked more like a potato chip than flat to each other.
3) The bottom ways were machined and fixtured for Moglice, which clamps beautifully. Note. Moglice is NOT like turcite, which is quite squishy.
4) Leadscrew totally worn out. but found another one on E-bay in excellent condition, and with a new nut courtesy of Russ Kepler.
5) Retrofitted the taper adjustment bolts to the new hex style , as I am just too clumsy with a wrench with the old ones.
6) New center dauber , made from pics.

163-6385_IMG.jpg


brufsupbane
 
Daryl

Exceptional work as always... it still impresses me every time I see the quality of your work.

Nice design on the dial indicator bracket with a touch of class.

You must be about done with your upscale restoration job of your EE.

If your looking for another EE to start on let me know and I'll get one on the way. :)

Hal
 
How did you lap the ram to the bore? I am about to start fixing my tailstock and I was hoping to send the tailstock out to be honed to whatever diameter makes it straight and round. I was then going to have the ram hard chromed and ground to the bore diameter minus .0002-.0003 and then use fine lapping compound to smooth the tight spots. Any suggestions on what to look for in a shop to do the honing? This may be the wrong way to do it but, I wonder if a 32mm reamer would be a good way to fix the bore.
Thanks
Lee
 
Nice job!! looks like the dial mount may prevent the ram from retracted all the way to eject the tool ( unless your new ram is longer than the original one). That gave me some ideas for my 10EE. Ever thought about an LCD type of DRO?
 
Here's the story on the ram fiasco. Both Tim and I took the tailstock bodys over to Commerce Grinding to have the bores ground oversize. Well, we got back and found that the bores were round but only accurate to about .003. Not so good. We borrowed some hones and laps and just did it ourselves. We got the final size to about .0002 for the length of the bore. We then took the rams over to a old time hard chrome plater to have them plated and then ground to size. Tim managed to get a good job, mine, they never could hit the required tolerance, .0002, boths times they redid it. I was disgusted that fellow Texas boys couldn't grind to tenths. Anyway I just made a new one, used my K.O.Lee T&C grinder to get it within a thousandth. made a split lap and finished it to size. No big whoop. I get about .0002- at full usable extension dry, and almost nil with oil. In fact, when I have a tool in the morse taper hole, it blows oil and air out the clamp cotter hole.
Knuygen, Yes I misspoke on the 1st reply(drunk again)thats the tradeoff, it does interfere with the auto eject, but that is the reason the bracket has a quick release clamp. You can remove the clamp w/o removing the tool in the MT socket. I like dials, I like watching the needle more than countin'
 
Outstanding job Daryl! Love the hinge detail on your ram clamp, subtle and almost over the top. Another polished dauber, I'm not the only one... The whole assembly brings words such as superb and sublime to mind.

I'm with you on analog readouts for position too. Trying to hit a number watching a digital display has always seemed an unnatural act to me.
 
Daryl,

Very nice work! I take it you either work without much of the tailstock ram extended or slide the clamp on the ram back so that you can reach it with the indicator?

Cal
 
Or use a longer indicator. I have a long Miti indicator just for that, but the clamp can be moved just as easily. Thats the reason for the length of the rod that holds the indicator holder, so that it would accomodate a longer indicator.
 
Very nice job! I'm thinking on just how to do mine, very much liking the idea of Moglice. I've figured out how to jig for level, but my question for you is how did you set up for parallel on the left & right? It seems to me it's a one shot deal, as you're lowering the base onto the V-way it can't be given any twist left or right without distorting the shape of the v-way in the Moglice. So how did you deal with this - if you understand what I'm getting at?

Rod
 
Very nice job! I'm thinking on just how to do mine, very much liking the idea of Moglice. I've figured out how to jig for level, but my question for you is how did you set up for parallel on the left & right? It seems to me it's a one shot deal, as you're lowering the base onto the V-way it can't be given any twist left or right without distorting the shape of the v-way in the Moglice. So how did you deal with this - if you understand what I'm getting at?

I'm not Daryl, but when I did my carriage I made little clamps with screws that registered with the tops of the V and flat ways as well as on each side of the V ways. With that rig you can dial in what you want.

There's a series of posts discussing it, and some pictures:

http://www.practicalmachinist.com/vb/forumdisplay.php?f=10
 
Doing the tailstock is not unlike the carriage. One thing we found is when building the fixtures, it is best to register on the flat and side parts of the ways and not directly on the V. Tim came up with a great design in steel. As Russ probably realized when adjusting the jack screws on the V, it changes height as well as pitch and yaw. You can really chase your ass working to a tenth. All this AND keeping everything level to the rest of the lathe:bawling:
 
Thanks Dave, Having restored motorcycles,I really understand keeping things "original". This lathe was a big steaming POS, totally wore out, everything was shot. It is a tool after all and I didn't feel I was desecreting holy ground by putting tasteful, useful touches on her.;)
 
"...was a big steaming POS..."

Daryl has masterfully demonstrated to us all that it is indeed possible to make a silk purse :drool5: from a big steaming :eek: POS.

Split laps are used for sizing ODs, not IDs. Working to sub tenths is well within the process capability.
 
3) The bottom ways were machined and fixtured for Moglice, which clamps beautifully. Note. Moglice is NOT like turcite, which is quite squishy.

You put moglice on the bottom? The standard stuff or the way repair material. I have heard of someone using the standard moglice that I used to repair the underside of my carriage to repair the tailstock ways and found they had a hard time clamping because the low friction of the moglice. Devitt has a way repair material that is more suited than the standard moglice.


Back
Top