What's new
What's new

Fwd/Rev headstock lever assy

PaulM

Stainless
Joined
Feb 16, 2007
Location
upton ma
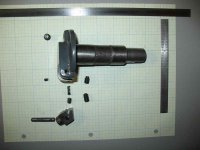
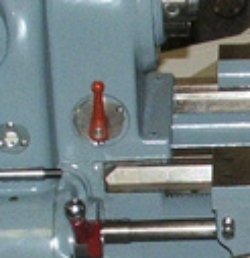
I was able to purchase a replacement control lever assembly for my 73 10EE to replace the kludge that was on there when I got it;
4259766660_4cbbce4b9c_o.jpg


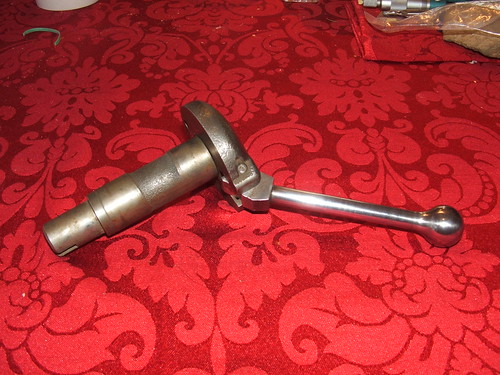
Here is the replacement as received;
4258986003_9f0bce27e4.jpg


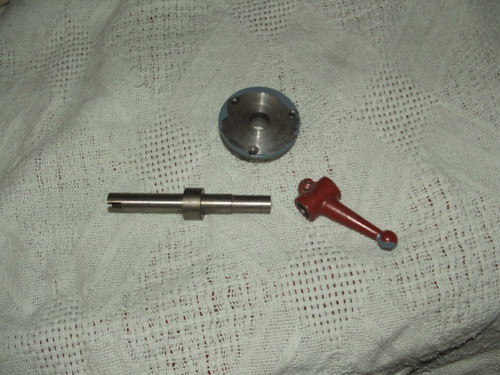
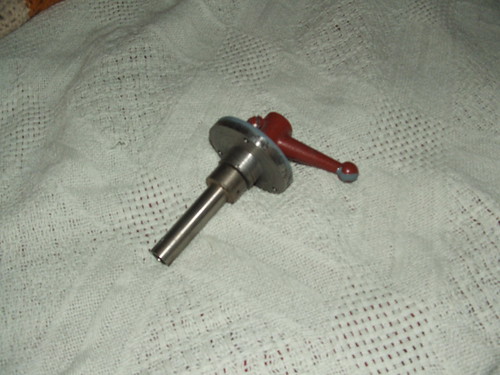
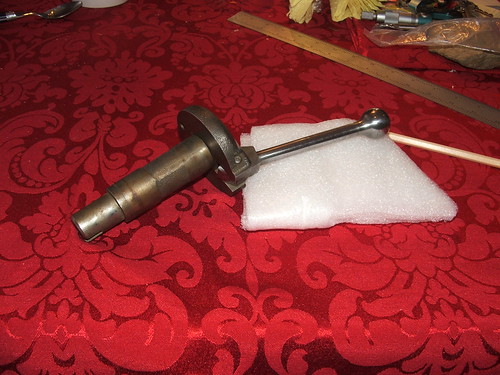
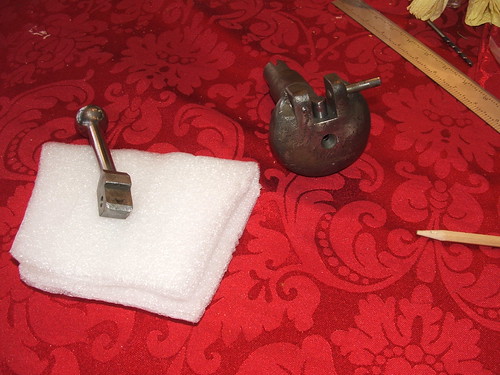
Reversed the handle to match the drawing orentation - spring works better here
4258986765_24f65d2867.jpg


Here is the factory drawing of this asembly;
4259185859_39a875a4ca.jpg


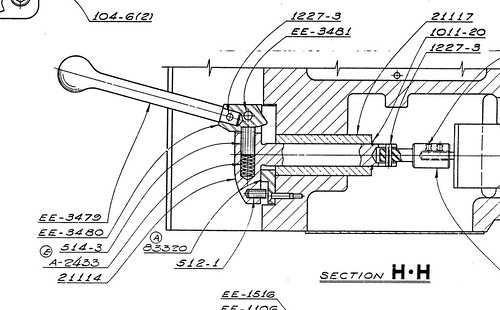
So it looks like my replacement is either a different version or has had some work done on it. In this picture the pencil points to a pin which holds the end onto the shaft (the slotted end that engages the drum switch). In this case this piece also holds on the bushing that the control turns in.
4258987229_3d1719dde1.jpg


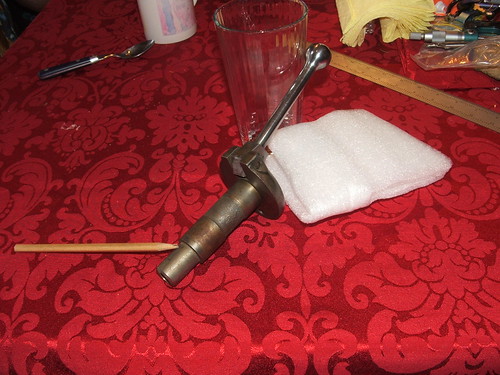
There is a hole in the front of the casting which looks like it was modified to turn the part between centers for the rework that was done;
4259896108_734d0644d7.jpg


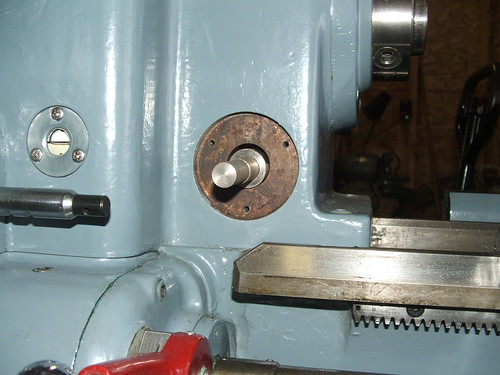
So I am missing part 83320 which is the disk that attaches via 3 screws to the headstock and is slotted for the off position (there is a pic of this in Harrys post on the wreck). OK not a big deal to make one but I want to make sure I undersatnd how the assembly should work. With what I have now the assembly would just be a press fit from the front, nothing would secure it in place as the bushing comes all the way to the face of the control:nutter:
Looks like the engagement to the drum switch should be a thin section that will fit through the bushing, and the assembly is held in place by a circlip part 1011-20 which is probably a pain to install from the hole the drum switch goes in?

Is this correct? Looks like I will have to create a new 83320, modify the bushing to fit flush in the headstock, and then redo the end of the control lever. Looks to me like the thin wall section that engages the drum switch can be fairly thin as the only load should be what it takes to turn the drum switch (Pin it or loc-tite type adhesive?).

Also the interlock cam (EE-5480) is rounded a bit on the sides, per Harry's comments in the wreck it may be better to make a replacement with sharp edges? The actual part of the cam that should extend into part 83320 only protrudes about .100" eyeballing the part it looks like if I make a replacement I can also get a bit more engagement?

Thanks Paul
 
Paul,

The handle assembly that you have is very similar to the one from my '43 round-dial. I really don't think yours has been modified.
attachment.php


The slot on the end of the shaft engages a cross pin in the drum switch assembly shaft. The switch in the drawing does not appear to have the cross pin. What does your drum switch have?

The missing round plate is called a "catch plate" in the round-dial parts list, but it attaches with 4 screws, not 3.
attachment.php


The handle assembly is retained by a pair of 1/4-20 set screws that are run into a hole on the flat face of the headstock facing the tailstock, at about 7 O-Clock with respect to the spindle. You can see the tapped hole in this photo. Yours may be hidden under paint and filler.
attachment.php


I have a center hole in front of my handle casting, just like yours. I suspect is was part of machining the casting.

Cal
 

Attachments

  • IMG_5426.jpg
    IMG_5426.jpg
    47.7 KB · Views: 900
  • IMG_5430.jpg
    IMG_5430.jpg
    42.4 KB · Views: 808
  • IMG_5445.jpg
    IMG_5445.jpg
    30.1 KB · Views: 762
Also the interlock cam (EE-5480) is rounded a bit on the sides, per Harry's comments in the wreck it may be better to make a replacement with sharp edges?
I believe that is intentional, so the handle need not be precisely aligned to slip into the stop notch.

That would be significant safety advantage.

- Leigh
 
Thanks Cal and Leigh,

On my square dial the "catch plate" will have only 3 screws, here is a picture and also see post 107 on "Wreck update" where you can see the radial groove on the bottom that the pin rides in to limit the motion (at least thats my assumption from the drawings)
4264679326_568e12c4e9.jpg

here with the shaft removed - the flash does allow you to see the end of the drum switch inside.
4263927823_f85f9e2f8b.jpg


Square dials do not have the set screws you note (I checked there is no hole in the bore), and I dont think I want to drill and tap the headstock. I think I am better off with the scheme schown in the square dial drawing I posted.

Here are a couple pics of the parts in the "kludge"
4264680142_5bb7b9f2b9.jpg


4264679724_ef1ee37858.jpg


It did not have any kind of bushing, the shop made catch plate acting as the bushing but its a lousy fit.

So once it warms up enough to actually work in an unheated shop I'll pull apart the new assembly and likly shorten the bushing so it will sit behind the catch plate. Then modify the end of the shaft so it will have a small enough dia to fit through the bushing and add a groove for a circlip.

Can someone confirm the square dial assy is held in place with a circlip put on from the back (through the drum switch hole)?

Thanks
Paul
 
...
On my square dial the "catch plate" will have only 3 screws, ...
It's functionally the same as mine, they just milled a step instead of cutting off the bottom.

...
Square dials do not have the set screws you note (I checked there is no hole in the bore) ...
I'm not sure that is true across the board. I think the older square-dials with motor/generator drive may have used the set screws.

What kind of machine did the donor handle come from?

...
So once it warms up enough to actually work in an unheated shop I'll pull apart the new assembly and likly shorten the bushing so it will sit behind the catch plate. Then modify the end of the shaft so it will have a small enough dia to fit through the bushing and add a groove for a circlip.
...
Assuming that the bushing that's on the donor handle is a good fit to the bore in the headstock, you might consider making the catch plate with a hole that will pass the bushing. Mine is a light interference fit to the bore and has to be lightly tapped in/out; I don't think the set screws are really necessary. A drop of Lock-tite would probably be sufficient to retain it. That way you could dispense with the circlip.

Cal
 
Thanks Cal,

I don't know the vintage of the machine the parts came from (I know I'm trying to put it on a 73), given the incremental changes Monarch made over time it could easily be as you suggest - later square dials have the circlip earlier ones the set screw.

I think your suggestion of a catch plate with clearance and using the light interference fit of the busing is a good one. I'll do a better check on the bushing to bore as well as the length to the switch (when the temp is more reasonable). Using the part as-is (or as close to as-is as possible) allows me to make the update to a circlip later if needed. Given the control sees no real loads I cant envision there being an issue. Another thing to put on a note in the back of the bed casting for someone 30 or 40 years from now.

Paul
 
I'm working on getting a 10ee running from 1953. I'm trying to figure out how to remove the forward/reverse handle and inspect the switch. Does it simply pry off the shaft? Then remove the clutch plate? Any help is greatly appreciated.
Adam
 
I'm working on getting a 10ee running from 1953. I'm trying to figure out how to remove the forward/reverse handle and inspect the switch. Does it simply pry off the shaft? Then remove the clutch plate? Any help is greatly appreciated.
Adam
The handle need not be removed the switch is removed from the back it is attached to the round plate on the back, handle stays in place.
 
I'm working on getting a 10ee running from 1953. I'm trying to figure out how to remove the forward/reverse handle and inspect the switch. Does it simply pry off the shaft? Then remove the clutch plate? Any help is greatly appreciated.
Adam

The answer is a couple of posts above yours. There is a circlip that must be removed. You first remove the switch itself, from the back side of the headstock, then access the circlip with a pair of long-reach circlip pliers. Then you can remove the bushing and front plate by removing the three screws.


Back
Top