What's new
What's new

How to use the electric leadscerw reverse?

  • Thread starter Roger Van Maren
  • Start date
  • Replies 6
  • Views 1,744
R

Roger Van Maren

Guest
Hello all,
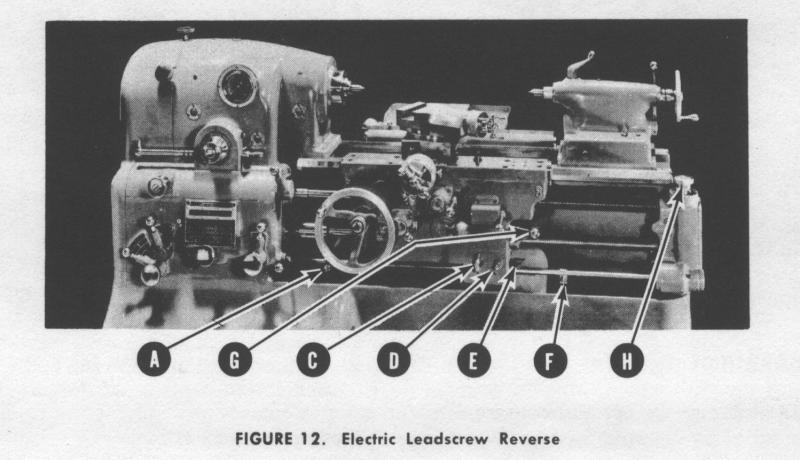
I can't seem to figure out how you are supposed to use the electrice leadscrew reverse feature. This is a '42 vintage, round dial EE with a lever on a rod across the front of the machine to start and stop the spindle and a spindle direction switch located on the headstock near the threading direction knob. (this seems to be locked out sometimes and can't be moved) I can see how to set things up so the spindle will turn off at a preset point of carriage travel. Would this work to thread to a shoulder? The spindle would have to coast to a stop the same each time, yes?

Are you then supposed to back the crossfeed out to the threading stop and reverse the spindle? It seems that this would be pretty slow on a long, fine thread.

What am I missing here? When would you want to use the spindle direction switch up on the headstock?
confused.gif


Thanks,
Roger Van Maren
 
I guess you're missing the variable reverse speed control that was controlled by the electric leadscrew reverse control. You could have it return a lot faster than the 'forward' threading speed. I don't have it on any of the schematics that I have but think it would be fairly easy to setup and wire in.
 
I'm not sure I will come up with a satisfactory explanation, but I'll give it a try. My first EE was a 42 which had the
remnants of this mechanism, and I finally found a complete assembly, installed it and
figured it out. Sort of. So my real recommendation is that you take it apart and
figure it out.

The long rod that runs from the tail end of the bed, through the saddle and into the leadscrew reverse casting has a spiral babbeted guide bushing on the right end which causes the rod to move to the right
as you push the lever down. If you put that
lever horizontal, there is a dentent pin in the lower left corner of the leadscrew reverse casting that will lock the rod in place and prevent accidental on/off
events. In use, push the lever down for
one direction of motion, and pull it up to
instantly reverse the spindle and feed. As
I recall, the change is accompanied with a
big "bang" as the reverse contactors engage,
the motor and gearbox suddenly reverse direction, etc. Probably not the best thing
in the world, to do to your lathe, but its a Monarch... Pushing the lever down causes one of the pairs of switches to open/close inside the leadscrew reverse casting.

Inside the casting there is a typically complex Monarch design of a square cam that
prevents the knob from being manually moved
to the wrong position. Each position actuates one or the other of a pair of micro-switches, and determines whether the forward/off/reverse lever causes the lathe to turn clockwise when pressed, or counterclockwise. I think that when you set
the feed direction using the round dial on the front of the leadscrew reverse casting, the square cam changes position and allows you to select one or the other position for the knob.

The last feature I recall is that when the
carriage contacts the stop ring on the rod,
it also pushes the rod into the leadscrew
reverse casting, which shuts down the spindle
and reverses the feed.

-Dave
 
I don't think that you're really supposed to reverse the running spindle with the leadscrew reverse, but it still shouldn't be worse on the contactors than using the regular forward/reverse - if they're both causing a real bang I'd check the anti-plugging relay as it's releasing way too soon. The off process should short the armature against the resistors to slow and stop the spindle fast (mine works well) with the AP relay holding off the power until the armature drops to about 300 RPM. where it drops out, the resistors drop out and power is reapplied. If the spindle is taking more than a second to stop I'd make sure that the resistors are working.

Anyway, to using the electric leadscrew reverse. The manual talks about setting up the electric leadscrew reverse (typos and errors are mine):

<<
The following are the steps in setting up the electric leadscrew reverse.

1) Set knob (H) Figure 12 for right hand or left hand threads as required.

2) Rough position stops (A) and (F) for the start and finish position of the carriage.

3) Loosen lock (D).

4) Knob (C) proviced final position adjustment for the carriage stop bars (E).

5) Tighten lock (D).

In chasing right hand threads the down position of lever (G) gives spindle rotation forward and carriage movement towards the head. When stop bar (E) contacts stop (A) lever (G) is returned to the neutral position and the spindle stops. The cross slide is then retracted to clear the tool and laver (G) raised to the up position. The spindle the operates in reverse and the carriage moves toward the tailstock. When stop bar (E) contacts stop (F) level (G) returns to neutral and the spindle stops. In chasing left hand threads the process is reversed, that is, the up position of lever (G) gives forward rotation of the spindle and carriage movement toward the tailstock.
>>

elec_leadscrew.jpg


(I still want to know just what the neutral position on the electric leadscrew knob is for, other than frustrating newbies: "See, RH Threads is for right hand threading, LH Threads is for left hand threading, and Neutral is for regular feed" is always a good 'un).
 
The round dial machine is different than your picture. The switch on the right on the newer machine is located above the thread directio selector on the headstock.and there's no way to increase the speed for the tool to return to the start of the thread.

I guess I can see how it's supposed to work, it just doesn't seem like a big improvement over regular threading.

Roger
 
The improvement comes in two ways. First, because the half nut can stay engaged throughout the whole operation the thread can be more accurate. This would especialy be true when using metric translation gears because the thread dial is meaningless.

Second, though I would never thread to a shoulder without an undercut at the end to clear the tool, one can run the threading operation a lot faster and use a smaller undercut if the machine stops automatically at the undercut. I find my EE stops with in about .010" everytime once it's set.
 
Can anybody explain, if you can control fw/rv on the spindle and leedscrew by moving the leedscrew lever up or down then why do you need the left,newtral and right hand thread selector knob on the right then?


Back
Top