Cal Haines
Diamond
- Joined
- Sep 19, 2002
- Location
- Tucson, AZ
[continued from http://www.practicalmachinist.com/vb/showthread.php?t=159301&page=3]
I haven’t been able to spend much time on the paint job in the last two months, for various reasons, but I’ve been pecking away at it. I’ve finished up with the base filler and have the high fill primer on now.
As I said in the previous thread, I decided that the 4+ layers of old paint on the headstock and gearbox had to go. There was just no way to get a decent result with all the layers of hastily applied paint on the many compound surfaces.
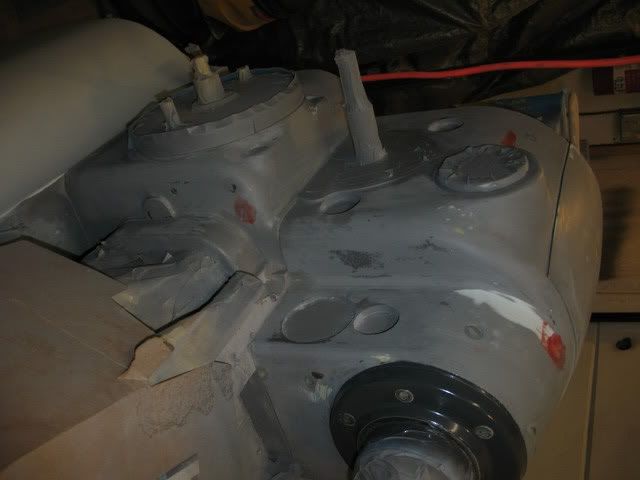
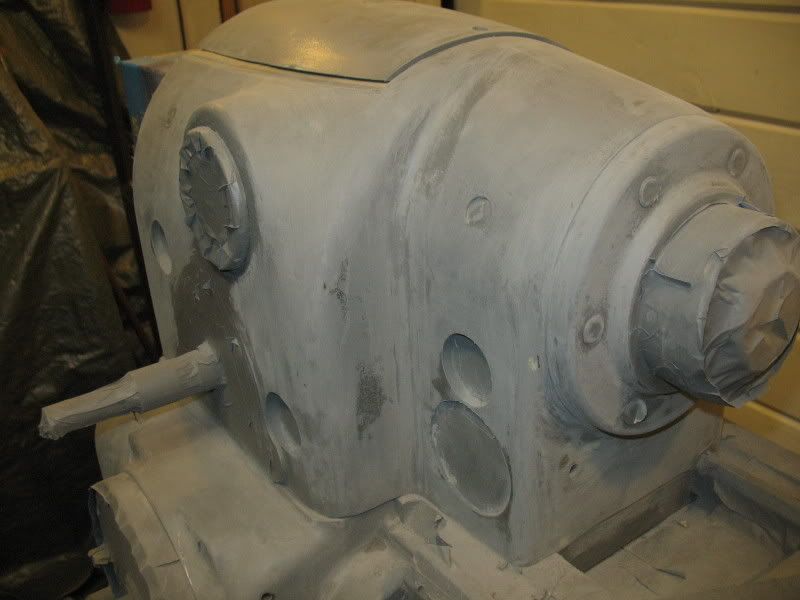
Here’s where I wound up after stripping the headstock and gearbox, primarily with 2” Scotchbrite discs on air tools:
One problem that I didn’t properly appreciate was the lump on the rear half of the headstock casting, over the spindle. Here’s a photo with a piece of steel strapping bent across the top of the casting. You can see that the left side is lower than the right (back) side. I suspect that something happened to the pattern position when it was being rammed up:
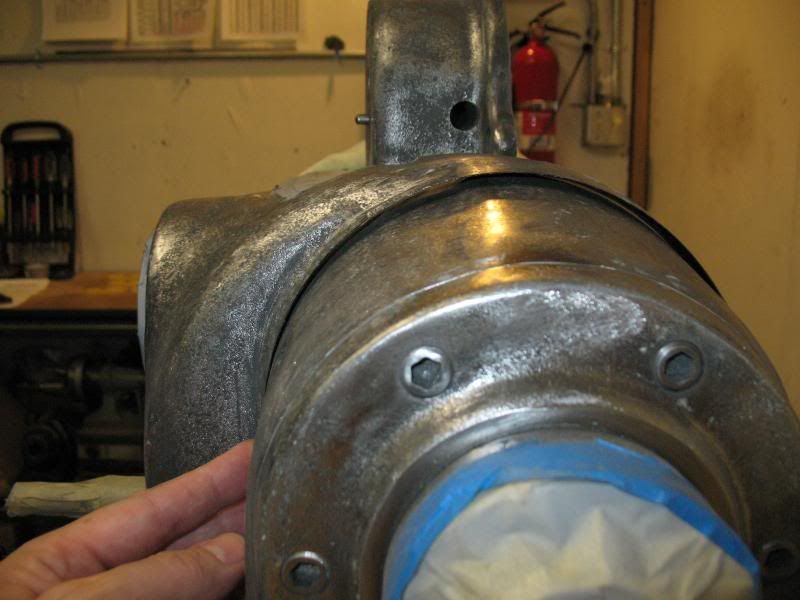
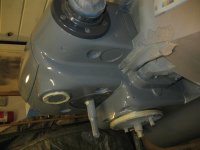
I had initially thought that the left (front) half was low and decided to fill it to match the back. But on closer inspection, it’s the other way around. A very crude grinding job was done at the factory to blend the casting to the front bearing retainer ring. I decided not to try to grind the casting to the correct shape; I just don’t have the necessary skills. Instead, I opted to fill the low area and try to blend it together.
I took DaveE’s suggestion to use Evercoat Rage body filler. It’s only available in gallons, but I was able to get partial can, about a third of a gallon, from a local body shop. It took about 4 hours to coat the headstock and gearbox. Most of that time was spent mixing filler and cleaning up tools between batches. It took me 20 to 30 minutes to mix a batch, apply it and clean up for the next round. I used a digital scale to help control the proportions. You’re supposed to mix 2% hardener by weight. I wound up using 25 to 30 grams of Rage with one drop of hardener.
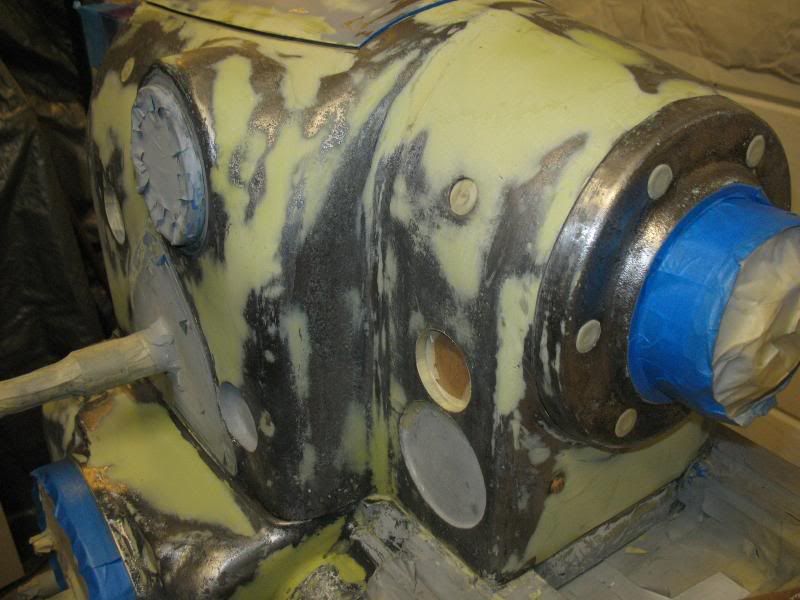
Here’s a photo with most of the first coat of filler on:
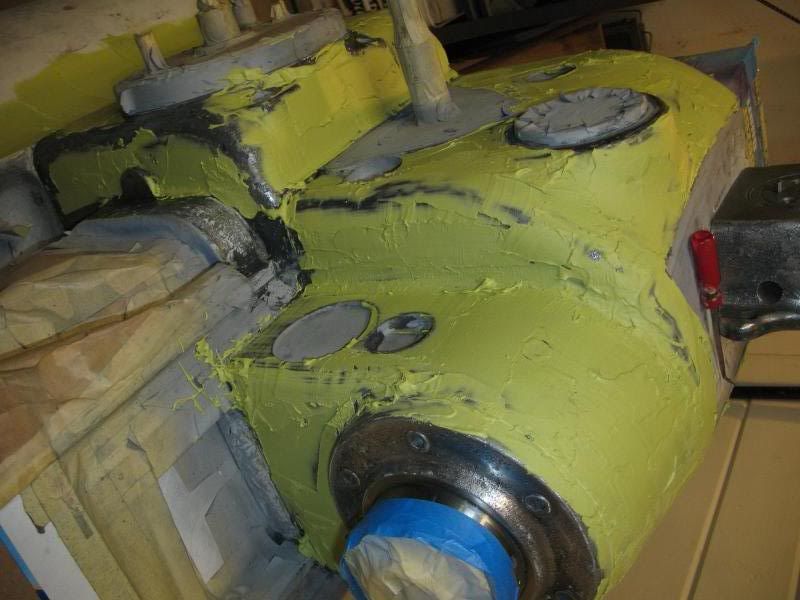
Mostly out of ignorance, I proceeded as if I were icing a cake. Instead of the paper-thin layer that I had imagined, I wound up with an eighth inch or more in some places. The problem was compounded by ridges and high spots on adjacent patches which would lift up the putty knife and make the thickness even greater. (It’s definitely a good idea to trim those things off while the filler is still soft; something I didn’t do).
In retrospect, “icing” a lathe is a very poor way to proceed. I had done something similar with the Bondo 902 putty on the base and it was easy to sand down the high spots. Not so with the Rage! It took me 4 hours alone to just trim and file off the high spots so I could start sanding:
The headstock upper cover had been powder coated and all of the grain of the casting showed through. I decided to paint it as well and was pleasantly surprised how smooth the powder coating sanded out. It apparently makes pretty good high-fill primer.
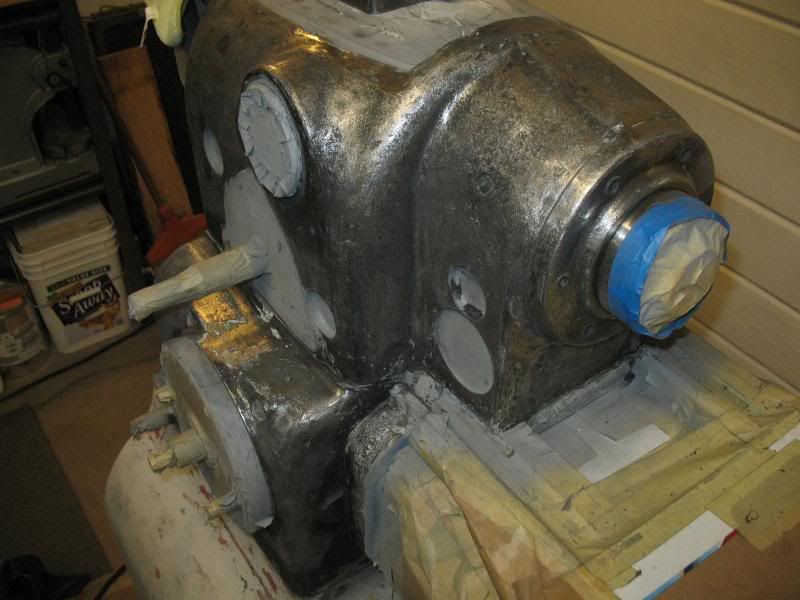
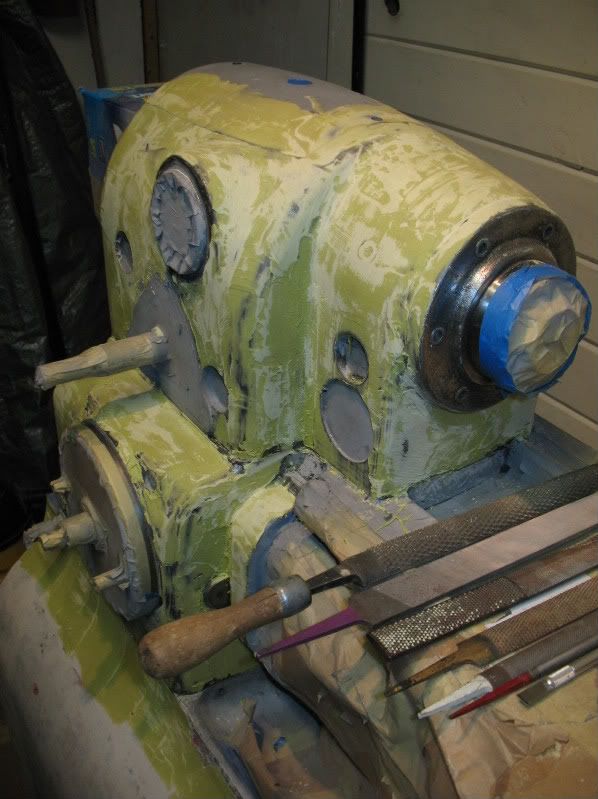
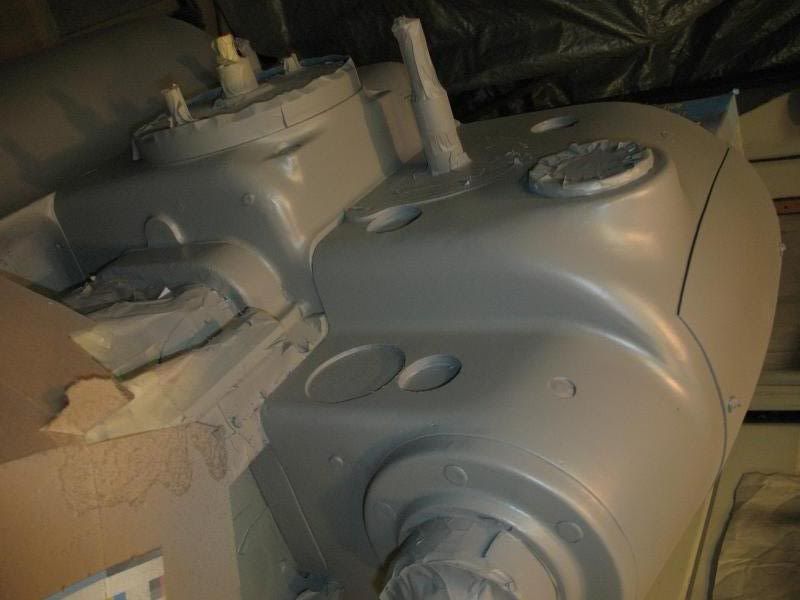
It took another 15 hours of tedious work to finally get to a point where I just had filler in the low spots:
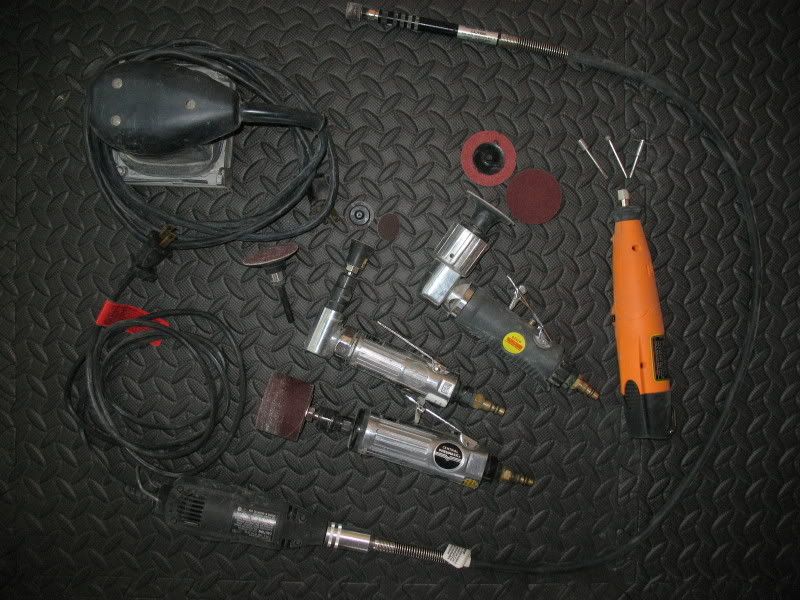
I wound up using just about every small sander I own, including a Dremel-type tool with a small diamond plated ball for the small radii:
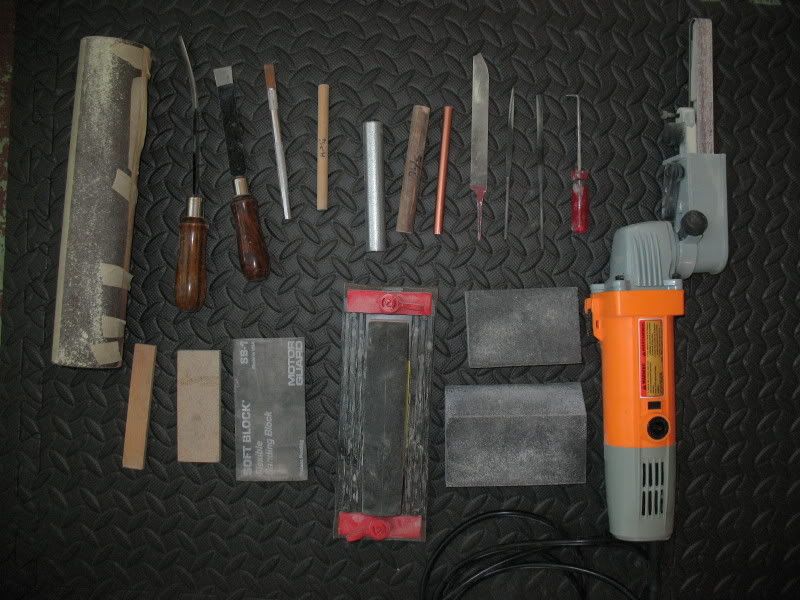
… and an assortment of sanding blocks, dowels, scrapers, and the like:
I learned a few things along the way. If anyone is interested in more details on the sanding part, just say so and I can elaborate.
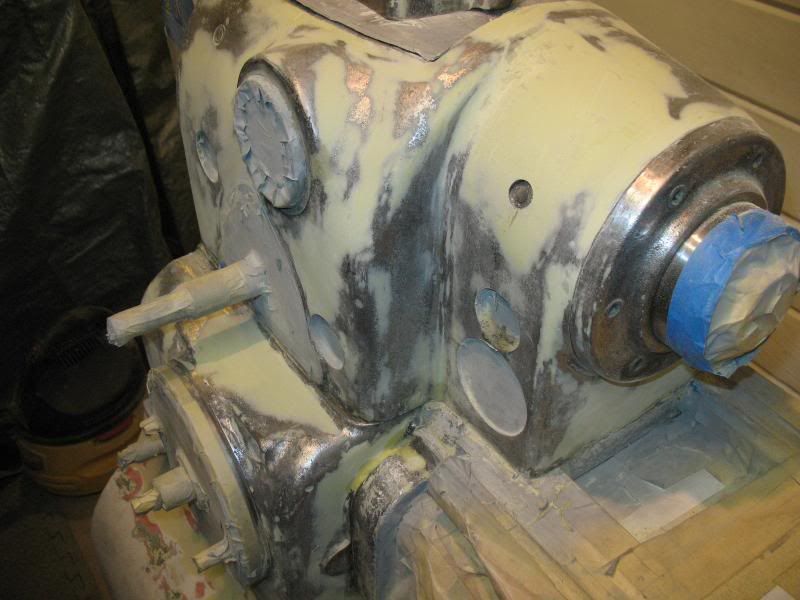
It took another 11 hours to apply 3 more coats of Rage to low spots and sand. I spent a lot of time trying to blend the headstock upper cover to the headstock. The Rage isn’t very good near sharp edges, so I used JB Weld to fix a corner that had broken off of the cover.
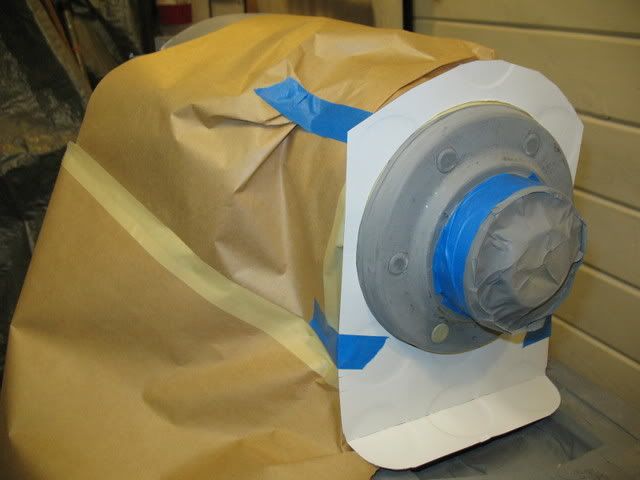
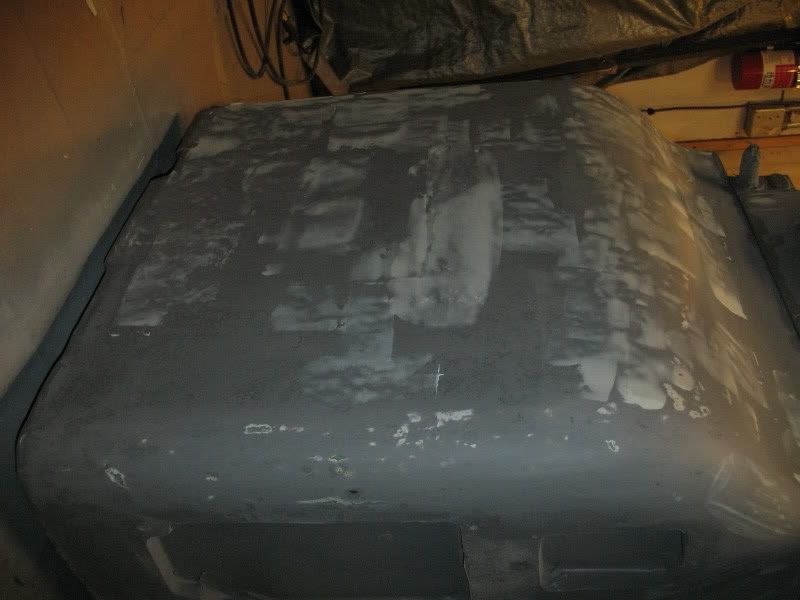
Re-masking for primer took another 3½ hours. One of the most tedious parts of masking is all the small round things like bolt heads. I solved that by putting masking tape on the backing paper from Avery labels, then punching various diameter round masking tape disks with a gasket punch set. (Slit the backing paper before you apply the tape.)
Here we are ready for primer:
A pencil sharpener and a length of dowel are handy to make plugs for small holes.
[to be continued…]
Cal
I haven’t been able to spend much time on the paint job in the last two months, for various reasons, but I’ve been pecking away at it. I’ve finished up with the base filler and have the high fill primer on now.
As I said in the previous thread, I decided that the 4+ layers of old paint on the headstock and gearbox had to go. There was just no way to get a decent result with all the layers of hastily applied paint on the many compound surfaces.
Here’s where I wound up after stripping the headstock and gearbox, primarily with 2” Scotchbrite discs on air tools:
One problem that I didn’t properly appreciate was the lump on the rear half of the headstock casting, over the spindle. Here’s a photo with a piece of steel strapping bent across the top of the casting. You can see that the left side is lower than the right (back) side. I suspect that something happened to the pattern position when it was being rammed up:
I had initially thought that the left (front) half was low and decided to fill it to match the back. But on closer inspection, it’s the other way around. A very crude grinding job was done at the factory to blend the casting to the front bearing retainer ring. I decided not to try to grind the casting to the correct shape; I just don’t have the necessary skills. Instead, I opted to fill the low area and try to blend it together.
I took DaveE’s suggestion to use Evercoat Rage body filler. It’s only available in gallons, but I was able to get partial can, about a third of a gallon, from a local body shop. It took about 4 hours to coat the headstock and gearbox. Most of that time was spent mixing filler and cleaning up tools between batches. It took me 20 to 30 minutes to mix a batch, apply it and clean up for the next round. I used a digital scale to help control the proportions. You’re supposed to mix 2% hardener by weight. I wound up using 25 to 30 grams of Rage with one drop of hardener.
Here’s a photo with most of the first coat of filler on:
Mostly out of ignorance, I proceeded as if I were icing a cake. Instead of the paper-thin layer that I had imagined, I wound up with an eighth inch or more in some places. The problem was compounded by ridges and high spots on adjacent patches which would lift up the putty knife and make the thickness even greater. (It’s definitely a good idea to trim those things off while the filler is still soft; something I didn’t do).
In retrospect, “icing” a lathe is a very poor way to proceed. I had done something similar with the Bondo 902 putty on the base and it was easy to sand down the high spots. Not so with the Rage! It took me 4 hours alone to just trim and file off the high spots so I could start sanding:
The headstock upper cover had been powder coated and all of the grain of the casting showed through. I decided to paint it as well and was pleasantly surprised how smooth the powder coating sanded out. It apparently makes pretty good high-fill primer.
It took another 15 hours of tedious work to finally get to a point where I just had filler in the low spots:
I wound up using just about every small sander I own, including a Dremel-type tool with a small diamond plated ball for the small radii:
… and an assortment of sanding blocks, dowels, scrapers, and the like:
I learned a few things along the way. If anyone is interested in more details on the sanding part, just say so and I can elaborate.
It took another 11 hours to apply 3 more coats of Rage to low spots and sand. I spent a lot of time trying to blend the headstock upper cover to the headstock. The Rage isn’t very good near sharp edges, so I used JB Weld to fix a corner that had broken off of the cover.
Re-masking for primer took another 3½ hours. One of the most tedious parts of masking is all the small round things like bolt heads. I solved that by putting masking tape on the backing paper from Avery labels, then punching various diameter round masking tape disks with a gasket punch set. (Slit the backing paper before you apply the tape.)
Here we are ready for primer:
A pencil sharpener and a length of dowel are handy to make plugs for small holes.
[to be continued…]
Cal

") Great job.. Wanna come over and finish my 62 Nova I have been working on LOL
Great job.. Wanna come over and finish my 62 Nova I have been working on LOL