Update as I get ready to button the beast back up.
The brake system is actually out of a 1965 Datsun Roadster. (Fairlady in Japan)
The master cylinder and pistons are available as new manufacture aftermarket parts. But they're pricey.
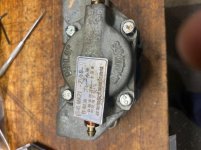
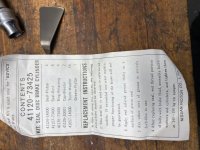
There are rebuild kits from Nissan at least for the pistons. Apparently the first 6 months of the 280ZX had the same pistons, so the rebuild kits are in Nissan's parts book as 280ZX parts. The kit I got was: Nissan seal kit # D1ABM-73425. The piston units themselves are Sumitomo Mk21, 2 1/8 B. (2.125 bore?)
They may have been used in other things.
The break pads are available as well, but I don't know the number. They don't have anything on them.
I got my kit from
DatsunParts.COM Inc.- Datsun Roadster Parts
Expensive and grouchy, but he had the gear.
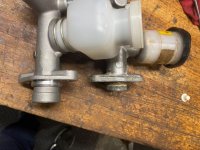
The master cylinder is just a 3/4" bore piston. You'll have to salvage the front yoke off of your existing master, and replace the piston yoke on the new one. They're different lengths. You'll also probably need to mill up a pair of spacers to space the new piston a bit farther back into the body of the lathe. On my unit, there's a .362" difference between the resting 'zero' or 'out' position of the piston, versus the mounting flange, compared with the original part. (translation: the new one sits a bit farther forward at rest, relative to the mounting flange, than the old one did.)
Since you're dealing with the brake bar, and have no adjustment for slop, you need to space the piston farther back to get the same 'home' position.
Watch out for the tube flanges: on the original master unit, it had a 10MM bubble flange fitting for the hose. The new aftermarket part has a 3/8-24 reverse cone fitting. So your original brake line won't fit without reflanging.
Watch out for the new brake pistons. The original ones had 10mm bubble flange ports on both sides. The new aftermarket ones have 10mm bubble flange on one side each, but 3/8" reverse cone on the other two. Use the reverse cones for the brake line coming from the master, and for the bleed screw. Save the two 10mm fittings for the transfer pipe between the two pistons. That one is 10MM bubble flange, and is a pain to redo if you don't have to.
Also: know of the wonder of copper crush washers. I just *COULD NOT* get the (new) brake line to seal to the master cylinder properly. Reflanged it twice, etc. Just would not stop leaking.
UNTIL! My local hose shop suggested I use a little 5 cent copper crush washer in-between the two sides of the joint.
Problem solved in one. They make them in 45 degree cone, intended specifically for this sort of thing. Absolute lifesaver.
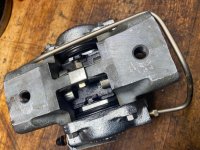
I ended up pulling the caliper once I decided to rebuild (ended up replacing) the pistons. Putting it back isn't too hard, but I'm still having alignment issues.
The current problem is that the pads won't retract as far as they drive in when pressed. So the pads rub after you hit the brakes the first time. Still working on solving that, but the brakes themselves work well, and no leaks.
Now that I've seen how these brakes work when they're working right, all the Moris and Whatcheons I've used in the past had bad brakes. When you hit that pedal now, it *STOPS*. Right now. So it's a thing worth doing.
Thoughts for the next poor bastard down this road:
I replaced mine with original parts. That's getting difficult and expensive. Think hard about what the guy above this said about replacing the master with a 3/4" trailer piston. It'd probably work just as well. The brake pistons aren't sacred either. Find a good auto parts guy, take him the entire caliper setup, and see if he can find you a set of pistons that'll fit the caliper, then get pads to fit them. Probably easier than what I went through tracking down the parts for a 65 Datsun. Certainly cheaper. The brake line can be replaced with flex hose. For this, it'll work just as well, and a whole lot easier to deal with. (Especially if your new master has 3/8" ports, rather than bubble flares. You'll have to change the line anyway.)
The original master cylinder has its port vertically, on the rear. The aftermarket has the port on the left side, as you look from the piston. That's a *much* easier place to be. Because you can see it, and it isn't obstructed by the fluid tank the way it is on the original design. Remember this when looking at trailer masters.
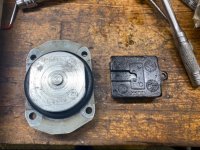
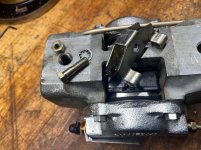
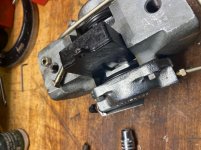
To change the brake pads, there's a slot in the rear of the caliper mount. (Right side of the motor axle, as you look at it in the lathe.)
There's a little gold clip in there, with a cross bolt holding it in. Remove that, then pull the clip straight out back through the hole in the caliper mount. The pads will pull straight out through the hole once that's gone. They have a groove in their piston-side faces that locks into a mushroom shaped tab that holds them in contact with the piston. Make sure that tab realigns when you put the new ones in. The put the gold clip back in, replace the bolt, and you're good to go. Try hand spinning it a few times with no belts on the pulley to make sure it's not dragging or binding.
Hope this is of some help to you.
Regards,
Brian


")
