What's new
What's new

Cazeneuve HBX360 is splitting threads! Why?

Patio

Plastic
Joined
Sep 29, 2010
Location
Washington state
I have a Cazeneuve HBX 360 lathe. It seems to be in pretty good condition over all, but it has an issue.
When trying to cut a thread it will split the thread. Some times it goes on for a bit and hits it right and then it will split the thread, the next path it will split it again, by about the same amount as it split the first one. Ends up being like a multi start thread, and I have no idea why. This happens across all the pitches, both metric and imperial.

I have pulled the top gear on the quadrant and the shear pins are intact and lined up.

I would entertain any thoughts on this.
Thanks in advance for any help I may receive.

Pat
 
Cut some threads without opening the half nuts. Just back out the tool, and reverse the spindle. DON"T TOUCH ANY OTHER CONTROL OR SETTING.
If that fixes the issue, There must be problems with the thread dial (or something else) but at least you have reduced the drive gear box possibilities.

Another test would be to cut threads with the carriage moving "out" from the headstock. Just to see if any drive gears or pins etc would show weakness if loaded the other way.

Does the the HBX360 have some special metric threading arrangement that allows disengagement of the half nuts?

The over all symptom sounds like either something is slipping, OR the metric change gears are being used with opening half nuts. That is a "no win" operating condition.
 
Hi Patio and Calg,

first of all, there are no half nuts. keeping the threading lever engaded is a good start to check of the problem is gone or still is present.
please check the oil level in the apron. IMO a low oil level affects the behaviour of the HBX.
I must say I've faced more or less the same issue with splitted threads as you have.
at the end it turned out that you realy firmly have to engage the thread lever, and not half way on the cautious side.
there are shear pins in the gearbox just left of the headstock, but when these are broken, this would affect the normal feed as well.
just give it an other try and let us know

regards, Bertus
 
Patio!

You might not have set the controls right, the problem can well be the bar on the front of the apron with the small numbers on the shaft. The text in the manual is not easy to understand for anybody, it is most likely written by the inventor himself (!) When you figure it out, it works as a charm! Read it again, and see if you can make sense of it.

CalG: This lathe does not have halfnuts, but a strange, but wonderful (= french) system not found on any other lathe.
 
Ole.steen, I have figured out how the threading works and the settings for each thread. Also i now understand why it does not need a thread dial.
I have run many test runs and there defiantly is a problem with the timing of the engagement during threading. It will engage properly for several passes the then the next path it will split the thread, by about .030". It may do that for a couple of passes and then it will go back to threading properly. If one used the hand wheel of the carriage to stay ahead of the back lash, when it is in one of the spitting passes it will some time be in the proper orientation with the thread. It is not easy to explain.
One of the things I have learned, is the shear pin in the gear box should be one solid 2mm, but has 4, roll pins, installed. Which leads me to believe someone may have had problems with the lathe, at some time in its life. I figure I will be pulling the apron soon to have a look.
What I need to understand now, is how the engagement of the apron to the screw, via the worm, works when the threading lever it engaged. I have a suspicion there may be some sort of interference or damage, happening at that point in the system. Any knowledge you have about how that works would be really helpful.
Thanks for all the suggestions, as I am on new ground here. :)
 
There is an adjustable trip mechanism to disengage threading when running against a stop. This has an adjusting screw on the extreme right side of the apron. Try to see if this needs adjustment or is loose or stuck. (bear with me if I don't remember all correctly, I sold the machine some years ago).

Ole
 
Ole.steen, I am aware of the adjustable trip mechanism. I need to learn how the internal mechanism works. I believe the problem will be found at the point where the mechanism connects and disengages, the apron to the screw.
 
Hi Patio,

I'm not sure the trip mechanism causes the problem as this mechanism's task is to kick out after hitting the stop.
more likely is wear on the shift systems of the 1-6/10- 1/2 - 1/4 selector or the K-L etc selector.
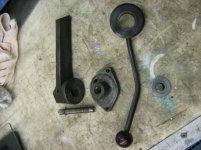
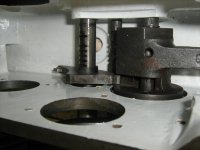
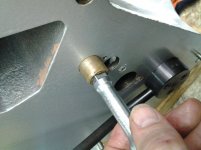
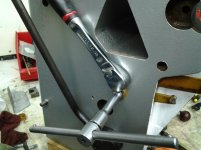
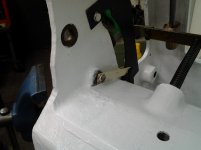
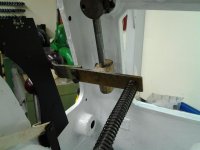
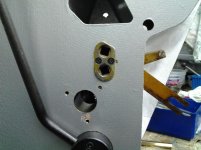
I put in some pictures of the internals of the apron and perticular the kick-out mechanism.
00-111118 trip spring holder.jpg01-120423 apron kick out lever.jpg02-120410 thread cut lever parts.jpg03-120508 mounting position of pull selector KLM.jpg05-120616putting lock pin in place.jpg

regards,
Bertus
 
Bertus, the problem is, that sometimes when the carriage is engage for cutting a thread it does not do it at the same exact time. Some times it is at the front of the backlash of the machine and others when it is at the back of the backlash of the machine. There is about a .030" of difference between the two engagement locations. The part I need to understand is what two part engage each other when the threading lever is thrown.

I understand how the traverse and cross feed engagements are done, but not the threading engagement.
 
Happy Happy news tonight! :lol:
The only problem with the way the lathe threads, is the operator!
There are 7 different settings that can effect the threading, I had all of them right but one.
The indicator on the lathe, that lets you know whether one is threading Imperial or Metric, is not intuitive. In fact it is the opposite of what it seems it should be. The Imperial to Metric indicator in the selector window has a red color that will move from under one window to under the other window. When the red is under a window, that is NOT the window you should be using. You use the one that now has nothing under its window!

I was mentally and physically, preparing to disassemble the entire apron. The feeling of relief would be an understatement at this moment.
During this ordeal, I have learned much about the operation of this machine. I also may have a lead on some parts, but that is yet to be seen and I won't know anything about that for a couple of days.
I think I will sleep good tonight. :)

Thank Bertus and Ole for time you have spent trying to help me. Most of my postings have been over on Home Machinist forum if you are interested in how I got to this point, as I am not a machinist by trade. By day I am on electrical contractor.
Here is a link. The Home Machinist!
 
Hi Patio,
that's realy good news.
in the beginning you've really to look carefully to each selector. I've learned it the same way.
But the system is alright. you should notice a red or a GREEN color,
I post some pictures to show you.
01-Afb026.jpg
01-back of selector slide.jpg
02-slide construction.jpg
This is the coloured strip seen in the front and from behind.
when a part is painted black, you'l be fooled.
this is how it should look from the outside.
00-2014-04-12 15.59.27.jpg
I hope you will enjoy your lathe, because it is a technical marvel
BR,
Bertus
 
I'm happy for you!

And for myself, at being able to "hit the problem" even without familiarity with the machine details.

"The over all symptom sounds like either something is slipping, OR the metric change gears are being used with opening half nuts. That is a "no win" operating condition."

Even a blind pig finds an acorn from time to time ;-)

My psychiatrist would tell me that is healthy. ;-)
 
Bertus, there is a red and maybe a green, I am not at the lathe. If there is a green it just makes the window look empty, as in no indication where as the red is a definite indication, and that is what threw me. I was understanding the red to be be a positive indication when in reality it indicates a negative.

You seem to have a really good set of pictures of your lathe. Would you happen to have a picture of the end of the speed and fwd/rev rods, where they connect to the levers, inside the gearbox?
 
Patio,
there should be green. this is now less important to you, but atleast helps to speed up te selecting process.
yes, I believe I've some pictures for you. I hope they show you the details you're looking for.
2013-09-16 20.56.09.jpg

2013-09-16 20.56.32.jpg

2013-09-16 20.59.36.jpg

2013-09-16 21.05.17.jpg

2013-09-16 21.32.37.jpg

in the next post you'll find some more.

BR.,
Bertus
 
Hi Patio,
here are some more.
2013-09-16 21.33.04.jpg

2013-09-16 21.56.40.jpg

2013-09-16 21.56.46.jpg

2013-09-16 21.57.02.jpg

these are the most clear pictures. In total I happen to have 630 pictures of the most components.
This is a impression where I started.
111230 parting out the Apron-1.jpg

it took al lot of cleaning, I can tell you.

BR.
Bertus
 
Bertus, You have come a long way to get your Caz to where it is today. It does not look like that machine would have survived, if not for your great effort.
I am fortunate of have bought a machine in really good condition to start with. I have other projects that have been waiting since I bought the lathe and don't need another project at this time. The pictures you have posted, are very helpful. Someday I intend to move the controls back to the apron which will make the lathe very easy to run, as intended. At the moment the controls are to the far right end of the lathe and is a reach, but it works easy enough for now.
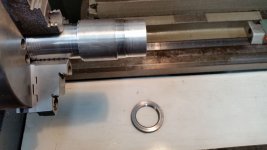
I turned a threaded bolt, to match the spindle preload nut, so I can make a lock nut for it. My first, proper threads, with the lathe.
20151113_203628a.jpg20151113_203640a.jpg
 
Hi Patio,
your making good progress. having a project opertional is always a relief and opening new possibilities.
Yesterday I had to make a M35 x 1.5 in bronze for a longitudinal feed screw of a milling machine. I was threading at pretty high speed and didn't engage one right. result was a splitted thread. luckely only minor. I started with the Caz project with the idea of just replacing the seals in the variators.
but got dragged in a still on going total overhaul of the HBX. there are some leaks to cure and the nut in the top slide needs to be replaced. this is a TR 16 x 5, which is non standard. at this point I can use the lathe to produce parts for other project and small jobs to raise money to re-invest in the shop.

regards,
Bertus


Back
Top