What's new
What's new

Project Schaublin 135

marcsO

Hot Rolled
Joined
Mar 24, 2020
Location
SURREY
I have posted a few threads on my new/old Schaublin 135 lathe and felt that now I have the machine it would be best to use this new thread to document the journey to 'revive' this 50 year old machine to a condition that hopefully ticks my boxes and works sympathetically with the machine.

I'm not planning a back to new renovation and currently the plan is to strip the key mechanicals and clean and check over and re-assemble, clean the paint and metal surfaces as best I can, check the lubrication and drive system, brake system and test the motor etc.

Once this is done and the machine hopefully looks good to keep and enjoy I may then spend more time bringing it to another level, time will tell.

The machines history is like most old machines not fully documented but it appears to have been sold originally to a US dealer, it found its way back to the UK and was used by a well respected engineer who set up a charity to manufacture devices to help disabled people use every day tools and devices, when he retired the machine was donated to the charity and was used for prototyping. I heard about the machine some 18 months ago when I was told that a Schaublin might be in this charities possession and 'could' be for sale. I contacted the charity and at the time they were not willing to sell, I kept in touch and at the beginning of this year I reached out and was told that they would sell, we agreed a price and the 135 was bought. It has stood standing for the last 18 months in a cold and sometimes damp building, and as a result I have not even had a chance to start the motor so it may be a dud from the get go but hopefully not. The purchase price was worth taking the risk.

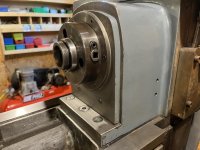
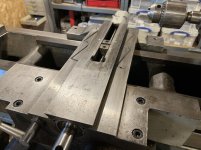
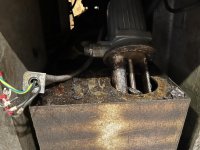
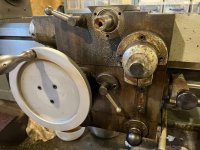
Here is the 135 as I bought it:
View attachment 342226
View attachment 342227
View attachment 342228
View attachment 342229
View attachment 342230

Hopefully it will be fun and look forward to all your help along the way.

More to update shortly as I catch up with a few bits posted on the other threads to get this one up to speed.......


Marc
 
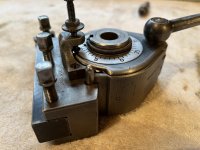
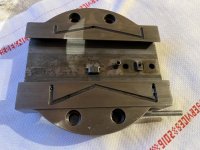
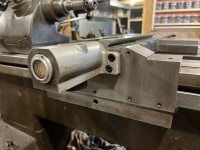
Did some work on the toolholder and tool post that came with the 135, what appears to be an original Multifix set up, size A. There are only three toolholders so will probably use these to do the checks once (hopefully) the 135 is running before deciding on tooling up with some holders or looking at the E version which I read is an option being more robust but requires, as I understand, the slide being machined to allow the holder to sit lower so the tips make the centreline.

I posted a thread to ask about this and if the slide I've seen in some pictures of these lathes is a factory item or are they customer modified to achieve the outcome, if anyone has more info on this slide etc I would like to understand my options.

The Multifix all cleaned up OK so no issues there, the slides and rails etc also seem fine once I worked out how to get it apart! I also have read horror stories of the leadscrew being totally rusted due to water soluble coolant sitting inside the slide and rusting the leadscrew, seems I'm lucky and the items whilst very dirty etc all cleaned up well enough, lots of WD40 and Scotchbrite pads along with a clean in petrol. Will get the airline on all the oil channels and feeds to ensure they are clear as typically some bright spark has pumped grease into the oilers, fortunately as it appears to not be worn I think the beds will suffice without any major attention or scraping.

Final ask, are the little oiler nipples which do like like the normal grease ones you find on machinery available from anywhere other than Schaublin?

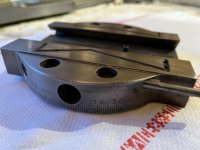
Few pics of the above items cleaned up for the 'stage 1 revival'..

IMG_3856.jpg
IMG_3857.jpg

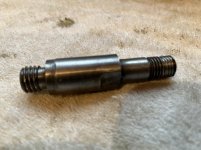
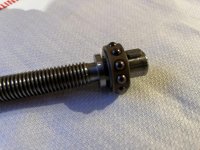
The tool post bolt will need to be machined up as its worn badly..

IMG_3858.jpg

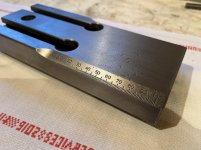
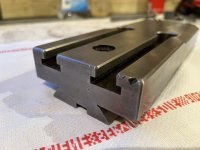
Slide and swivel base..

IMG_3863.jpg
IMG_3864.jpg

More to follow

Marc
 
IMG_3865.jpg
IMG_3867.jpg
IMG_3868.jpg

Leadscrew and bearings seem good (in my view but that's not from an experts eye!)

IMG_3859.jpg
IMG_3860.jpg

Marc
 
Peter I'm not planning to strip gearbox etc or the belt system, spindle bearings etc just the parts that are simple to do as routine. My background is engineering and I raced saloon cars and build rc jets for customers around the world so whilst I'm no lathe expert I do understand mechanical devices and do have tools to do most things.

I will clean and check the apron and ways, slides and tailstock to ensure they are clean and lubricated and not bunged up with crud and grease which I have found already, will remove the suds tank and pump for now as its horrible in there and I don't use flowing coolant anyway, will check the oil feed system and flush it out and replace with fresh etc too as the oils have been in the machine for well over 2 years.

I'm sure there will be things I need to ask and its why I like a set of drawings to show how things are assembled as it makes the work less of a head scratcher.

Marc
 
Two items for your expertise....

The 135 came with a genuine Multifix A tool post and 3 holders, I noticed that when the holder was mounted to the slide the top of the cutting tip in a toolholder with down rake was just above the centreline and there was no more downward adjustment, admittedly the tool carrier fits the toolholder with no spare room top or bottom so a thinner toolholder might deliver a solution but it would also be less rigid so here is the question. I have seen a cut away version of the 135 slide that allows a tool post like the A or the E to be fitted and give a lower fixed position to use decent toolholders. Do any of you know if its a Schaublin part which required special order and loads of £££££'s to buy or an option for a customer to do the modification themselves? If the latter the two slots in the slide that take T nut fixtures would need to be partially machined away whereas the picture I saw of a lowered slide did not appear to have these two T slots which made me think its a special part.

Oil feed system. I've not checked mine yet but it seems one of the issues these machines have is leaking banjo joints, one by the pulleys liberally covers belts in oil rendering them useless which is a costly issue. Could or has anyone done a conversion using something like Festo push fit fittings to replace the banjo affairs and whilst not 'original' would IMO be way more reliable and practical?

Feedback really appreciated.

Marc
 
Last edited:
There aremany small differences between the different 135
Till up to be identical to a 150 beside the centre hight
I machined a new topslide for a 125 recently
Not to comlicated Get a good piece of CI Keep in mind to slightly machine the opposing part with the same dovetail cutter to get the exact same angle
You can make it as high as you like
I would leave those T-slots out then
They tend to break out

Peter
 
Wow new topslide, if you ever do one for a 135 suitable for the Multifix let me know and I would give you an order :-)

Been locally cleaning the 135, petrol and brush mainly and also found hand cleaner cloths do a decent job on the less caked on grime too which is less aggressive to paint and hands!

Still a little to do on some parts still but things are cleaning up nicely, going to keep the paint etc as is as its the original and shows the character etc....

IMG_3854.jpg

IMG_3882.jpg

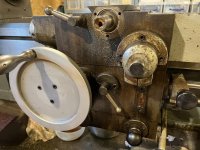
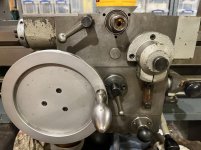
Controls all removed and cleaned up and gearbox side cleaned....

IMG_3884.jpg

IMG_3886.jpg

Headstock....

IMG_3883.jpg
 
Last edited:
I've got a similar aged 135 (same rounded headstock and same pedestal base) and a Multifix E was a good fit on the 'standard' topside imo.
 
Few more pics of progress...

Carriage slide off and being cleaned and checked, leadscrew seems good, will clean out the tray it runs in as this is filled with oil when completed. Sadly when I removed the collar to the hand wheel there was an oil seal inside which I did not see and pulled it off over the key which sits in leadscrew shaft, its damaged and although its a secondary seal will see if I can find a replacement without having to go via Schaublin.

Also started tackling the coolant tank, OMG is this a horrible place to be, nasty oily mess and the tank is very full so tried to remove the pump last night but it would lift out as the base casting is not high enough so will have to drain the tank first and then slide it out before removing the pump, one design element Schaublin missed sadly....

IMG_3887.jpg

IMG_3889.jpg

Apron is the next job after removing and cleaning where the coolant tank was, I don't plan to re-fit the coolant tank and pump but will re-furbish and service the pump so they are ready to be used if required later. I will simply fit a plastic tank inside and let any fluids used to cool or lubricate drain into this via the drain pipe in the chip tray, emptying it when needed.

Apron in its current state....

IMG_3888.jpg

Marc
 
16mm shank tools. The adjustment is pretty much bottomed out though on the holders but they do fit. I also had a multifix A on my machine when I purchased it too but found it too small for what the machine is capable of really.
 
Interesting exactly my thoughts about the A, will get an E and then see how the tooling lines up and adjust the slide once I have measured up.

Marc
 
Peter I would struggle with the scraping and hardening processes once the slide was made, done neither in my time....
 
Apron cleaning taking shape, checked the oil dosing system and oil is getting up the the slide beds, one side is getting more oil but guess when the slide is on and the feed holes are restricted with some back pressure the delivery will even out a little - is that a decent assumption?

One question on the main lead screw which is covered with that expending coiled sleeve, what is the best way to move the sleeve to inspect the leadscrew and clean if required?

Apron before and after (job almost done just a little more Scotchbrite on the bare metal faces to bring them up a bit....)

IMG_3854.jpg

IMG_3848.jpg

IMG_3888.jpg

IMG_3899.jpg

IMG_3901.jpg

Marc
 
One question on the main lead screw which is covered with that expending coiled sleeve, what is the best way to move the sleeve to inspect the leadscrew and clean if required?

You can undo the end bracket on the tailstock end and that right side coil should be able to be removed.

You are then able to unwind the lead screw out towards that direction with the carriage handwheel and the other coil can be compressed and taken out from the left side of the leadscrew. But do NOT go too far to go past the ball screw otherwise you will have the balls fall out. I lightly applied kluber to grease the screw after cleaning. Hope this makes sense.


Back
Top