What's new
What's new

10K handle nut threads stripped on crossfeed lead screw?

ohmanitsdan

Plastic
Joined
Mar 5, 2021
Howdy! New here, but planning to dig in and learn a bunch from all of you.

I recently bought a 1971 South Bend 10K model A lathe. It's been apart and back together a few times as I've cleaned it up, re-lubed it, and replaced the lead screw nuts. I shimmed the crossfeed lead screw bushing ~0.036" to get the zero dial tick mark to be anywhere near vertical - not sure if there's a better trick for that, but the biggest problem: I put the handle back on, and the little retaining nut that holds the handle on stripped.

The threads (er, single thread, I guess? hah) on the lead screw appear all kinds of buggered up. The nut also doesn't thread onto any of my standard thread identifiers, nor does it thread onto the lead screw anymore at this point. Per this thread, the threads are likely #12-24 (or 7/32-24, yeeesh), but that doesn't really help me fix the lead screw.

I read through this thread on repairing the handle end threads of the lead screw, but unfortunately, this is the only machine I have so far in my shop. I guess I could limp through cutting some threads into an insert, drill out the end of the lead screw, and press / Loctite in the insert, but it feels a little risky for the very first machining operations on an older machine I've never used.

Does anyone have any other tricks or advice for fixing this?

IMG_4136.jpg
IMG_4138.jpg

Thanks in advance!
 
Could cut off the hosed stud, drill and tap a suitable hole for some threaded rod and then tack, stake or epoxy said threaded rod in place.

Maybe borrow someone else's lathe to do the center drilling so you don't have an eccentric stud afterwards. See if there are any maker-spaces or job shops in the area who might be willing to donate five minutes of lathe time pro-bono.

Otherwise if you're good with a welder you might get away with building it up, turning it to size then running a threading die over it.
 
I fixed my compound screw by cutting off the threaded portion and drilling and tapping a hole for a retaining screw. I think I used #6 32 counter sunk socket head screw. I made a brass disk that I counter sunk the screw into and secured with Locktite. I turned the OD of the disk to fit recess in the handle and dome shaped the end so it looks right. It’s not factory anymore but looks good and is perfectly functional.

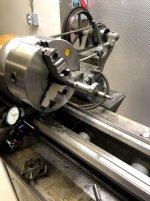
You should be able to do this on your lathe. Lock the cross slide in position with the gib and use the compound to face off the threaded stub. Drill and tap with the tailstock.

Hope this helps.

Ben
 
I fixed my compound screw by cutting off the threaded portion and drilling and tapping a hole for a retaining screw. I think I used #6 32 counter sunk socket head screw. I made a brass disk that I counter sunk the screw into and secured with Locktite. I turned the OD of the disk to fit recess in the handle and dome shaped the end so it looks right. It’s not factory anymore but looks good and is perfectly functional.
You should be able to do this on your lathe. Lock the cross slide in position with the gib and use the compound to face off the threaded stub. Drill and tap with the tailstock.
Ben

After studying the pics, I think I have to agree with Ben. As much as I personally would like to keep the #12-24 thread for the sake of the
button-nut, there just don't seem to be enough material to drill and tap in the shaft for that....would be a very slim side-wall, and not worth the risk.

Personally, I'd go bit larger than a #6...that is so very tiny and prone to get messed up. Maybe a #10 or #8? I don't have the part in my hands
for a visual inspection.

Fashioning a new button nut shouldn't be too tough....if drilled thru for the screw, then it's really just a fancy spacer.

If you have no good options, send it to me an I'll drill and tap the hole for you.

PMc

View attachment 315708
 
Thanks for the thoughtful responses - I think I like the gib-lock / compound facing of the screw plan to tap a hole and make a retaining nut from a screw. This feels a lot more doable than any kind of press-fit / male thread part, at least until I get a bit more familiar with this particular machine.

mcload, that machine is GORGEOUS! I'm starry-eyed looking at it! :eek:

I bought some epoxy paint to redo mine as I have time, but unfortunately that's not critical path to getting this up and running for my company.

I'll let y'all know how it turns out. Cheers!
 
The real takeaway from this thread is locking the cross feed gibs and using the compound as a cross feed .The lathe can repair its self. Use a face plate and a square to square up the compound for best accuracy. The compound can also be used as a longitudinal slide when making little things on a big lathe.A parallel bar will align the compound for this trick.
 
The real takeaway from this thread is locking the cross feed gibs and using the compound as a cross feed

Yes! This is where I just couldn't quite visualize how to do this, but was the key piece of advice. Worked like a charm. I was pretty impressed by how well the whole process went, and how easily machined the lead screw was. Part of me had it in my head that the shaft would be rock hard, but I was pleasantly surprised.

First, I made the collar for the socket head screw from some stainless - I turned down the head of the screw, set it into a counterbore in the collar with Loctite 638, and put a few angled cuts on the part to make it look "rounded" without actually being radiused. Then I snipped off the mangled thread nub with a hacksaw, faced it, and drilled + tapped an #8-32 hole. The collar/nut/screw thing still sits just a bit more proud than I'd like, but I didn't want to weaken the part by extending the c'bore for the screw head into the stepped down diameter.

Thanks again for the guidance, and hopefully I'll have a tip or two to contribute back someday! Next up: replacing that godawful plastic hackjob with an actual freespinning steel handle spindle thing. Anyone know what that's called? :confused:

IMG_4152.jpg
IMG_4153.jpg
IMG_4157.jpg
 
That looks like a first class repair to me. I was taught that the lathe is the king of machines because it is the only machine that can make itself. Now for the handle, or the bat. Make one. You have a lathe. The skills honed in each project make you better at the craft. I just updated my rebuild thread where I had to replace a couple of knobs. Maybe you can find some inspiration there.

10L W/chip pan, need short leg

Never posted a link, hope it works.
 
Nice job with the fix...first class. And thanks for the photos!

Those handle knobs or "bats" are available. I know McMaster-Carr has either the entire crank or just the bat/handle itself. They do have the spinning type handle too.


Balanced Machinable-Hub Crank Handles

A bat! Learn something new every day. Thanks for the link! I actually didn't realize they're weight balanced, tbh, but it makes a ton of sense. That repair might have to wait a bit, but hopefully after I wrangle a milling machine into our little shop, I'll be able to sneak it into the queue.

Cheers!


Back
Top