Paula
Titanium
- Joined
- Sep 16, 2005
- Location
- Indiana, USA
Posting Pictures
**Note: Great work by Paula, doing the original write up here. But as of 5-19-2022, these instructions in the first posts no longer work with system upgrades. Always go toward the last page of the thread for more up to date information regarding this.
You are encouraged to place pictures within your posts in the South Bend Forum. (I heard somewhere that each one is worth 1000 words!) Unlike some forums out there, Practical Machinist does not host forum members’ pictures -- they must exist on a separate internet server.*
In some cases, your Internet Service Provider (ISP) account includes a modest picture-hosting provision. If not, there are numerous picture-hosting services available on the internet. One of the most popular is Photobucket.com. I have used this service for several years, and it has proven reliable and simple to use. Since I am most familiar with Photobucket, I will use it as an example for the purposes of this tutorial, though other image hosting services will no doubt function in a similar manner.
Photobucket has two basic types of accounts: “Free” and “Pro”. The free account is fine for most users, but if you post a lot of pictures, the modest cost (a couple bucks a month) of the Pro account may be worthwhile for you. Once you have created your account, the first step is to load your pictures into Photobucket. These can be pictures that you took with a digital camera, and uploaded to your computer, images that you have scanned, or even images copied from elsewhere on the net. Note that in the latter two cases, the subject images can only be those which are in the public domain (non-copyrighted).
Though not an absolute requirement, it’s very handy to have some kind of image-editing program on your computer for re-sizing, rotating, cropping, etc. of your pictures. I use a very old (circa 1997) copy of MicroGrafx Picture Publisher that was bundled with the first digital camera I purchased. It has PhotoShop-like capabilities, but nothing so elaborate is needed. There are numerous shareware programs available out there that will do the basics. Just Google something like “Image Editing Software”.
Once you have uploaded your images to Photobucket, the rest is easy. Just go to the particular “album” in Photobucket where the image you want is located. You will see a “thumbnail” (reduced size version) of the picture, and below it will be several “html” codes for you to select from:
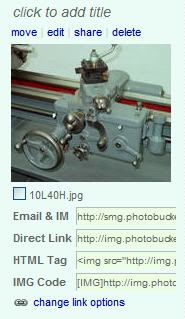
To place the image in your post, simply click on IMG Code. The word Copied will appear, indicating that the image URL has been copied to your Windows “clipboard”. Now, go to the South Bend Forum window where you are composing your post. Right-click where you want the image to appear, and click “paste”, and the image’s URL will appear. That’s all there is to it! When you click on “Add New Topic” (or “Add Reply”), your image will magically appear where you pasted the Photobucket IMG Code in your post.
In general, placing any valid image URL between the tags will cause the image to appear in your post.
Getting the Size Right
When posting images to this forum, it is important that the image (or images) are not so large so as to cause difficulties for those viewing the thread. When a very large image appears in a post, most browsers will re-format every post in the thread to the same width as the post with the large image, making it necessary to scroll back-and-forth to read the text in a normal size window. For this reason, the recommended maximum image size is 800 x 600 pixels. Those refusing to follow this guideline are subject to having the offending image converted to a link, which will open the image in a separate window when clicked.
With Photobucket, re-sizing your images is easy...
1) On your Photobucket page, go to the “thumbnail” of the oversize image, and click edit:
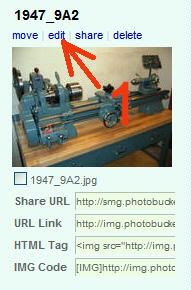
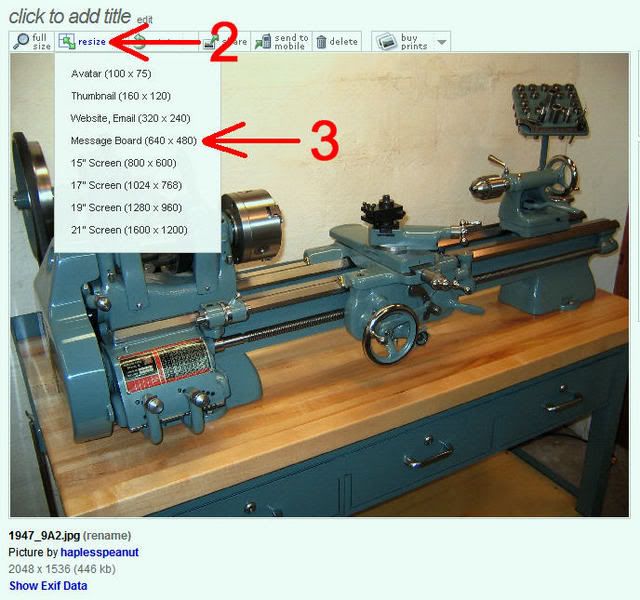
2) The image opens, and several editing options appear above the image. Click on Resize.
3) A drop-down menu displays the available image size options. Click on Message Board (640 x 480) (or select a smaller size, if desired):
And that’s all there is to that.
For Advanced Users
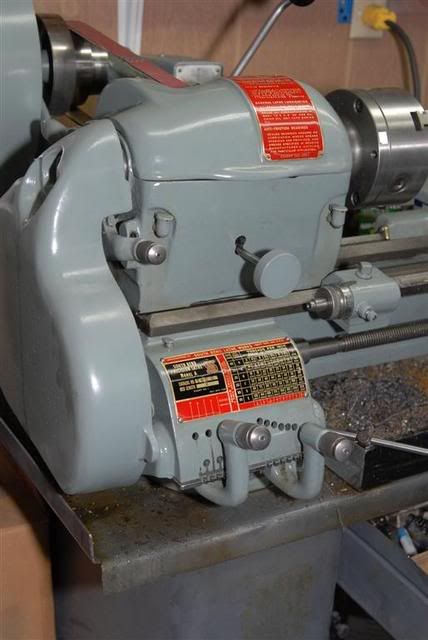
If you want to get fancy, you can make your image “clickable”, such that when someone clicks on it, a full-resolution image will open in a new window. To do this with Photobucket, you will need to upload two separate versions of your image, with different titles (Example: MyLathe-large.jpg and MyLathe-small.jpg). The small image (up to 640 x 480 size) will be the one that will appear in your post, and when clicked upon will open a new window with the LARGE image. Use the following format to place the clickable-image in your forum post...
[ url="Photobucket Direct Link for large image"]"Photobucket IMG Code for small image"[/url ]
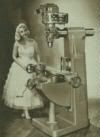
...replacing the text in quotes with the appropriate Photobucket link -- no spaces. Using this method, you will get the small image in your post (with a blue border), and when someone clicks on it, a new window will open with the large image. Nifty! Here's an example:
That pretty well covers the basics. If there are any questions, comments, corrections, etc., feel free to post them here in this thread.
Good luck!
Paula
___________________________________________________
*Since adopting the new forum software, this is no longer true. Now you have the option of uploading your own images to the forum, without having to have them hosted on another server.
After you click "Post Reply", down below the "Reply to Thread" box, there is another box called "Additional Options". Click on "Manage Attachments" to upload images from your computer. Note that these images will not be imbedded in the text of your post, but will appear as "thumbnails" at the bottom of your post (as shown in the example below), which can be clicked to open the full-size image.
**Note: Great work by Paula, doing the original write up here. But as of 5-19-2022, these instructions in the first posts no longer work with system upgrades. Always go toward the last page of the thread for more up to date information regarding this.
You are encouraged to place pictures within your posts in the South Bend Forum. (I heard somewhere that each one is worth 1000 words!) Unlike some forums out there, Practical Machinist does not host forum members’ pictures -- they must exist on a separate internet server.*
In some cases, your Internet Service Provider (ISP) account includes a modest picture-hosting provision. If not, there are numerous picture-hosting services available on the internet. One of the most popular is Photobucket.com. I have used this service for several years, and it has proven reliable and simple to use. Since I am most familiar with Photobucket, I will use it as an example for the purposes of this tutorial, though other image hosting services will no doubt function in a similar manner.
Photobucket has two basic types of accounts: “Free” and “Pro”. The free account is fine for most users, but if you post a lot of pictures, the modest cost (a couple bucks a month) of the Pro account may be worthwhile for you. Once you have created your account, the first step is to load your pictures into Photobucket. These can be pictures that you took with a digital camera, and uploaded to your computer, images that you have scanned, or even images copied from elsewhere on the net. Note that in the latter two cases, the subject images can only be those which are in the public domain (non-copyrighted).
Though not an absolute requirement, it’s very handy to have some kind of image-editing program on your computer for re-sizing, rotating, cropping, etc. of your pictures. I use a very old (circa 1997) copy of MicroGrafx Picture Publisher that was bundled with the first digital camera I purchased. It has PhotoShop-like capabilities, but nothing so elaborate is needed. There are numerous shareware programs available out there that will do the basics. Just Google something like “Image Editing Software”.
Once you have uploaded your images to Photobucket, the rest is easy. Just go to the particular “album” in Photobucket where the image you want is located. You will see a “thumbnail” (reduced size version) of the picture, and below it will be several “html” codes for you to select from:
To place the image in your post, simply click on IMG Code. The word Copied will appear, indicating that the image URL has been copied to your Windows “clipboard”. Now, go to the South Bend Forum window where you are composing your post. Right-click where you want the image to appear, and click “paste”, and the image’s URL will appear. That’s all there is to it! When you click on “Add New Topic” (or “Add Reply”), your image will magically appear where you pasted the Photobucket IMG Code in your post.
In general, placing any valid image URL between the tags will cause the image to appear in your post.
Getting the Size Right
When posting images to this forum, it is important that the image (or images) are not so large so as to cause difficulties for those viewing the thread. When a very large image appears in a post, most browsers will re-format every post in the thread to the same width as the post with the large image, making it necessary to scroll back-and-forth to read the text in a normal size window. For this reason, the recommended maximum image size is 800 x 600 pixels. Those refusing to follow this guideline are subject to having the offending image converted to a link, which will open the image in a separate window when clicked.
With Photobucket, re-sizing your images is easy...
1) On your Photobucket page, go to the “thumbnail” of the oversize image, and click edit:
2) The image opens, and several editing options appear above the image. Click on Resize.
3) A drop-down menu displays the available image size options. Click on Message Board (640 x 480) (or select a smaller size, if desired):
And that’s all there is to that.
For Advanced Users
If you want to get fancy, you can make your image “clickable”, such that when someone clicks on it, a full-resolution image will open in a new window. To do this with Photobucket, you will need to upload two separate versions of your image, with different titles (Example: MyLathe-large.jpg and MyLathe-small.jpg). The small image (up to 640 x 480 size) will be the one that will appear in your post, and when clicked upon will open a new window with the LARGE image. Use the following format to place the clickable-image in your forum post...
[ url="Photobucket Direct Link for large image"]"Photobucket IMG Code for small image"[/url ]
...replacing the text in quotes with the appropriate Photobucket link -- no spaces. Using this method, you will get the small image in your post (with a blue border), and when someone clicks on it, a new window will open with the large image. Nifty! Here's an example:

That pretty well covers the basics. If there are any questions, comments, corrections, etc., feel free to post them here in this thread.
Good luck!
Paula
___________________________________________________
*Since adopting the new forum software, this is no longer true. Now you have the option of uploading your own images to the forum, without having to have them hosted on another server.
After you click "Post Reply", down below the "Reply to Thread" box, there is another box called "Additional Options". Click on "Manage Attachments" to upload images from your computer. Note that these images will not be imbedded in the text of your post, but will appear as "thumbnails" at the bottom of your post (as shown in the example below), which can be clicked to open the full-size image.
Attachments

Last edited by a moderator:

 )
)")