I am new here, the name is Brian.
I am just beginning down the path of this project, converting my Miller SR-150-32 from 3-Phase to 1-Phase using the Haas-Kamp Conversion.
Based on the excellent past posts by David Kamp, and his assistance with my particular machine, I am going to undertake this project.
I will post as I go, and try to make this serial in nature, so that it will be easy to find the installments. Hopefully at the end I can link them all back into this original post, and make it even easier.
David Kamp's fantastic, inspirational work is here.
History
I bought this welder, wanting a TIG machine, not knowing much of anything about it. The price was right and it came with a full 120CF Argon tank, so why not? Or so I thought. The seller was either dishonest, which I don't think he was, or he was just as naive as I was, because when I tested the machine at his place (running off 220VAC 1-phase), it was enemic and I just didn't know any better.
The machine was in good shape, and it has a lot of great features that only come on >$1000 welders, and since I only paid $350 for the whole package, the size was the only real down-side.
The SR-150-32 has high-frequency start, gas in and out timers, and the the remote foot pedal. The other options were not installed on this particular machine; spot weld timer, and Volt and Amperage guages.
I had to rehab the HF start, but it didn't take much work, and the thing seemed to run great - as the fan, timer, and HF start all run off 2 legs of the 3-phase input source, it ran fine wired to 220vac 1-phase.
I ended up spending some good money on a new Lincoln PowerMig 210MP with the TIG setup, and that has become my welder of choice, so I am really wanting to sell this Miller - but NO ONE has 3-phase power, so this is really a vehicle for me to make the machine usable and attractive for a cheap price.
Challenges
The largest challenge to start is that my machine does not match the Miller documentation available here.
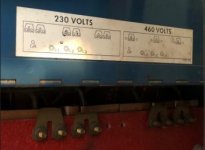
This machine is 230/460 volt, so the transformer layout in the manuals is wrong (200/230vac). As luck would have it, thanks to David's help in my comprehension, this is an advantage for me - as the 200/230 VAC machine's transformers would not be suitable for this conversion effort. Lucky me!
So I will be pulling the cover this weekend and looking for the correct wiring diagram on the inside of the cover, as per David's recommendation.
I will continue this thread as I uncover details and make progress. For now, I will end with some pictures.
Glamour Shots


This diagram is incorrect:

Note the Wye ties ... in the 220 configuration they put the twin coils in parallel, and in the 460 configuration they put the coils in series.

NEXT STEPS
1. I need to check for an accurate wiring diagram in the machine case
2. Barring that, pull the rear wiring interface and trace wires, and validate that my machine is configured the way I think it is. Should be similar to David's SRH-333 project machine
3. Come up with the wiring change plan, and document it.
4. Acquire capacitors (if I don't already have them)
5. Perform modifications
6. Test & Report
I am just beginning down the path of this project, converting my Miller SR-150-32 from 3-Phase to 1-Phase using the Haas-Kamp Conversion.
Based on the excellent past posts by David Kamp, and his assistance with my particular machine, I am going to undertake this project.
I will post as I go, and try to make this serial in nature, so that it will be easy to find the installments. Hopefully at the end I can link them all back into this original post, and make it even easier.
David Kamp's fantastic, inspirational work is here.
History
I bought this welder, wanting a TIG machine, not knowing much of anything about it. The price was right and it came with a full 120CF Argon tank, so why not? Or so I thought. The seller was either dishonest, which I don't think he was, or he was just as naive as I was, because when I tested the machine at his place (running off 220VAC 1-phase), it was enemic and I just didn't know any better.
The machine was in good shape, and it has a lot of great features that only come on >$1000 welders, and since I only paid $350 for the whole package, the size was the only real down-side.
The SR-150-32 has high-frequency start, gas in and out timers, and the the remote foot pedal. The other options were not installed on this particular machine; spot weld timer, and Volt and Amperage guages.
I had to rehab the HF start, but it didn't take much work, and the thing seemed to run great - as the fan, timer, and HF start all run off 2 legs of the 3-phase input source, it ran fine wired to 220vac 1-phase.
I ended up spending some good money on a new Lincoln PowerMig 210MP with the TIG setup, and that has become my welder of choice, so I am really wanting to sell this Miller - but NO ONE has 3-phase power, so this is really a vehicle for me to make the machine usable and attractive for a cheap price.
Challenges
The largest challenge to start is that my machine does not match the Miller documentation available here.
This machine is 230/460 volt, so the transformer layout in the manuals is wrong (200/230vac). As luck would have it, thanks to David's help in my comprehension, this is an advantage for me - as the 200/230 VAC machine's transformers would not be suitable for this conversion effort. Lucky me!
So I will be pulling the cover this weekend and looking for the correct wiring diagram on the inside of the cover, as per David's recommendation.
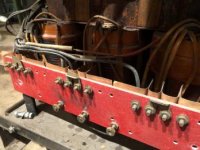
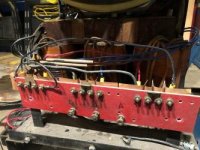
I will continue this thread as I uncover details and make progress. For now, I will end with some pictures.
Glamour Shots


This diagram is incorrect:

Note the Wye ties ... in the 220 configuration they put the twin coils in parallel, and in the 460 configuration they put the coils in series.

NEXT STEPS
1. I need to check for an accurate wiring diagram in the machine case
2. Barring that, pull the rear wiring interface and trace wires, and validate that my machine is configured the way I think it is. Should be similar to David's SRH-333 project machine
3. Come up with the wiring change plan, and document it.
4. Acquire capacitors (if I don't already have them)
5. Perform modifications
6. Test & Report
Last edited:


