What's new
What's new

Sharpening Wood Planer Blades on a Milling Machine.

Newman109

Diamond
Joined
Sep 4, 2006
Location
Sacramento County, California, USA California
I have a vintage Parks Wood Planer that I bought and refurbished in 1970. I used it to plane wood for guitar building until about 1977. It performed beautifully and it's been in storage ever since then in my barn.
My son, who also plays guitar, recently expressed some interest in building a jumbo-sized steel string guitar - think Gibson J-200. I said that I'd be glad to help him, sort of a father-son project.

In cleaning up the machine, I noticed that the blades needed some help. they were still in decent shape, except one of the three blades had some notches in it, probably from some embedded metal in a piece of wood for a project sometime in the past. The blades were new at the time that I got the machine and had never been sharpened.

Checking in the yellow pages and online, I discovered that there was no company in my area that specialized in sharpening blades. They are sold on eBay and Amazon and other sites, but they get something like $50 or so for a set of three.

I checked on You Tube and there are lots of methods shown there, some of which I liked, others not so much. The best ones involved grinding on a milling machine.

Being a hobby machinist with a large Webb mill, I decided to see what I could do to set myself up to sharpen them myself, even if I had to purchase some tooling for the project.

That led to the purchase of a small, Chinese-made tilt table that would move to 50 degrees, the same angle as the blades. That was around $100. I also purchased some fine 3" grind stones and a 3/8" mandrel to hold the stones.

Pictures and Notes:

I turned some large washers to secure the blades to the tilt table with T-nuts. I used a dial test indicator to tram the tilt table to the mill table and then the blades to the tilt table.

Grinding was accomplished with the spindle set at 2,000 rpm. The mill will do 4,200 rpm, but I wanted to conserve the stone. I cooled the stone with soluble oil mix in a spray bottle and used successive passes with my X servo, advancing a few thousandths on my DRO for each pass.

The blades came out very nicely and are within .001 width all along on all blades.

Hopefully this will encourage others to DIY. :)


1 (0).jpg1 (1A).jpg1 (3).jpg1 (16).jpg
 
Good work! Don't forget to balance them now.

Stuart

Thanks. That's good advice. The cutting head on the Planer is already balanced and I plan on weighing each blade individually and grinding the ends as required.

They came out remarkably equal though. When placed sharp side down on a table, the backs are perfectly in alignment. I don't expect to have to do much to make them all the same weight


.1 (19).jpg1 (20).jpg
 
Wouldn't want the grit on my mills, but looks like you got great work done!

Parks planer is not a high-speed matcher: if the knives are all the same width as you indicate, i would not bother to balance them out of the machine. Balance is always good, but the point is that slight changes in height or position of the gibs and the gib screws (e.g.) can have more effect than a few grams difference between knives. The head may be balanced, but if it is slightly different position in the bearings due to replacement, it will have more difference, etc, etc.

If the head can be taken out of the machine and balanced as an assembly, that's one thing when chasing grams. Matching individual components (after original set up) down to the knives themselves is mostly guesswork as to balance of the head after they are installed.

Not arguing about weighing to verify difference is minor, but suggesting not doing anything about minor differences. Next sharpening it will be a different knife.

smt
 
Wouldn't want the grit on my mills, but looks like you got great work done!

Parks planer is not a high-speed matcher: if the knives are all the same width as you indicate, i would not bother to balance them out of the machine. Balance is always good, but the point is that slight changes in height or position of the gibs and the gib screws (e.g.) can have more effect than a few grams difference between knives. The head may be balanced, but if it is slightly different position in the bearings due to replacement, it will have more difference, etc, etc.

If the head can be taken out of the machine and balanced as an assembly, that's one thing when chasing grams. Matching individual components (after original set up) down to the knives themselves is mostly guesswork as to balance of the head after they are installed.

Not arguing about weighing to verify difference is minor, but suggesting not doing anything about minor differences. Next sharpening it will be a different knife.


Well, it's pretty fast, actually. The motor is a 2 hp reverse induction Emerson running at 1,750 rpm. It uses pulleys that give something like 4,200 rpm at the cutting head. 3 blades = something like 12,500 cuts per minute.

The cutting head is running on large ball bearings and is built in. It requires major disassembly to remove it. It has holes drilled in it for balancing at the factory. I will check the blades, but they are virtually identical so I won't have to do much.

There was very little grit since the amount of metal removed was minuscule. I used coolant mix to cool the stone and keep the dust down and it wiped right up.
 
Side of the wheel is used. Same as a bench grinder. Blade is at 50 degrees, Tilt table permits the sharpened edge to be vertical. Works nicely.

I brought my planer knives to a cutter grinding shop and they charged me $.45 an inch to sharpen them. I told him that I had considered making a fixture and doing them on my surface grinder but he said that you want a circular pattern on them, not a straight pattern. He said you get better life out of the sharpening that way and he is a very long time cutter grinder so I have a tendency to believe him. The guy showed me the machine that they use and it uses a cup wheel with the face of the cup doing the grinding. We used a similar machine to sharpen broaches for a production application where we moved tons of chips with broaches.
 
I brought my planer knives to a cutter grinding shop and they charged me $.45 an inch to sharpen them. I told him that I had considered making a fixture and doing them on my surface grinder but he said that you want a circular pattern on them, not a straight pattern. He said you get better life out of the sharpening that way and he is a very long time cutter grinder so I have a tendency to believe him. The guy showed me the machine that they use and it uses a cup wheel with the face of the cup doing the grinding. We used a similar machine to sharpen broaches for a production application where we moved tons of chips with broaches.

I want a straight pattern, the same as the new blades are. With the tilt table set at 50 degrees the other direction, I could sharpen the blades using the side of the stone. I sharpen the stone with a diamond tip so doing it that way, the stone would get thinner instead of smaller. Guess it would be OK, but I don't see any advantage to it.

As I mentioned above, I couldn't locate anyone to do them, Now that I have the setup, I can do them for no cost other than the electricity.

$0.45 per inch would be quite reasonable, though.
 
he said that you want a circular pattern on them, not a straight pattern. He said you get better life out of the sharpening that way
Well, yes and no. For edge durability, the best pattern would be straight perpendicular to the edge, and the worst pattern would be straight parallel to the edge. For non-production use, such as prepping work for a guitar or two, I would not worry about the difference for as much as 10 seconds. And I'd be quite content to set up short (12") planer blades as diagonally as they will fit on my surface grinder chuck and live with the results.
 
Well, yes and no. For edge durability, the best pattern would be straight perpendicular to the edge, and the worst pattern would be straight parallel to the edge. For non-production use, such as prepping work for a guitar or two, I would not worry about the difference for as much as 10 seconds. And I'd be quite content to set up short (12") planer blades as diagonally as they will fit on my surface grinder chuck and live with the results.

Perpendicular to the edge is what he was saying is best. As you say it probably isn't a very big deal to a home shop woodworker. He'll probably get a lot of years of use out of them no matter which way he sharpens them.
 
Perpendicular to the edge is what he was saying is best. As you say it probably isn't a very big deal to a home shop woodworker. He'll probably get a lot of years of use out of them no matter which way he sharpens them.


Doing guitar woods, the blades do last an amazingly long time, Whether you re-saw the wood yourself or buy from a seller, the sections are around 3/16" thick and you are taking them down to something like .100 so not much wood is being removed and it's very clean.
 
Last edited:
+ 1 on what Big B said. Professional sharpening services do a much better job than can be achieved with your setup. The also orient the grind pattern perpendicular to the edge. Search for sharpening services in northern CA.
 
I'm thinking that if I was going to do the same thing I would use a similar setup but use a small cup wheel and use the face of the cup to grind it so the grind would be perpendicular to the cutting edge. But unless you are planing a lot of wood it probably doesn't make much difference. And for 45 cents an inch I'm not going to find out.

If you feel like posting some pics of the guitar I'd be interested in seeing a build. Sounds like a great father and son project.
 
Using the side of the cup will wear a track in the side of the cup. Running without coolant risks burning the the blade's edge.

Using the bottom of the cup with a mist spray. Have done this before but it gets messy. I use this now with a few different wheel grits:

Makita 9820-2 User's Guide

The wet grinding on this machine produces a mirror looking edge.
 
Thanks. That's good advice. The cutting head on the Planer is already balanced and I plan on weighing each blade individually and grinding the ends as required.

They came out remarkably equal though. When placed sharp side down on a table, the backs are perfectly in alignment. I don't expect to have to do much to make them all the same weight


.View attachment 280742View attachment 280743

Nice job.

I like the bigger planers with the knife grinding attachments. Makes sharpening easier with less blade setup time.
 
I took a old screwdriver and ground off the tip. The shaft was narrower then the blade, 1/8" or so. Then I heated it redhot and bent the last inch to about 90 degrees.
I hook it under the blade at either end and lever the blade up to adjust height. The bend just has to be long enough to sit on the bottom of the blade slot and reach up to touch the bottom of the blade plus a little extra to allow for future sharpening.
Bil lD.

Getting Peak Planer Performance - VintageMachinery.org Knowledge Base (Wiki)

That's a good suggestion. I'm right at that point now. I'm starting into my tune up procedures for the Parks Planer.

I've read that article as well. It's built around the Parks Planer but the suggestions will work for most any motorized planer.

The last page of the article shows two tools that can be used to set and level the blades and also set the heights of the infeed roller, pressure bar, outfeed roller and the table rollers. He made them using wood, but I used metal. They work the same way.

Pictures:


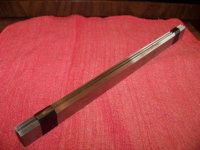
The first two pictures are of a blade height gauge. It sits on top of the cutter head and once set to zero on one side, it is moved to the other side to even the blades. I was made from steel tubing.
The second two pictures are of a blade depth height gauge. It can be used underneath the infeed and outfeed rollers and pressure bar rollers to check depth and also on the table to determine height of the table rollers. The base is made of 1/2" 6061 aluminum.


Blade Height Indicator  (3).jpgParks Blade Height Indicator (2).jpgDepth-Height Gauge -003 001.jpgDepth-Height Gauge -003 003.jpg


Back
Top