What's new
What's new

Haimer Z Offset Measurement for Haas

Bakerprecision

Plastic
Joined
Aug 20, 2022
Hello All,

I have searched high and low for an answer to my question with no luck. I'm trying to find the length value of my Haimer 3d Sensor in a CAT40 tool holder (Haas TM-1). I know that a lot of measurements are taken from the spindle nose, some are taken from the bottom of the taper on the CAT40. I've measured from the bottom of the taper flange to the tip of the Haimer (reading 0), and I have a pretty accurate measurement, but my issue is that I'm not quite sure where my measurement reference should be? Does this OAL need to be taken from the spindle nose, or can I use the measurement I took originally? The reason I ask (or the reason I'm confused), is because there is quite a difference between the two measuring points. Any insight/input is greatly appreciated as I cannot find information specific to Haas and the point of origin from which to measure.
 
I measured my haimer like a regular tool on a 1-2-3 block( I use 2 inch) measure until haimer indicate 0.
Set tool length as you would do for any tool.
Note this number.
Next time, measure the top of the part and take the length of the probe minus the machine position in Z next to the operator and work offset display


28986-HAAS-VF-4-Vertical-Machining-Centre.-Year-2012-11.jpg
 
I measured my haimer like a regular tool on a 1-2-3 block( I use 2 inch) measure until haimer indicate 0.
Set tool length as you would do for any tool.
Note this number.
Next time, measure the top of the part and take the length of the probe minus the machine position in Z next to the operator and work offset display


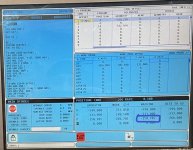
View attachment 383740

Thanks for the tip!

But I'm still not sure exactly where I'm supposed to measure my OAL from. Do I need to measure from the spindle nose to the tip, or from the bottom of the tool holder taper to the tip?
 
I’d say measure from the same place you measure tool from.
That doesn't help me figure out my probe (tool) offset for setting z axis. From what I understand about using the Haimer, it's treated like a renishaw probe in that you need to know the probe OAL in order to determine your z axis offset when using the Haimer.
 
You might be overthinking it. I measure all tools to same height, for me its 6" off the table. Measure Haimer to the same 6" ( you only have to do it one time) write the machine Z on the side of the machine in sharpie ( mine is around -14.401 on VF-3) then measure the top of stock with the Haimer, subtract machine Z from Haimer measurement that written on the machine ( 14.401 - 14.901 = -.500) put -.500 in your Z grid offset. That how I do it and has worked good for years.
 
You might be overthinking it. I measure all tools to same height, for me its 6" off the table. Measure Haimer to the same 6" ( you only have to do it one time) write the machine Z on the side of the machine in sharpie ( mine is around -14.401 on VF-3) then measure the top of stock with the Haimer, subtract machine Z from Haimer measurement that written on the machine ( 14.401 - 14.901 = -.500) put -.500 in your Z grid offset. That how I do it and has worked good for years.
I'm 100% certain I'm overthinking it. From what I've researched on the matter, I came to the conclusion that I needed to use a height gauge and find my probe height, zero the probe off the table, enter the probe height offset, and that's my "zero". I guess I just got hung up on what points to measure the haimer from. I have my measurement (6.0335), measured from the bottom taper to the ball end. This should be what I enter when I zero the probe on the table, correct?
 
I posted this some time ago but it might help you. We have used the method for the last 12 years.


Back
Top