What's new
What's new

3d Printed Press Brake tooling does work

JP Machining

Stainless
Joined
Jul 15, 2006
Location
Wisconsin
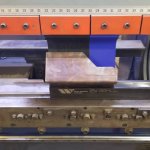
So here's some pics of some 3d printed custom gooseneck punches I just made and use for the first time. have done some others in the past but these were the biggest so far. Air bending max 16ga mild steel in a 1.5" V die with a 1/4" punch radius. Punch ht is 9.90"

Printed on a sub $500. 3d printed with cheap PLA filament, and after the initial 5 bends I just did I can detect no deformation at all. I fully expect to get many hundreds of bends out of these. I cant even imagine what I would of had to pay for something similar, I figure I have less than $20 total into these.

Don't be afraid to try it, just realize there are some limits. I have tried a hemming type die and it just needs to be steel, too much concentrated load. And while these did take 14hrs and 19hrs to print, I really only had to watch the first minute of each to make sure the first layer goes down good, rest of the time I was doing other things including sleeping.


Edit: Oh and after entering the designed overall length and radius into my press brake controller, the first bend was within 2 deg...
1.jpg
2.jpg
4.jpg
3.jpg
 
That’s interesting to say the least! What exactly is the material used to print the punch and did you say the printer used was $500?
 
I just read about your material PLA so I now know what it is but I’m still surprised that the gooseneck punch holds up. Impressive!
 
The printer I have is a JGaurora A5 which you can find for $295, direct from china. Is it the best of the cheap ones, I dont know but it works and pretty good online groups to figure out problems. Its a learning curve for sure, dont expect to just buy one and first print be a working punch. There are a lot of settings in which ever slicer you use to get things how you want. I'm using Cura 3d as its free. I have a hardened .4mm nozzle and ran these with .25mm layer ht, 5 walls (walls seem to add most strength in parts like these), 15% infill cubic pattern. running the speed a bit faster than normal so had to up the temp a bit so it doesnt cold flow or skip on the extruder.

Material for these was Hatchbox PLA from Amazon for like $20.00 per Kg. (less if you buy more at a time) I think the short punch used about 480 grams according to Cura. Buying to cheap of filament hurts the prints though, the cheap stuff doesn't have as good of diameter tolerance and thus affects everything downstream.

I got the hardened nozzle as I was trying some carbon fiber stuff, which is nice and stiff, but seems like isnt needed for everything. If you use carbon fiber filled filament with the stock brass nozzle it will destroy it.
 
Thanks for all your information.
A friend in the shop a few buildings from mine has been printing parts and showing me the process for a few years but I must admit that your punches certainly attracted my attention since I do some press forming myself.
 
Wow. As someone who owns a 3d printer (no expert), I'm really impressed. It's amazing how accessible this technology has become. I can't wait to print out some lathe or shaper tooling some day.
 
Best I can tell that's around 160 pounds per inch. Over a quarter inch radius that's pretty good, though I would expect the failure mode would be the nose of the punch flattening out.

If you are really pushing the limits of the tooling material maybe include a flat spot in the nose(divide it in two pieces with a small straight portion in between). This would allow you to keep surface pressure low and allow for consistent bends immediately without variation during wear in. Obviously not needed here, but maybe something to try if you need to bend something thicker or with a smaller V die.
 
Now that I would be alittle nervous about, seemed from my experience so far that the printed stuff wasnt a good match for coining type loads. I suppose if it was solid though. Its something I want to experiment with yet.
 
Were i use to be had one of the holders that take different rounds or profiled bottom feet with just a few studs, sure would save a lot of plastic to just print the bottom bit, i have used nylon before to make tooling for thin stainless and it held up great, secrets to make sure your using radius's for everything, plastics strong enough compression wise, but not at a point load.

images
 
Wow. As someone who owns a 3d printer (no expert), I'm really impressed. It's amazing how accessible this technology has become. I can't wait to print out some lathe or shaper tooling some day.

Why would you make shaper tooling ?

You make the part that the shaper would have made.....


Back
Top